Part of what makes Google Analytics 4 (GA4) so useful is how customizable it is.
But while you can create custom events to evaluate what’s most important to your business, start with GA4 recommended events. Because there are already many options that provide valuable information for every type of website.
We’re about to go through an overview of what GA4 recommended events are, the full list of events, and how you can enable them for your property.
Let’s get started.
What Are GA4 Recommended Events?
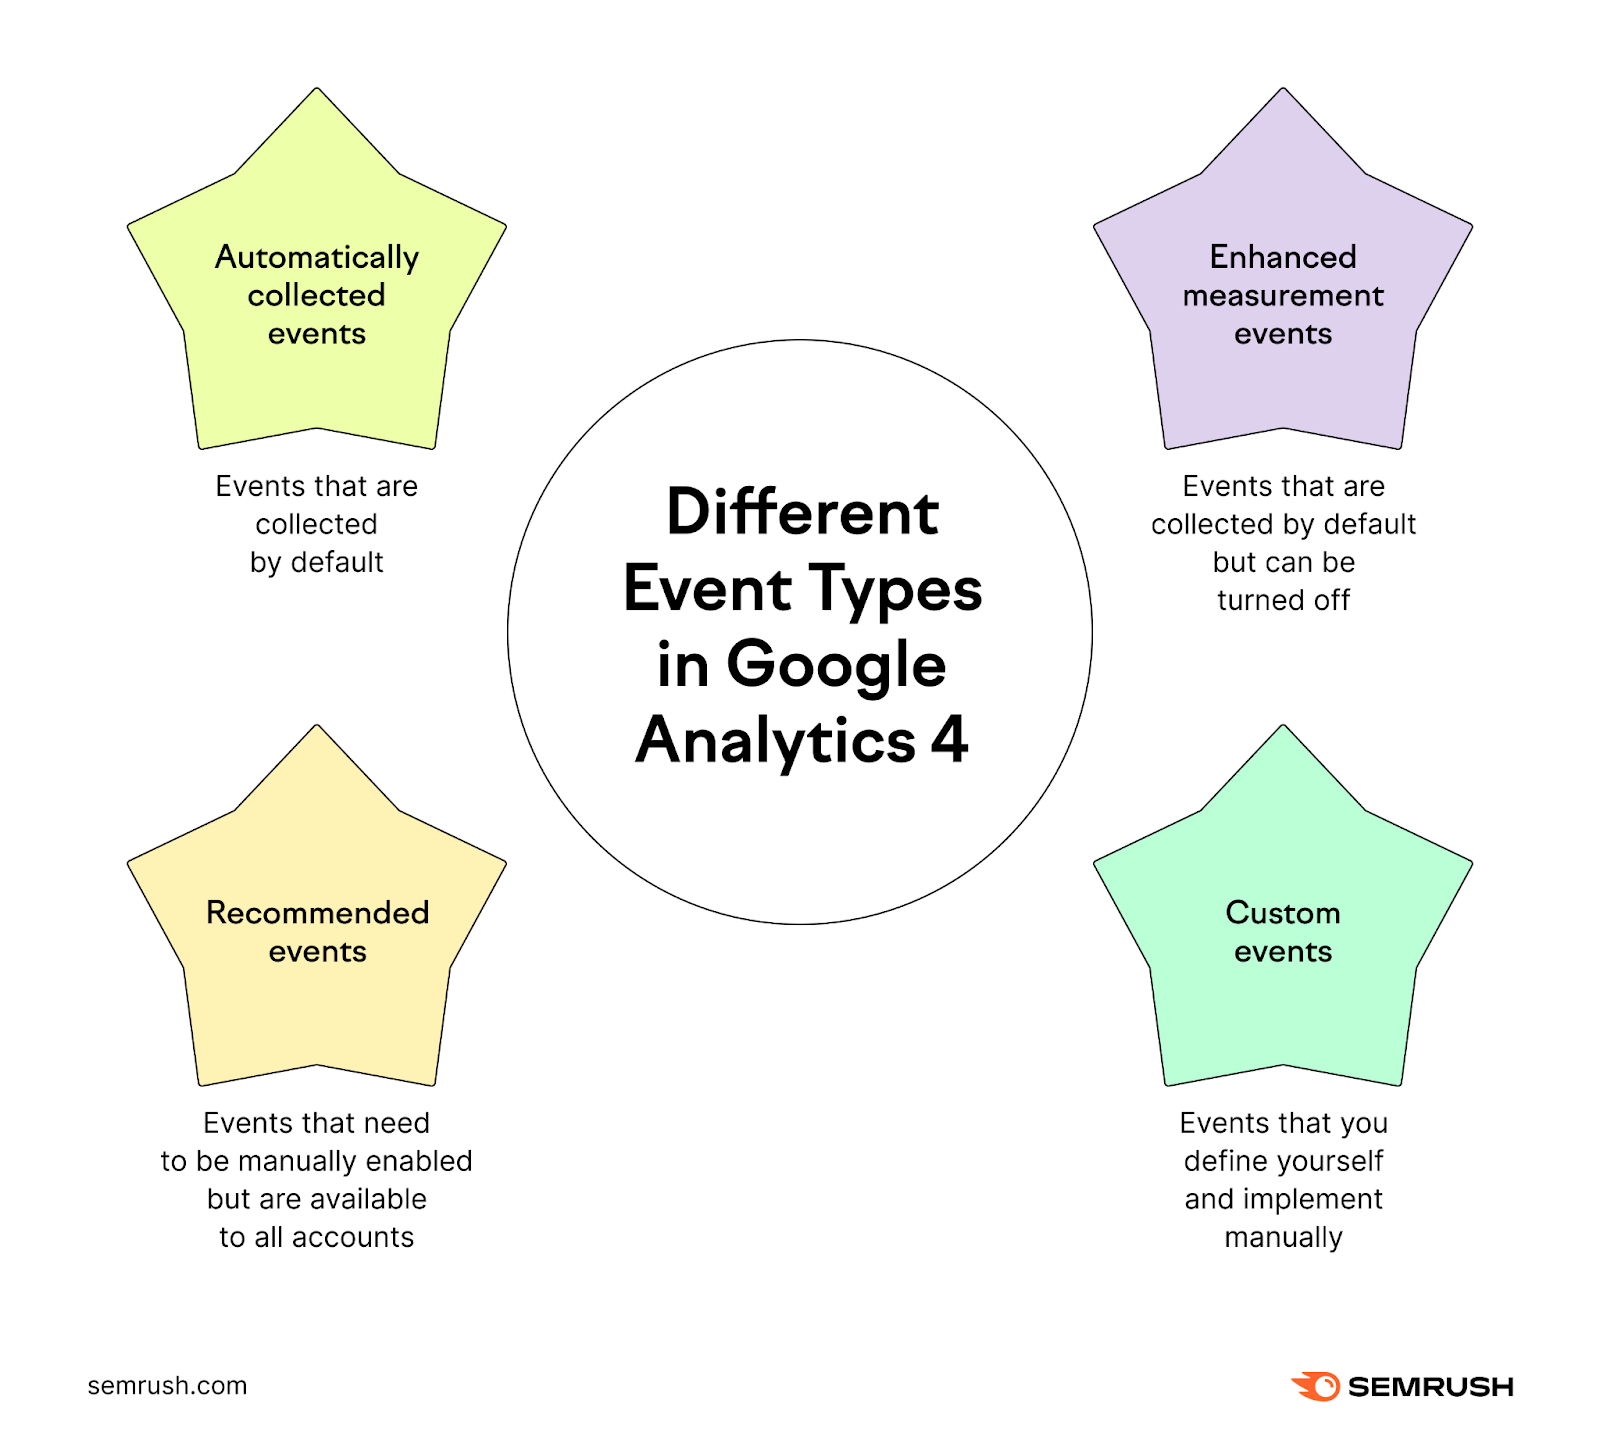
Google Analytics recommended events are events (which measure user interactions) that need to be enabled manually but are available to each account.
There are three other types of events as well: automatically collected events, enhanced measurement events, and custom events.

All recommended events have predefined names and parameters.
Parameters provide more information about events to provide more context and make the data more meaningful. And they can be adjusted to customize your data.
For example, ecommerce websites can track every action leading up to a purchase. That includes everything from payment information to cart removals.
Almost all businesses can benefit from at least some of them. So, implementing them should be a no-brainer.
And once you’ve set them up, GA4 recommended events will appear in your regular reports.
GA4 Recommended Event List
Google Analytics provides many recommended event options.
Here’s a full overview:
|
Event name |
Trigger |
Parameters to add meaning |
|
ad_impression |
Whenever a user is shown an advertisement in your application |
– ad_platform – value – currency – ad_source – ad_format – ad_unit_name |
|
add_payment_info |
Whenever a user submits payment information during the checkout process |
– currency – value – coupon – payment_type – items |
|
add_shipping_info |
Whenever a user submits shipping information during the checkout process |
– currency – value – coupon – shipping_tier – items |
|
add_to_cart |
Whenever a user adds an item to their cart to buy |
– currency – value – items |
|
add_to_wishlist |
Whenever a user adds an item to a wishlist |
– currency – value – items |
|
begin_checkout |
Whenever a user begins the checkout process |
– currency – value – coupon – items |
|
earn_virtual_currency |
Whenever a user is awarded virtual currency within a game. It’s most often used for applications. |
– virtual_currency_name – value |
|
generate_lead |
Whenever a lead is generated through a form or any other lead capture method |
– currency – value |
|
join_group |
Whenever a user joins any social community. It’s mostly used in apps. |
– group_id |
|
level_end |
Whenever a user reaches the end of a level of a game |
– level_name – success |
|
level_start |
Whenever a user begins a level within a game |
– level_name |
|
level_up |
Whenever a user moves up a level in a game |
– level – character |
|
login |
Whenever a user logs into an app or website |
– method |
|
post_score |
Whenever a user posts a score achieved in a game |
– score – level – character |
|
purchase |
Whenever a user purchases at least one item |
– currency – transaction_id – value – coupon – shipping – tax – items |
|
refund |
Whenever an item is refunded to a user |
– currency – transaction_id – value – coupon – shipping – tax – items |
|
remove_from_cart |
Whenever a user removes an item from their cart |
– currency – value – items |
|
search |
Whenever a user performs a search on your website or application |
– search_term |
|
select_content |
Whenever a user selects some type of content in a website or application |
– content_type – content_id |
|
select_item |
Whenever a user selects an item from a list (such as “related products”) |
– item_list_id – item_list_name – items |
|
select_promotion |
Whenever a user selects a promotion from a list |
– creative_name – creative_slot – promotion_id – promotion_name – items |
|
share |
Whenever a user shares content to an external platform (such as a social media website) |
– method – content_type – item_id |
|
sign_up |
Whenever a user signs up for an account |
– method |
|
spend_virtual_currency |
Whenever a user spends virtual currency within an app |
– value – virtual_currency_name – item_name |
|
tutorial_begin |
Whenever a user begins a tutorial process |
N/A |
|
tutorial_complete |
Whenever a user completes a tutorial process |
N/A |
|
unlock_achievement |
Whenever a user unlocks an in-game achievement |
– achievement_id |
|
view_cart |
Whenever a user views their cart |
– currency – value – items |
|
view_item |
Whenever a user views any piece of content (often for online shopping) |
– currency – value – items |
|
view_item_list |
Whenever a user is presented with a list of items that fall under a specific category |
– item_list_id – item_list_name – items |
|
view_promotion |
Whenever a user views a promotion from a list |
– creative_name – creative_slot – promotion_id – promotion_name – items |
Google discusses recommended events in three primary categories: for all websites, for online sales, and for games. So you can determine which ones make the most sense for your business.
How to Set Up GA4 Recommended Events
You can set up GA4 recommended events by using the Google tag (gtag.js) or Google Tag Manager.
The Google tag requires you to add code to your website and is a bit quicker if you have developers ready to implement code. You can follow Google’s Developer documentation to go this route.
But Google Tag Manager is a bit more flexible, requires less developer interaction, and enables you to modify everything much more quickly.
Implementing Recommended Events through Google Tag Manager
For this method, we’re assuming GA4 is set up for your property, that Google Tag Manager is set up on your site, and that Google tag is installed in Google Tag Manager.
Go to Google Tag Manager and Create a New Event
Open Google Tag Manager and click “Add a new tag” in the “New Tag” module.

You’ll then see the following screen:

First, enter a name for the event tag. Our event is meant to track all site searches on the homepage while tracking site searches when people search “sweaters.”
Make sure your event name is easily understandable for everyone who will be interested in analyzing data related to the event.

Then, click “Tag Configuration,” choose “Google Analytics,” and select “Google Analytics: GA4 Event.”

A few new options will open up. Enter your property’s measurement ID in the “Measurement ID” field. (You can add it by clicking the icon to the right of the field if you’ve previously saved it as a variable. Or copy and paste it from the admin section in Google Analytics.)
Next, enter the predefined name of the event you want to track. In our example, we’ll be using “search” as our predefined name.

Now, you’ll need to set up parameters. Click on the “Event Parameters” drop-down to open up a new menu.

Click on “Add parameter.”

Then, enter “search_term” in “Event Parameter.” And enter “sweaters” in “Value.”

Set Up a Trigger
A trigger is what happens on your website or app that indicates the event was completed. And enables tracking for the predefined event.
Scroll down and click on the “Triggering” module to open up the below menu.

Then, click on the “+” sign at the top right of the screen to create a custom trigger.

A new screen should open up. Start by entering a trigger name.

Click on “Trigger Configuration” and select the appropriate type. For this example, that’s “Form Submission.”

A few new options will appear. Click on “Some Forms.”
Then, select “Form Classes” in the first drop-down menu and “equals” in the second drop-down menu.
Now, you’ll need to identify the form used to perform a site search by looking at your source code. In our example, we’ll use “search-form.”
Then, click the “+” icon in the bottom right corner.

Now, we’ll specify that this event will trigger on the homepage.
So, select “Page URL” in the first drop-down menu and “equals” in the second one. And enter your homepage URL in the final field.

Now, save the trigger.
You’ll end up back on the tag creation menu, so click “Save” in the upper right corner there as well.

Preview and Publish Your Changes
You can see if everything is working correctly by using the “Preview” button on the top right of the “Overview” screen in Google Tag Manager.

Enter your website URL and click “Connect.”

Your website should open up in a new tab.
After it does, return to the Tag Assistant tab in your browser. Click “Continue.”

Head back to your homepage, test your search event, and then go back to the Tag Assistant tab.
Every trigger that has been fired will be visible in the menu on the left-hand side.

When you’re ready to push your changes live, click “Submit” back in the main dashboard.

You’ll then be able to add a name and description. And publish the changes.
How to Make Sure Recommended Events Are Being Tracked in GA4
You should always verify that events are triggering correctly in GA4. To make sure that you’re actually collecting the data you want.
There are two ways to ensure your event is being tracked—the “Realtime” report (which is easier to use) and the “DebugView” report (which is more powerful).
Let’s go through each one.
Using the Realtime Overview Report
Go to Google Analytics and head to the “Reports” section on the left-hand side of the screen.

Then, select “Realtime” to open the “Realtime” report. And find “Event count by Event name” at the bottom.

If your event is being tracked, it will be displayed in this table as “search.” And you can click on it to see more information.
If you’re unable to see the event showing up even after you’ve triggered it a few times yourself, it’s time to investigate.
Using the DebugView Report
The “DebugView” report gives you a lot of powerful tools to carefully troubleshoot your Google Analytics setup.
Start by enabling debug mode.
Now, head over to Google Analytics and go to the admin panel by clicking on the gear icon at the very bottom of the left-hand side of the screen.

Scroll down the middle column until you reach the “Data display” section. And click on “DebugView.”

The “DebugView” report will show all events that made it to Google Analytics during your Tag Assistant session within the last 30 minutes. And every event triggered will have a timestamp.
Now, go to your site to start triggering the event to make it appear in this report.
You can then look at each event in detail by clicking on it.

If you can’t find an event in the “DebugView” report, it hasn’t been triggered. So, you’ll have to go back to Google Tag Manager and make changes.
How to Analyze Recommended Events in GA4
Engagement reports are the best places to measure your recommended events. Because you can easily evaluate specific time ranges and compare event counts.
First, open Google Analytics and head over to the “Reports” section. Which you can find on the left-hand side of the screen.

Then, open up the “Engagement” menu and head to “Events.”

And you’ll be greeted with an overview of all events.

Measure Every Aspect of Your Traffic
Google Analytics 4 recommended events are just one way to measure your marketing efforts.
You can go beyond recommended events and Google Analytics 4 with Semrush’s Organic Traffic Insights. Which combines data from GA4, Google Search Console (GSC), and Semrush.
Go to Organic Traffic Insights, click “Add new project,” enter your domain, and click “Create project.”

In the next window, click on “Connect Google Account.”

Then, log in to your Google account to connect the corresponding GA4 and GSC accounts. And click “Allow” on the next screen.

Now, go through the “Google Analytics” and “Google Search Console” sections in the setup wizard. And click “Location and Device.”

Finish configuring your settings. And click on “Go to Organic Traffic Insights.”

You’ll now see a dashboard showing which keywords drive traffic, your webpages’ overall performance, and much more.

Evaluating the metrics you see here can give you a holistic view of your website’s performance. Which can help you make decisions to improve your results.


