
In the last episode, we installed all the Prerequisites and Configure the Modules. In this episode, we will talk about the Include and Rule configuration required for Sitecore Content Serialization. As we created a JSON file while creating a Module in the last episode, we will use the same JSON file to configure the Include and Rule.
Include an item for the Serialization
We created modules using a text editor and Sitecore for the Visual Studio plugin; now it’s time to learn about the allowed included properties. Then, we will consist of the required item, which we need to serialize using Text Editor and Sitecore Visual Studio.
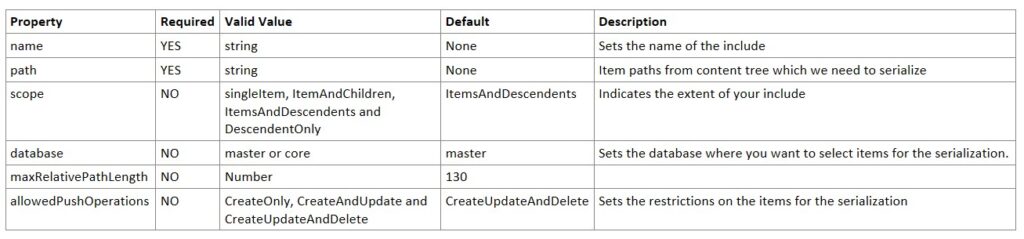
Allowed Include Properties
The included properties help while adding/selecting the item for Serialization. There few properties, such as name and path, will be required, but all others are not.
Configure an item for Serialization through Visual Studio Code
Step 01: Open the ProductModule.module.json we created while creating a module.
{ "namespace": "ProductModule" }
Step 02: Update the module JSON file and add the items along with include properties,
{
  "namespace": "ProductModule",
  "items": {
     "includes": [{
         "name": "Set the name of this include",
         "path": "Sitecore content tree path, example - /sitecore/content/products",
         "scope": "single Item"
      }]
   }
}
Configure an item for Serialization through Sitecore for the Visual Studio plugin
Step 01: Open the Sitecore module explorer toolbar and right-click on the module in which we created ProductModule.
Step 02: Click on Add Include option.
Step 03: Add the name of the included product include and put the item path in the Sitecore path input box.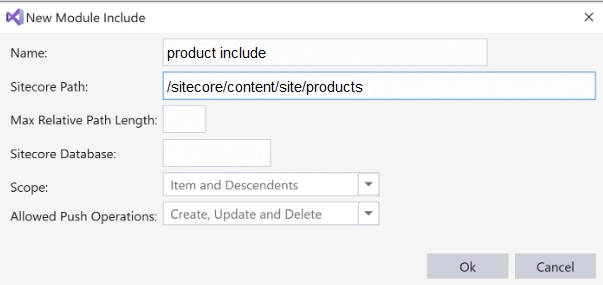
Step 04: Hit the Ok button to save the configuration.
Rules Configurations
We have created a module and included the Sitecore items we need to serialize. Now it’s time to create rules to modify the behavior of an include. The order of the rules dictates the order in which items get serialized. For example – we can ignore the single-child item, include all child items except grandchildren, have all child items along with grandchildren,
Create a rule in a text editor
Step 01: Open the ProductModule.module.json, in which we created a module, and in the module file, we also included the items we need to serialize.
Step 02: Update the module JSON file and add the rule properties,
{
   "namespace": "ProductModule",
   "items": {
       "includes": [{
        "name": "Set the name of this include",
        "path": "Sitecore content tree path, example - /sitecore/content/products",
        "scope" : "single Item",
        "rules": [
           "path": "/products/product-v1",
           "scope": "ignored"
         ]
     }]
   }
}
Create a rule in Sitecore for Visual Studio
Step 01: Open the Sitecore module explorer toolbar and navigate to include what we created in the previous step. Right-click on include.
Step 02: Click on Add Rule.
Step 03: Add the path of the Sitecore item on which you need to apply rules and select the scope from the dropdown.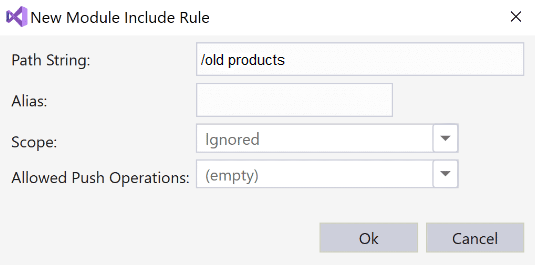
Step 04: Click on the Ok button to save the configuration.
After configuring a module in the last episode, we have updated the same JSON file to configure the include and rules require for Sitecore Content Serialization. Now we are done with the configuration needed for Serialization, so the next episode will explore serialization features, item packaging, and deployment. So stay tuned!
To learn about Sitecore Content Serialization with a beginning, please refer to this blog link – Sitecore Content Serialization Series – Episode 1 – Introduction. Also, if you want to refer to the complete serialization series, refer to this link.
Happy learning!