
What is a Slowly Changing Dimension?
Slowly Changing Dimension (SCD) is a dimension that allows us to store and manage both current and previous data over time in a data warehouse. It is considered and implemented as one of the most critical ETL tasks in tracking the history of dimension records. There are three types of SCD Type 1, Type 2, and Type 3. In this blog, we will look at SCD type 3.
What is SCD type 3?
A Type 3 SCD stores two versions of values for certain selected level attributes. Each record stores the selected attribute’s previous and current values. When the value of any of the selected attributes changes, the current value is stored as the old value and the new value becomes the current value.
Now let us start with how we can implement SCD Type 3 in Informatica PowerCenter.
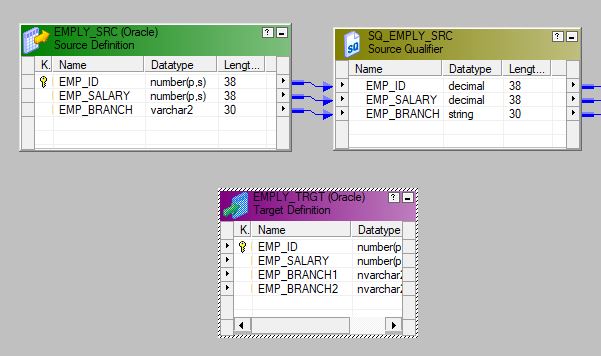
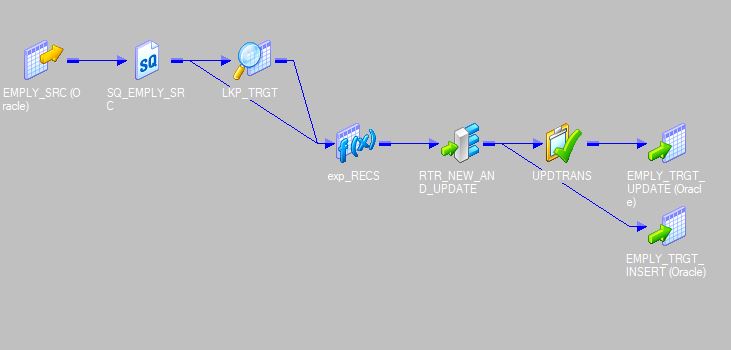
In the below sample mapping, we will check for Employee data in which Emp_branch column will get updated, If the value of Emp_Branch changes, then current value will be stored as the old value in EMP_Branch1 and the new value will become the current value in Emp_Branch2 column.
Source and Target
1. Drag and drop the required source and target instance to the mapping workspace.
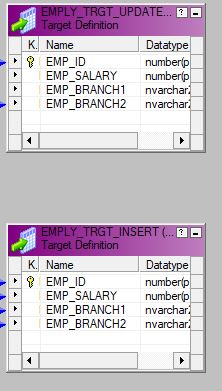
(Note here we required 2 target instances one for inserting data and another for updating data)
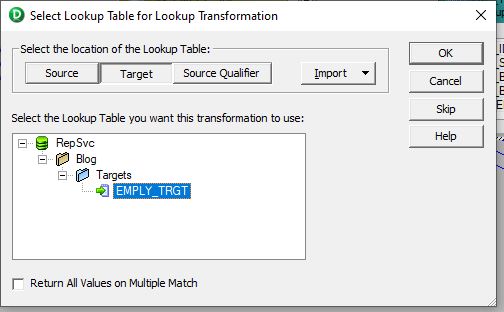
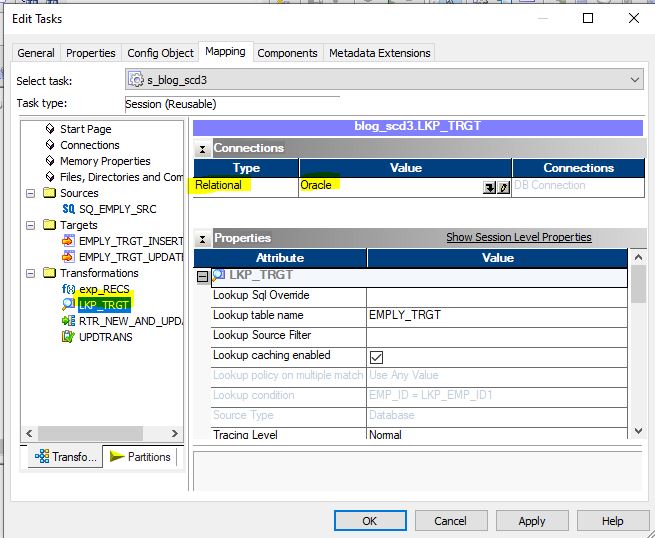
2. Add the lookup to the mapping to check whether the income row/data exists in the target. Select the Lookup Icon and click on mapping workspace, and we will get a screen. Select the Target table inside the window. And select your required target table on which you want to do a lookup or check the income row/data exist or not
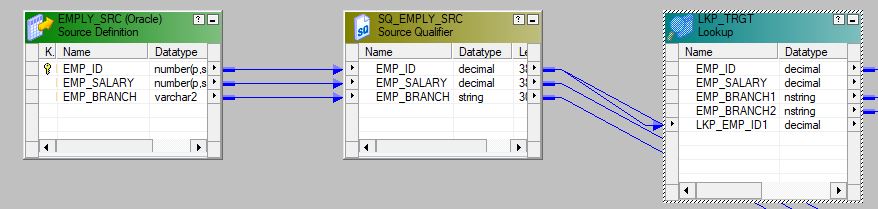
LOOKUP TRANSFORMATION
3. Lookup transformation will be created which is the same as the target instance. Drag & Drop Required or All the ports/columns to the lookup transformation from Source qualifier.
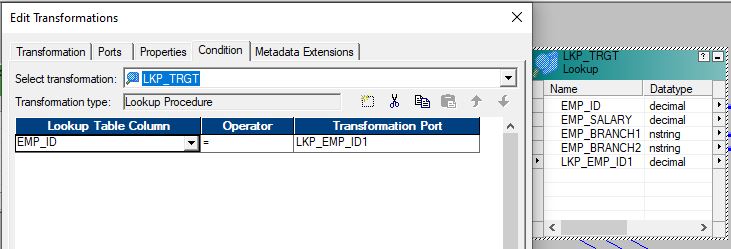
4. Double click on Lookup transformation then –> condition tab. Select the condition columns.
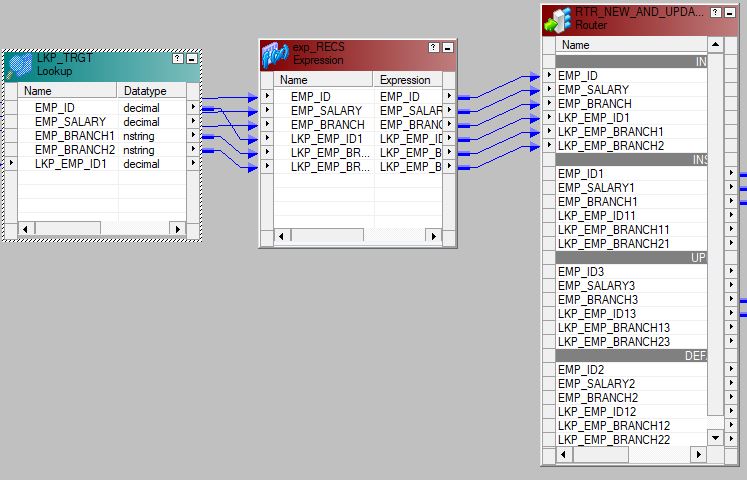
ROUTER TRANSFORMATION
5. Add a router and create two groups (Insert Group and Update Group). Now drag and drop all columns coming from the source & Unique columns from the lookup.
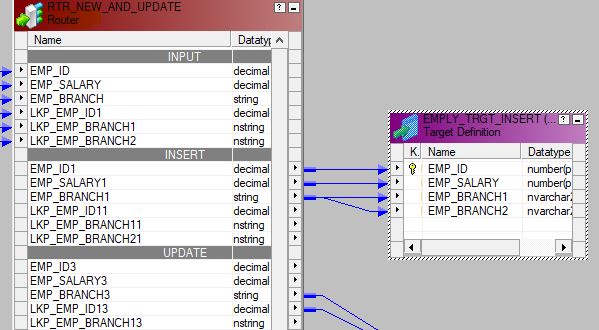
6. From Insert Flow of the Router group map columns to the target Definition (INSERT GROUP) as shown below. As they are new records they will go as insert.
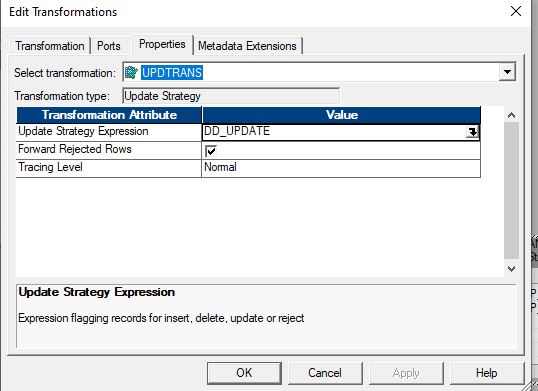
7. Drag and drop columns from the Update Flow of the router group mapping incoming ports to the Update Strategy.
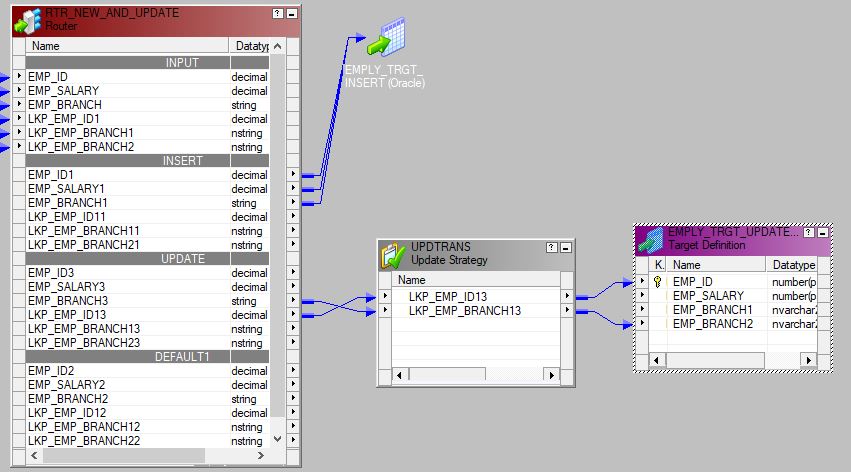
8. Select Update Strategy, double click and go to the properties tab –> Under the formula mention “DD_UPDATE” as they are going to update the history.
Mapping
9. Save and validate mapping.
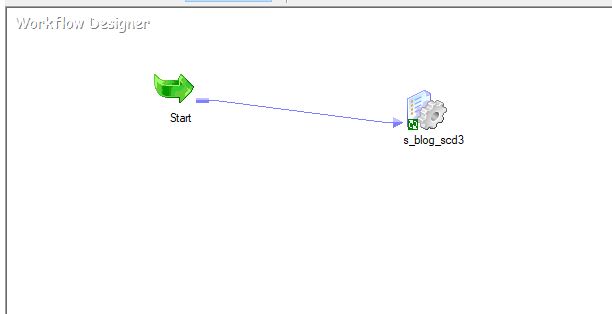
WORKFLOW
Now Create Workflow and Session for the above-created mapping.
10. Connect to workflow manager. From Menu,
Click Tools –> select ‘Workflows’ –> Create
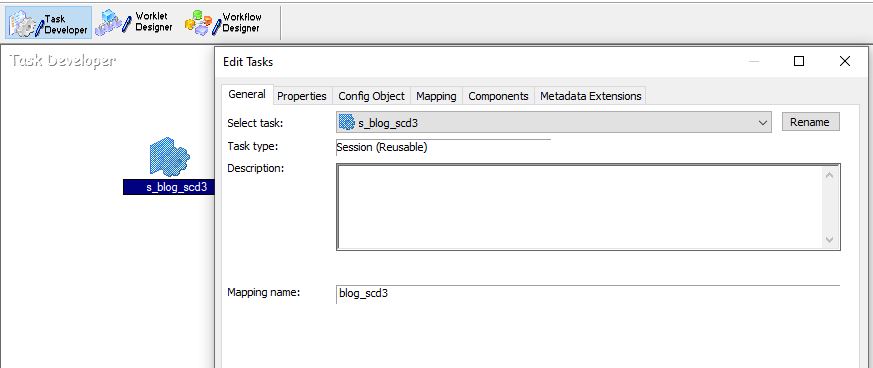
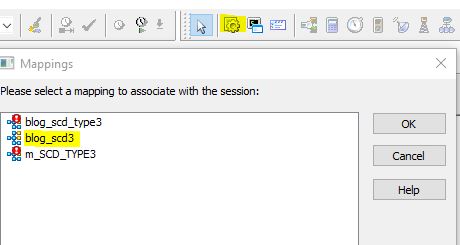
11. To create a session, click on the session icon selected in Red Box in the below screenshot. Then a screen will pop-up with a list of mapping available in that folder. Please select the mapping for which you want to create this session. Click Ok.
12. Now connect your session with Start Icon in the workspace.
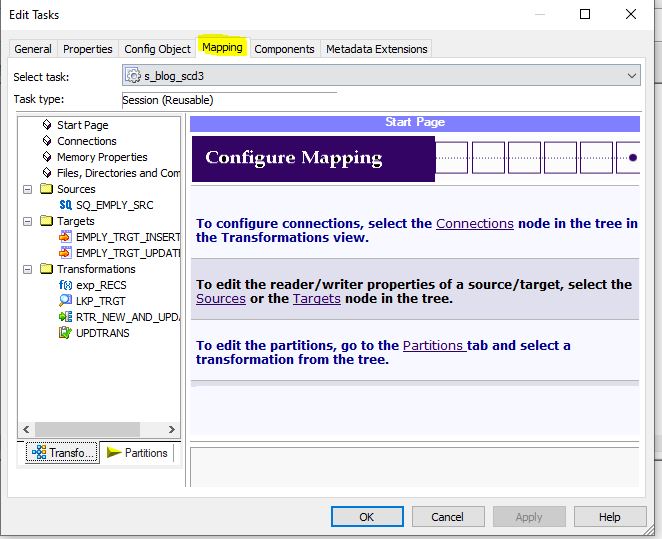
13. Select the session and double-click on it. Click on mapping.
14. Go to the Source Folder and select the SQ instance to defined connection. Click on down arrow button highlighted below to select the required connect for the instance.

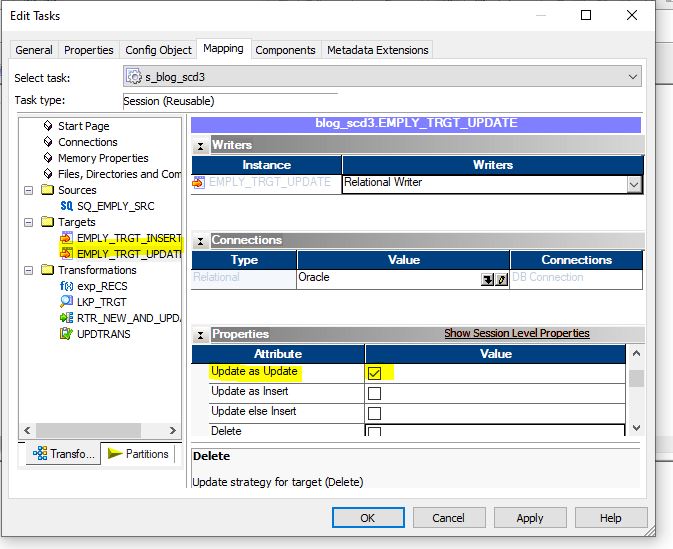
15. Go the Target Folder and select the Target instance for Update flow to defined connection. Click on down arrow button highlighted below to select the required connect for the instance. And under properties select “update as update” only as here we are update the existing records.
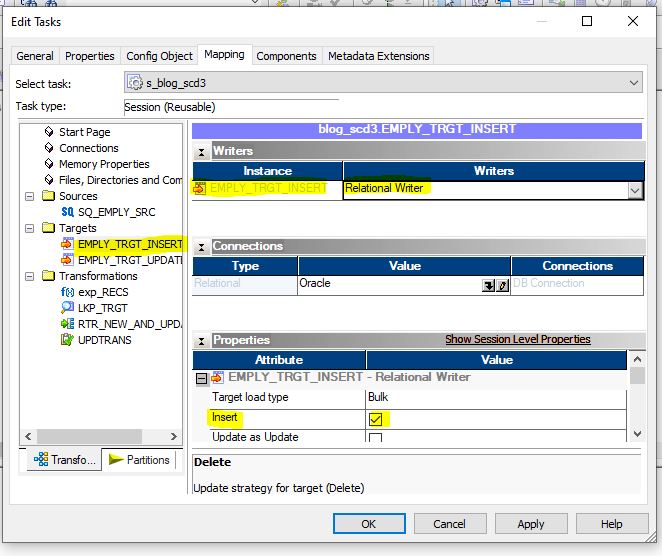
16. Go the Target Folder and select the Target instance for Insert flow to defined connection. Click on down arrow button highlighted below to select the required connect for the instance. And under properties select “Insert” only as here we are insert the new records.
17. Go the Transformation Folder and select the Lookup instance to defined connection. Click on down arrow button highlighted below to select the required connect for the instance.
18. Click Apply and Ok.
19. Save workflow and validation. Now you can run your job.
OUTPUT
Below is the screenshot of source table. Here it is having 3 records.

Below is the screenshot of target table after running the job successfully.
EMP_BRANCH1 is the update records column and EMP_BRANCH2 is the historical record.
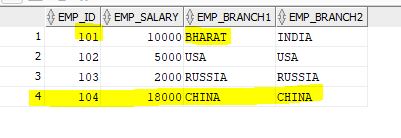
Here we can check that
New record is inserted where EMP_ID – ‘104’ and
EMP_BRANCH of EMP_ID – ‘101’ is updated to EMP_BRANCH – ” BHARAT ” .
This is all about the implementation of Slowly Changing Dimension(SCD) TYPE 3 Mapping.
Hope you enjoyed reading this blog and it was helpful.
Conclusion
I hope this 4-minute read has helped the enthusiast inclined to know about SCD Type3 in Informatica and get a broader view of how to create mapping of scd 3 in informatica. Referring to this blog, users can learn how to map and execute an end-to-end flow using these steps.