As we all know, Goals are testing areas inside a project which can be a small section of an application or a whole application. Once the Goal is created, it is set to add end-to-end test steps in the Journey.
What is Journey in Virtuoso?
With specific validations and checkpoints in between, the journey enables you to interact with your application from beginning to end.
The Journeys you create to represent the whole user flow of your application.
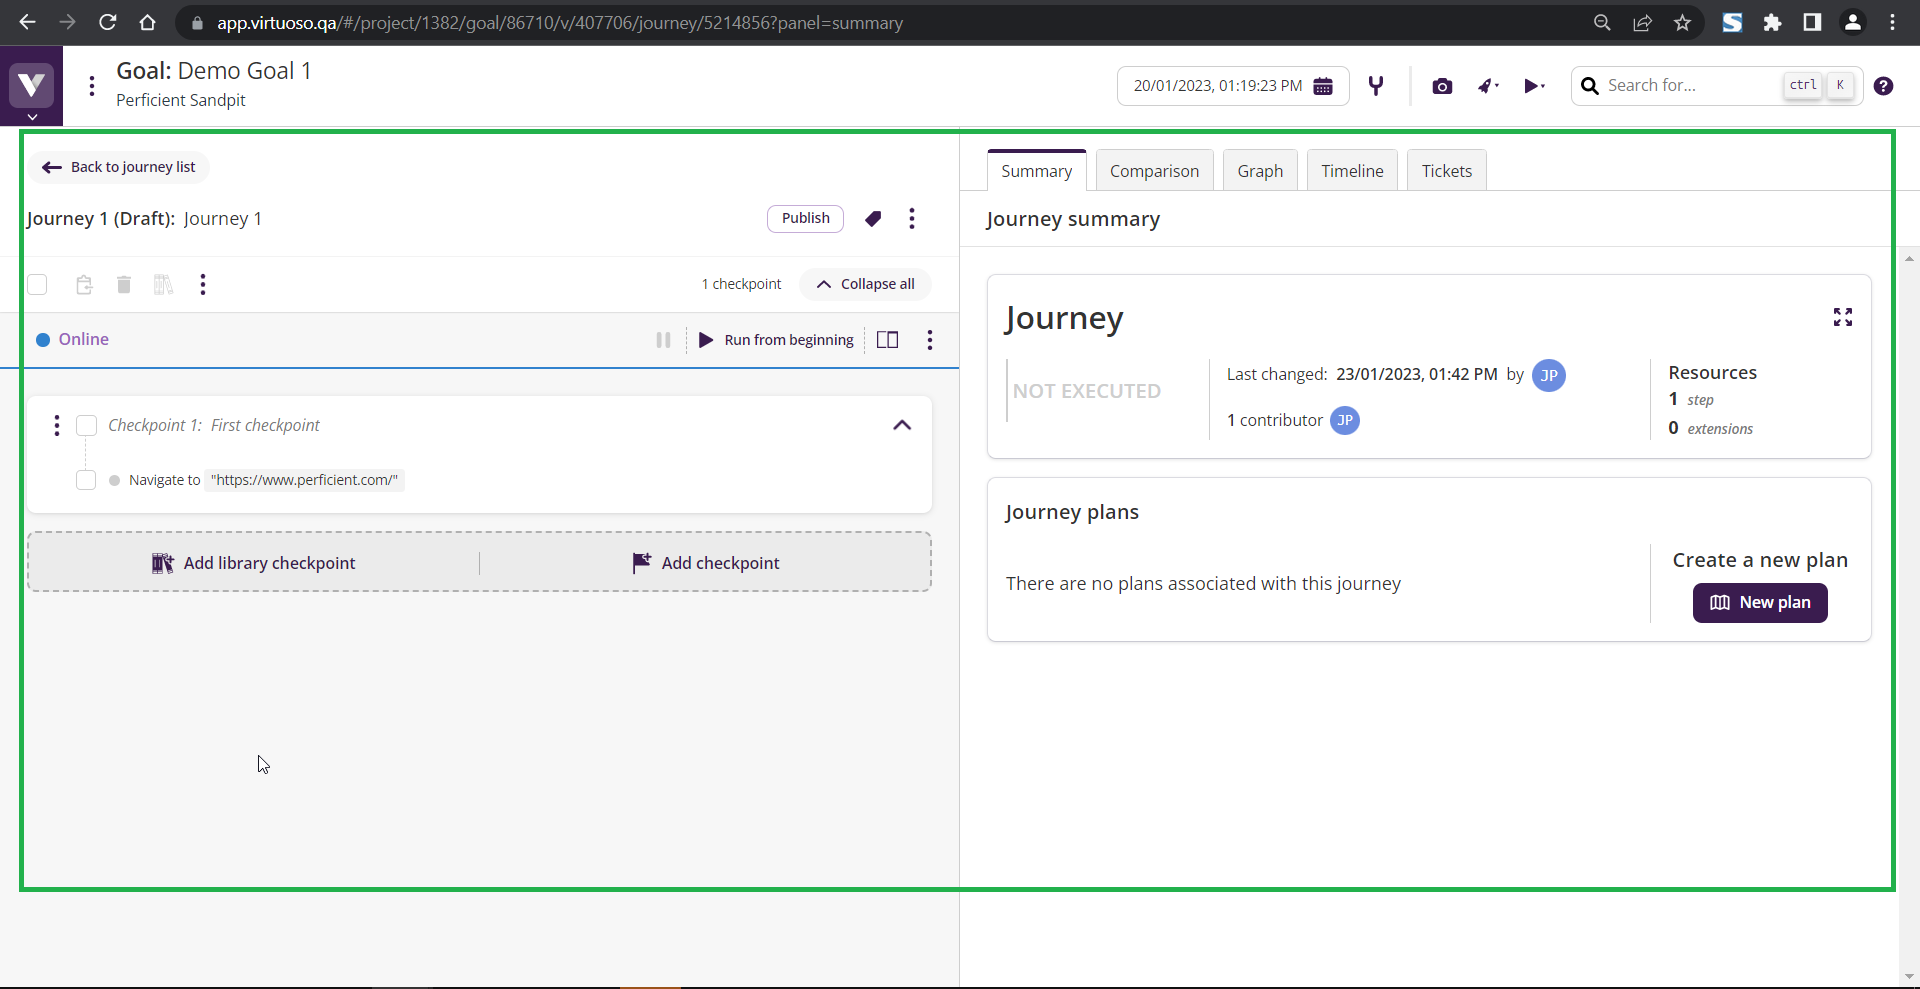
Virtuoso creates a first Journey for the user by default whenever any new Goal is created.
All of the Journeys in the Goal are displayed on the left side of the screen in Goal view. Similarly, the Goal summary is on the page’s right side.
I. Creating a new Journey in a Goal
- Click on ‘+ Add a Journey’ below the last Journey in the list.
- On Clicking ‘Add a Journey,’ Virtuoso will ask for a name for the Journey.
- Enter the name and click on ‘Save.’
- On clicking the ‘Save’ button, Virtuoso will take you to new created Journey.
- First Checkpoint in the Journeys will be created by default by Virtuoso, which will usually contain Navigation URL in the first step.
- If any of the first Checkpoints in any Journey is changed, the change will reflect on all the first Checkpoints of all the Journeys in the same Goal.
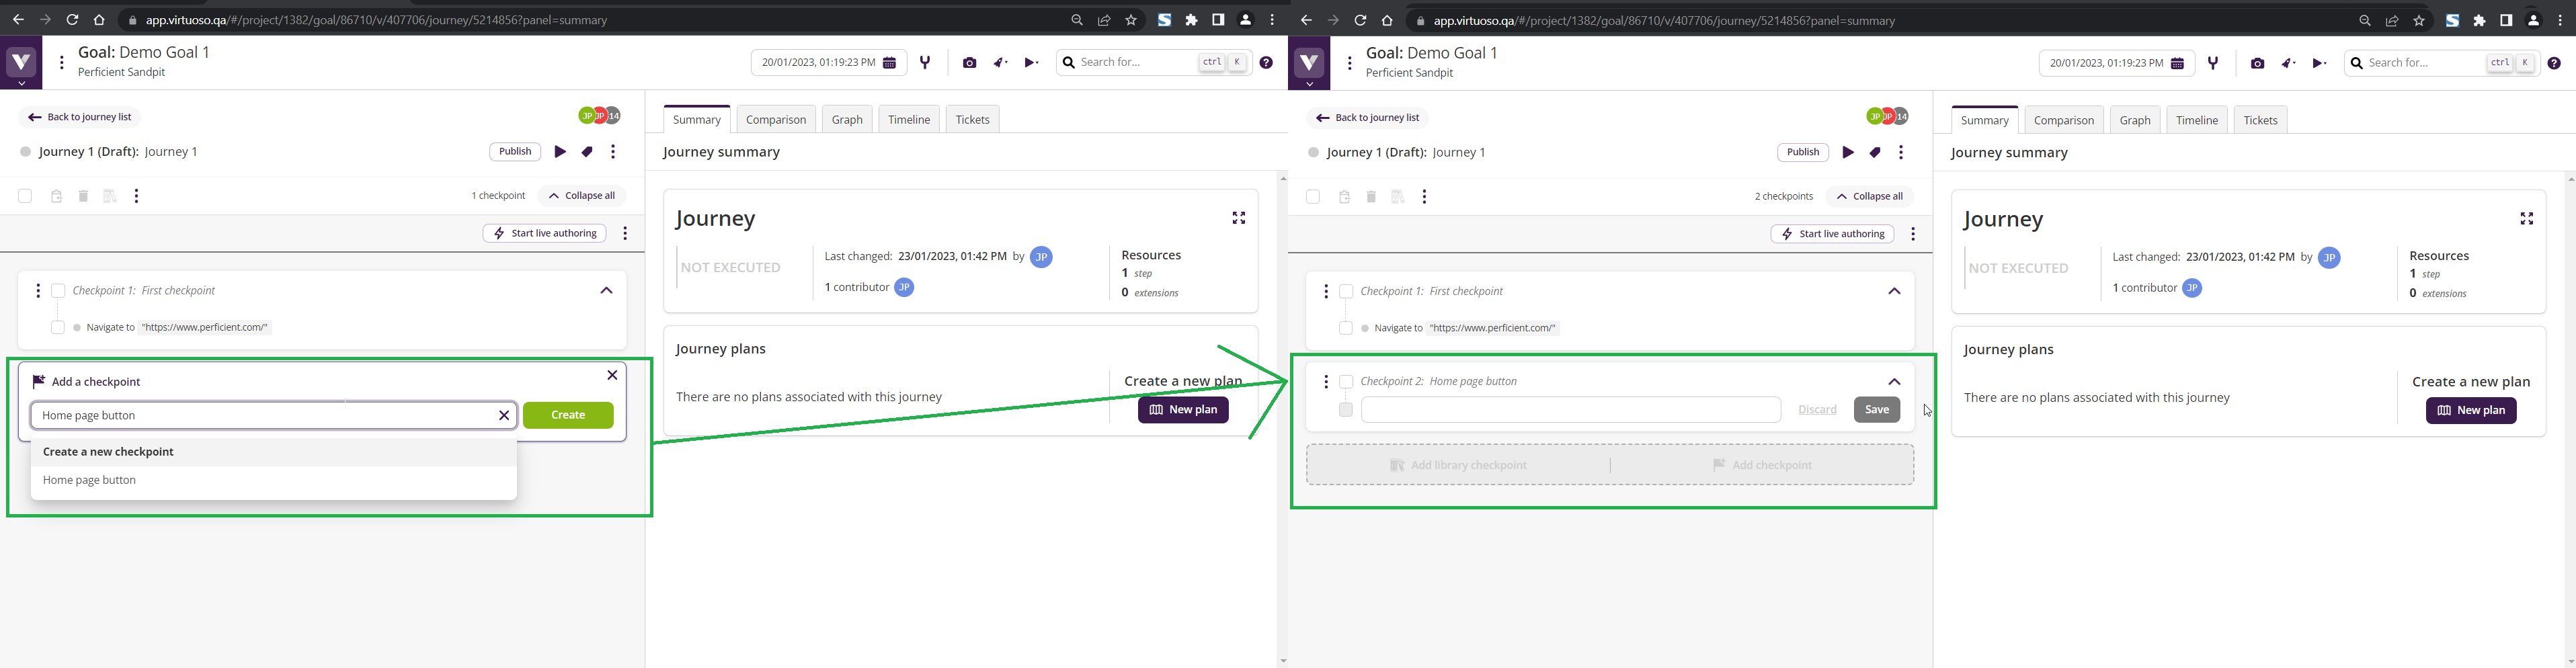
II. Creating a new Checkpoint in a Journey
- An application has a lot of features to test. So, to test these features, test steps are written separately, such as a group of test sets we call Checkpoints.
- To create a new Checkpoint, click on the ‘Add Checkpoint’ button under the previous existing Checkpoint.
- Enter the name of the Checkpoint. The name can also be the name of the feature for which we are creating steps.
- Lastly, click create, and a new Checkpoint will be created and ready to write test steps.
- Once the Checkpoint has been defined, users can add test steps in natural language syntax with plain English texts or use selectors like Xpath, CSS, JS path, and Hints to interact with the elements.
III. Reusing Checkpoint
- Virtuoso provides a useful feature of reusing a Checkpoint in the same Journey or Goal.
- When selecting a previously used Checkpoint, type a hint of the Checkpoint’s name or number on ‘Add Checkpoint’ to bring it up in the list and click attach.
- On clicking ‘Attach,’ the Checkpoint will be called again in the Journey with all the steps.
IV. Library Checkpoint
- When the same test step needs to be written repeatedly for several Goals within the same project, Virtuoso offers a very helpful functionality for this reusability to stack up the Checkpoints that need to be called repeatedly.
- These Checkpoints can be called at any point in any Journey inside the same project.
- If any library Checkpoints inside a Journey are updated, the same will reflect on all the Journeys where the Checkpoint was called.
a. How to Create a Library Checkpoint
-
- Click on the menu icon left aligned on the Checkpoint you want to use as a library Checkpoint.
- A flip will open; click on ‘Add to Checkpoint Library.’
- Once a Checkpoint is added to the library, a popup will display on the screen with the heading “You have now created a library Checkpoint!”
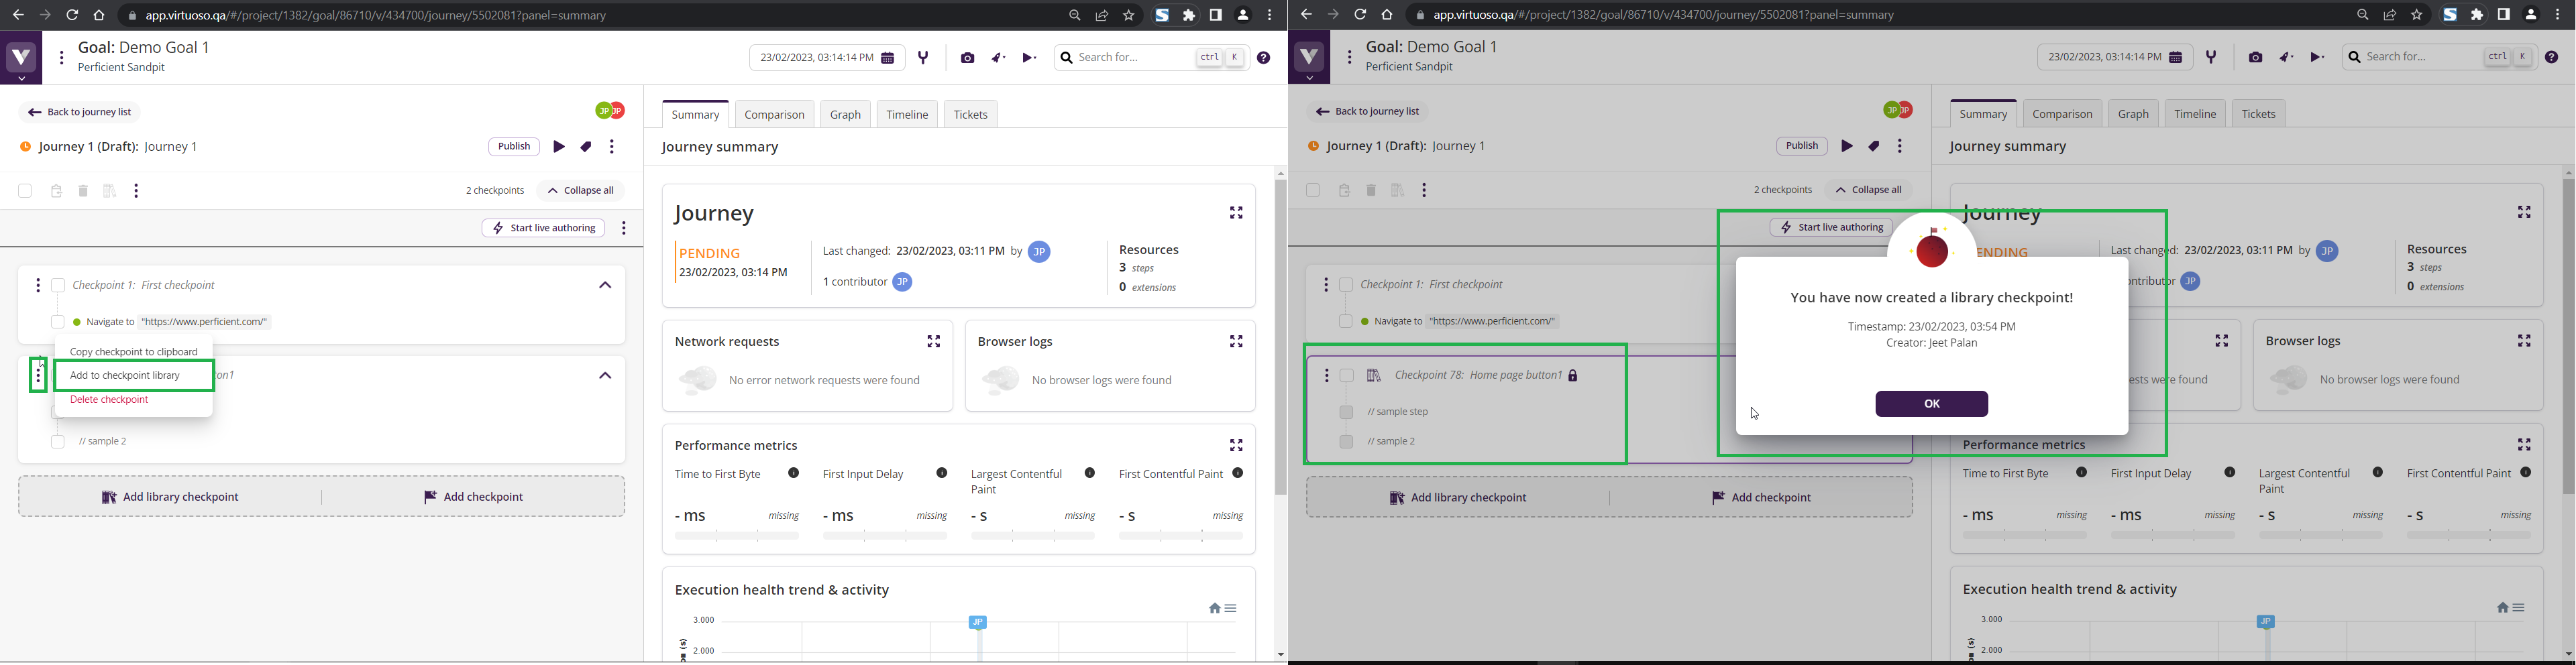
b. Calling a Library Checkpoint
-
- Click on the ‘Add Library Checkpoint’ button under the previous existing Checkpoint.
- On click, a list will appear; choose the Checkpoint name you wish to call in your Journey.
- Click ‘Add,’ and the Checkpoint will be added to your Journey.
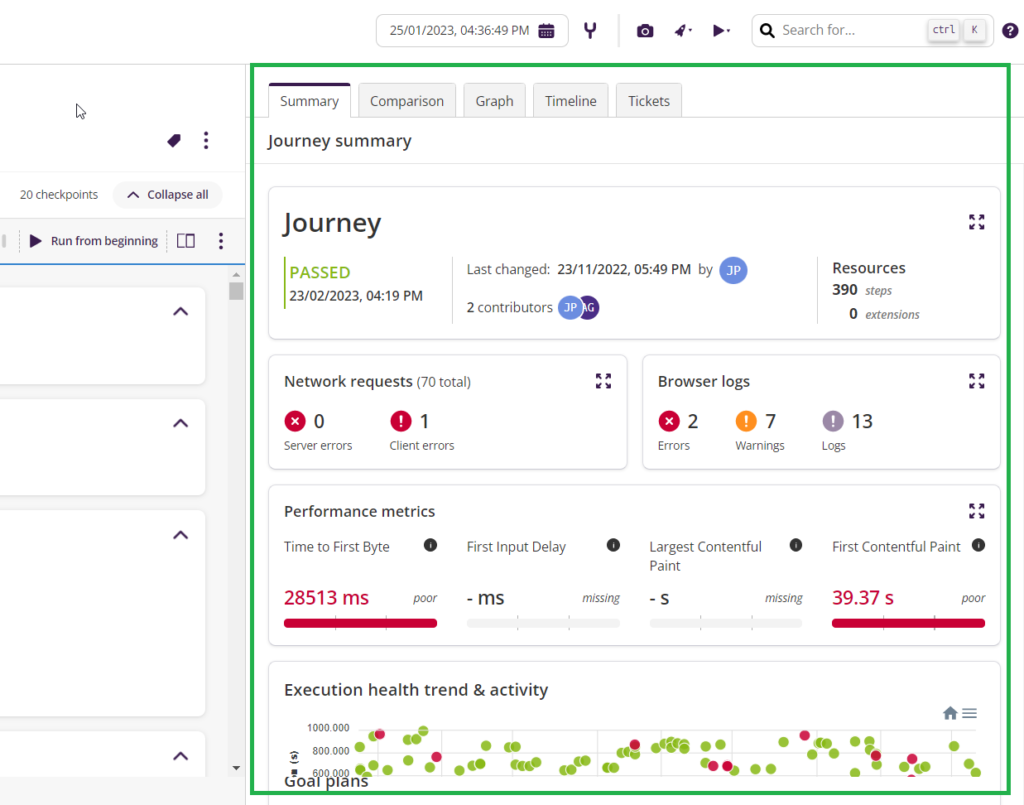
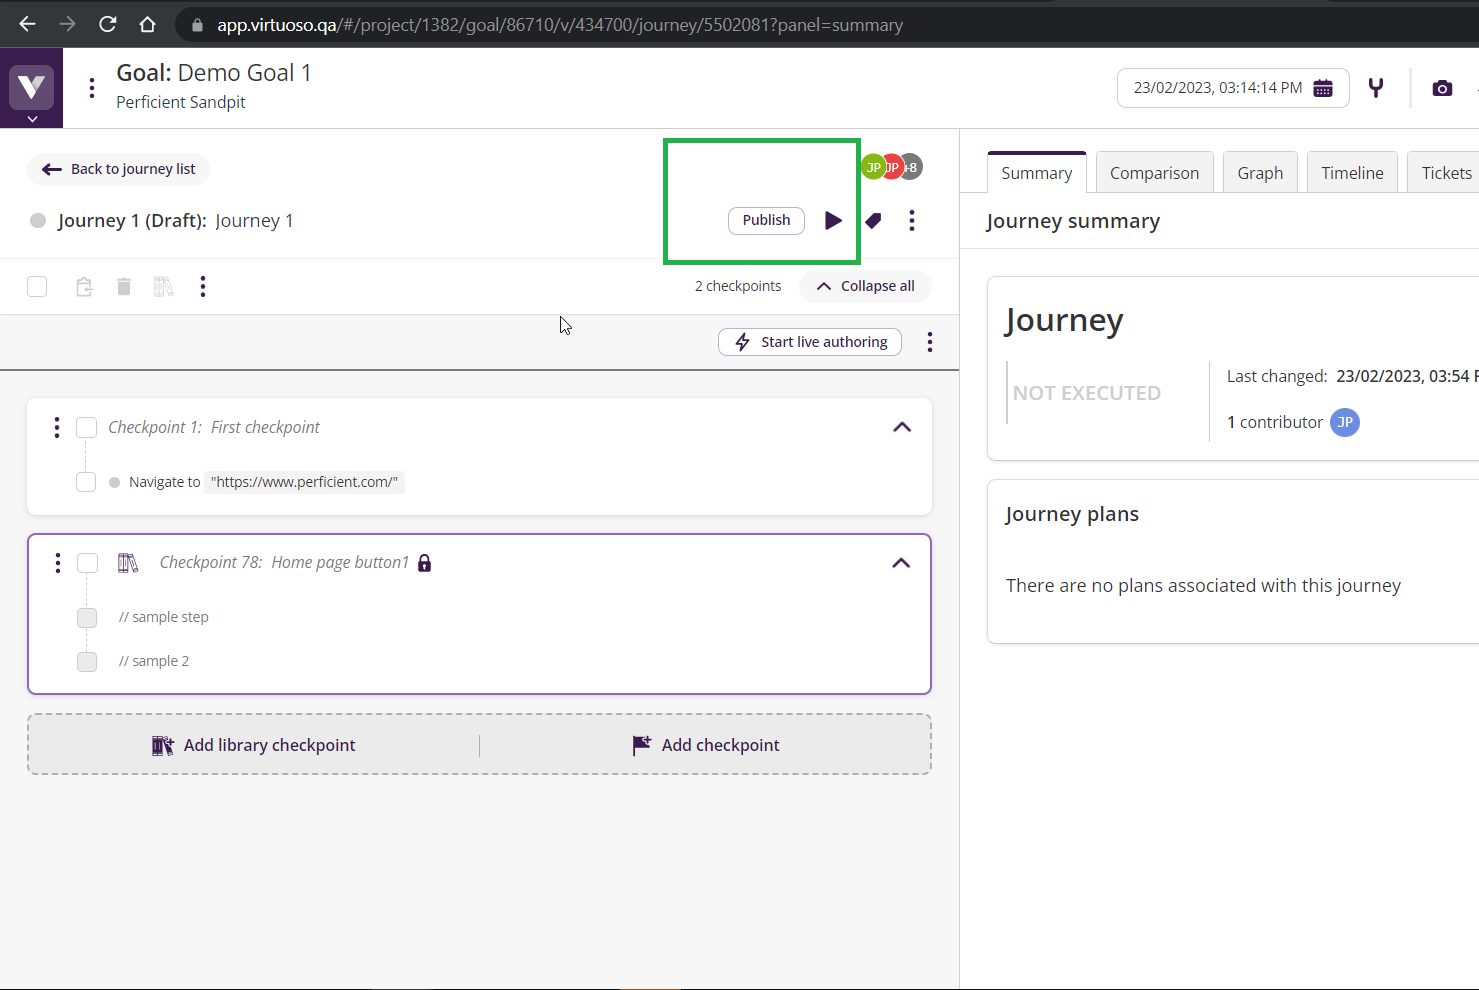
V. Journey Summary
- The journey summary is displayed on the right of the Checkpoints and test steps in the Journey view. For the user, it gets available as soon as a Journey is defined.
- It usually contains information related to the test steps and their executions.
- It lets the user know the most recent update, including when and who made the change.
- In addition to these details, Journey Summary contains Network requests, Browser logs, Performance metrics, and Execution health trends & activity.
- The Network requests section indicates the number of occurrences of network errors during the execution of the tests similarly, the availability of logs on the browser console is indicated by the Browser logs section.
VI. Publishing a Journey
- Developing new Journeys frequently implies experimentation and finding the ideal way to show an end-to-end user flow.
- To make this less complicated, newly created Journeys are prepared as drafts, which means that they won’t be executed until you publish them.
- Once you are sure your Journey is ready to be added to your Goal, you can publish it by selecting the ‘Publish’ button at the top.
Conclusion
I hope this 5-minute read has helped the enthusiast inclined to know Virtuoso and get a broader view of how journeys are created to test end-to-end flows. We learned how to create a Journey and the checkpoints, and also learned how to review the journey summary and publish it once it is ready to execute, which can be helpful to test an application end to end.