Are you looking for the best way to schedule content updates in WordPress?
Updating your site content is crucial since it helps you keep your content relevant. Having outdated content on your site can give the impression to the reader that you do not keep up with the newest trends, which can impact your brand’s credibility.
Furthermore, search engines like Google prioritize sites with fresh and up-to-**** material.
But, manually publishing content updates can be time-consuming, especially if you have many pages or blog posts.
Although WordPress has a native scheduling function, it doesn’t allow you to schedule content updates for a published post or page. In this post, we’ll show you how to schedule content updates in WordPress.
Scheduling content updates can save you time and effort, as you can plan and create your updates in advance and publish them later.
WordPress does have a native content scheduling tool. But it’s not the best way to schedule content updates for live posts and pages.
Here’s why:
When you schedule updates for an already-published post, the WordPress scheduling tool will unpublish it and save it as a draft. If you had incoming traffic to the post, you would lose it since users will get a 404 error when they try to access the URL.
To streamline your content update process, you need a reliable method that allows you to make changes to your content and effortlessly schedule them.
With that in mind, let’s get into the nitty-gritty of how to schedule content updates in WordPress.
2 Scheduling Content Updates in WordPress
The best way to schedule content updates in WordPress is by using a scheduling plugin.
The PublishPress Revisions plugin is a free and simple WordPress plugin that allows you to schedule and manage content updates.
Here’s how to schedule content updates in WordPress using the PublishPress Revisions plugin.
2.1 Install and Activate the PublishPress Revisions Plugin
To schedule content in WordPress, install and activate the PublishPress Revisions plugin.
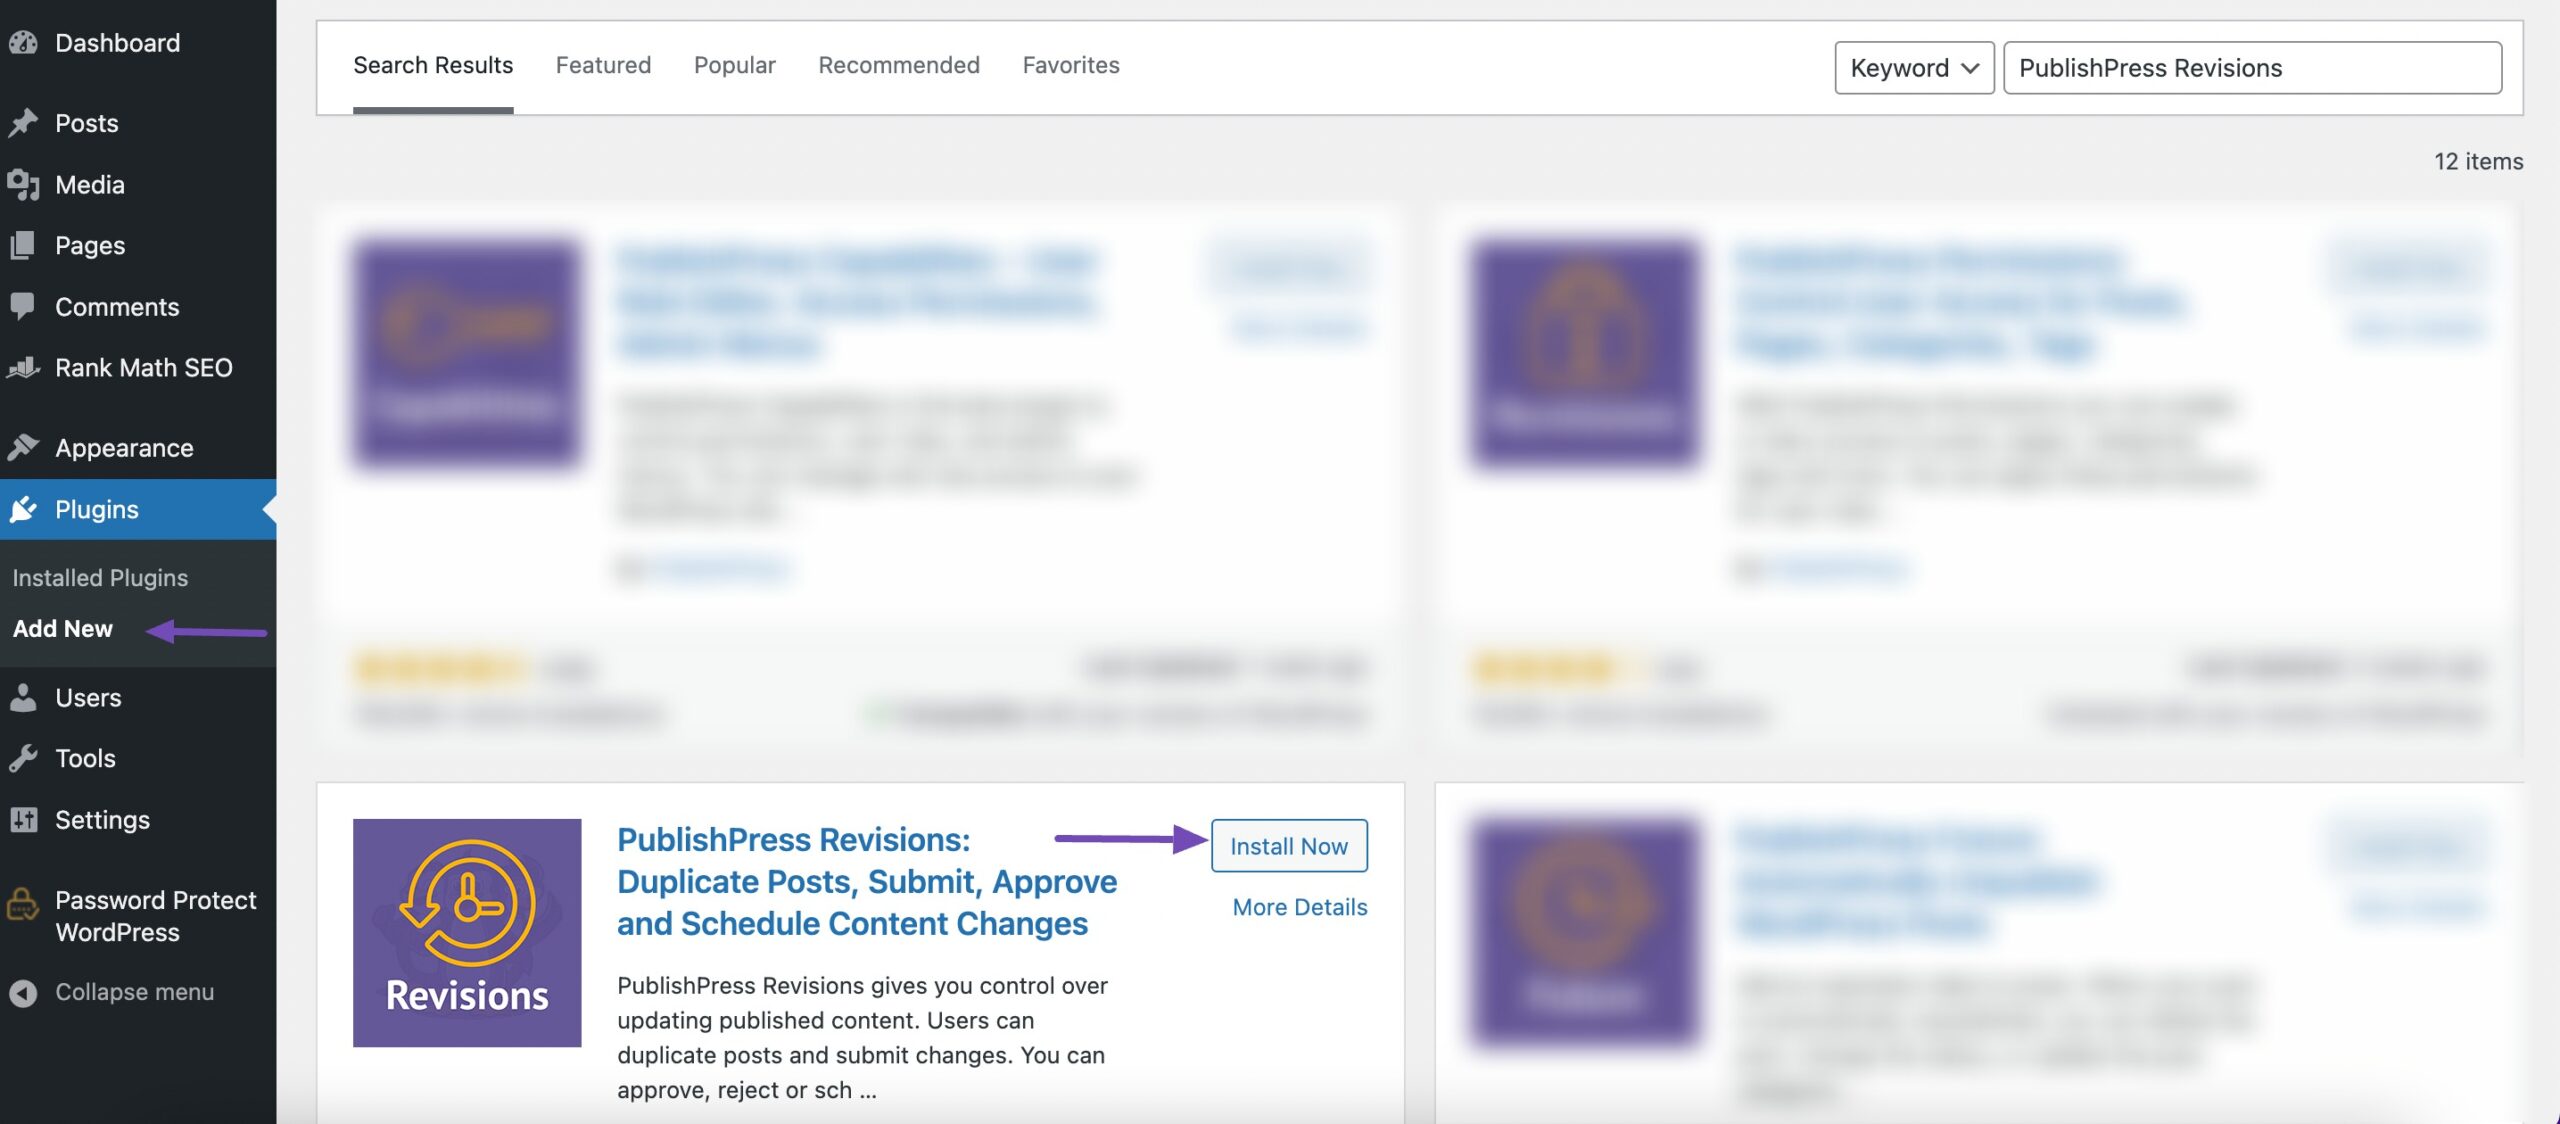
To do so, navigate to your WordPress dashboard’s Plugins → Add New section. Search for the PublishPress Revisions plugin in the search bar and install and activate the plugin, as shown below.
2.2 Schedule Content Updates Using PublishPress Revisions Plugin
Now it’s time to schedule WordPress updates to your already-published content. In this case, we’ll show you how to do it in WordPress posts.
Navigate to Posts → All Posts from your WordPress dashboard. Locate the post you wish to update and click the New Revision link, as shown below.
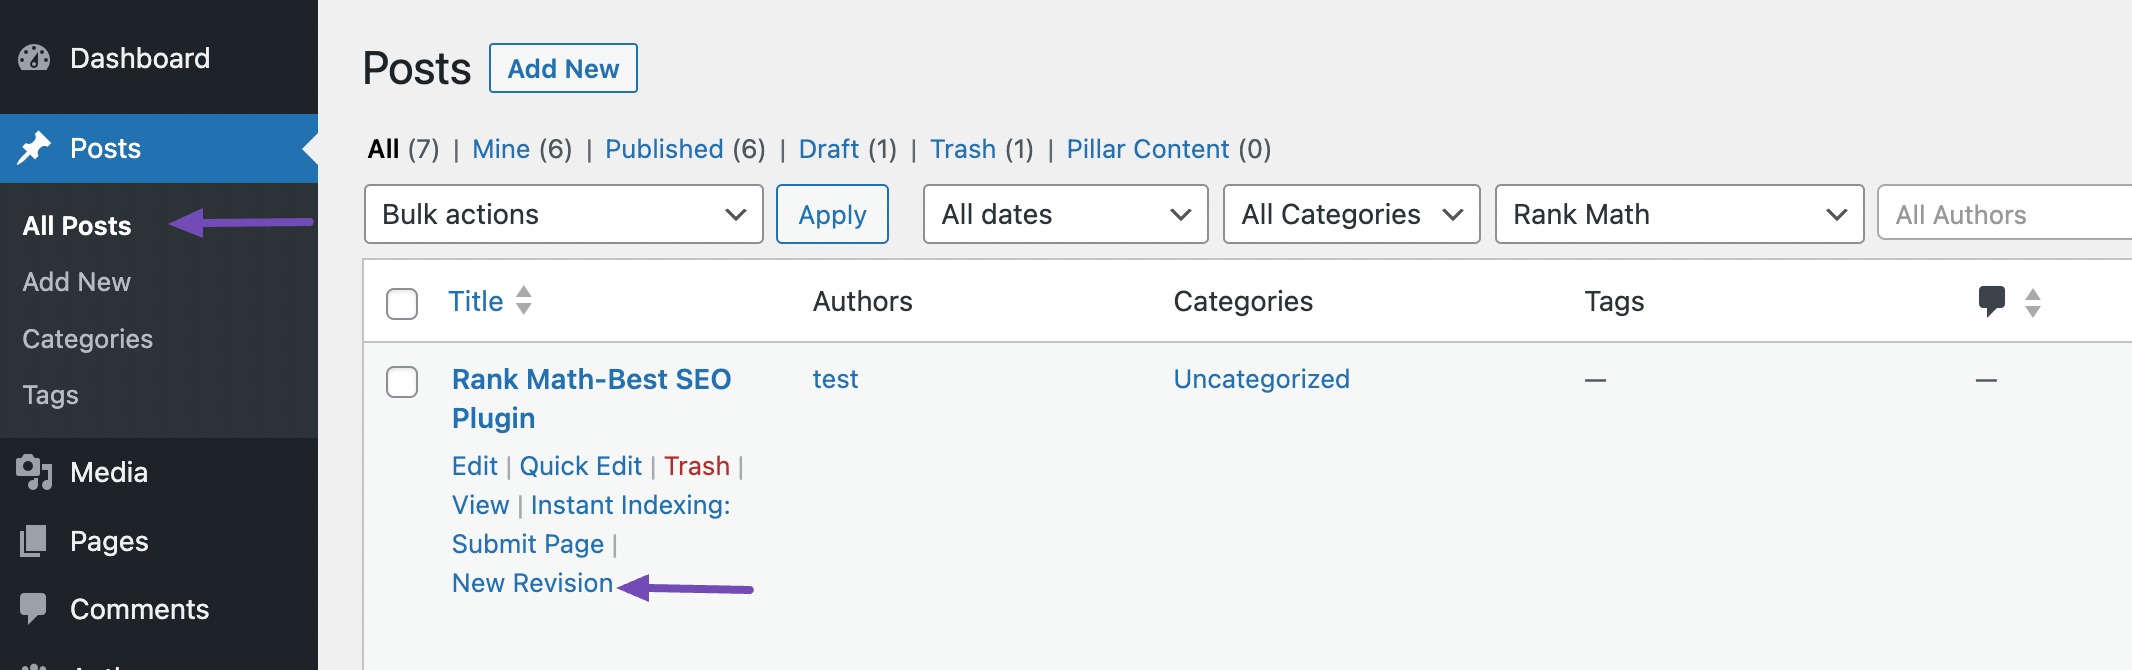
The plugin will automatically create a copy of your original post.
2.2.1 Scheduling Content in WordPress Block Editor
If you’re using the Block editor, you can easily schedule content updates using the PublishPress Revisions plugin, as shown in this section.
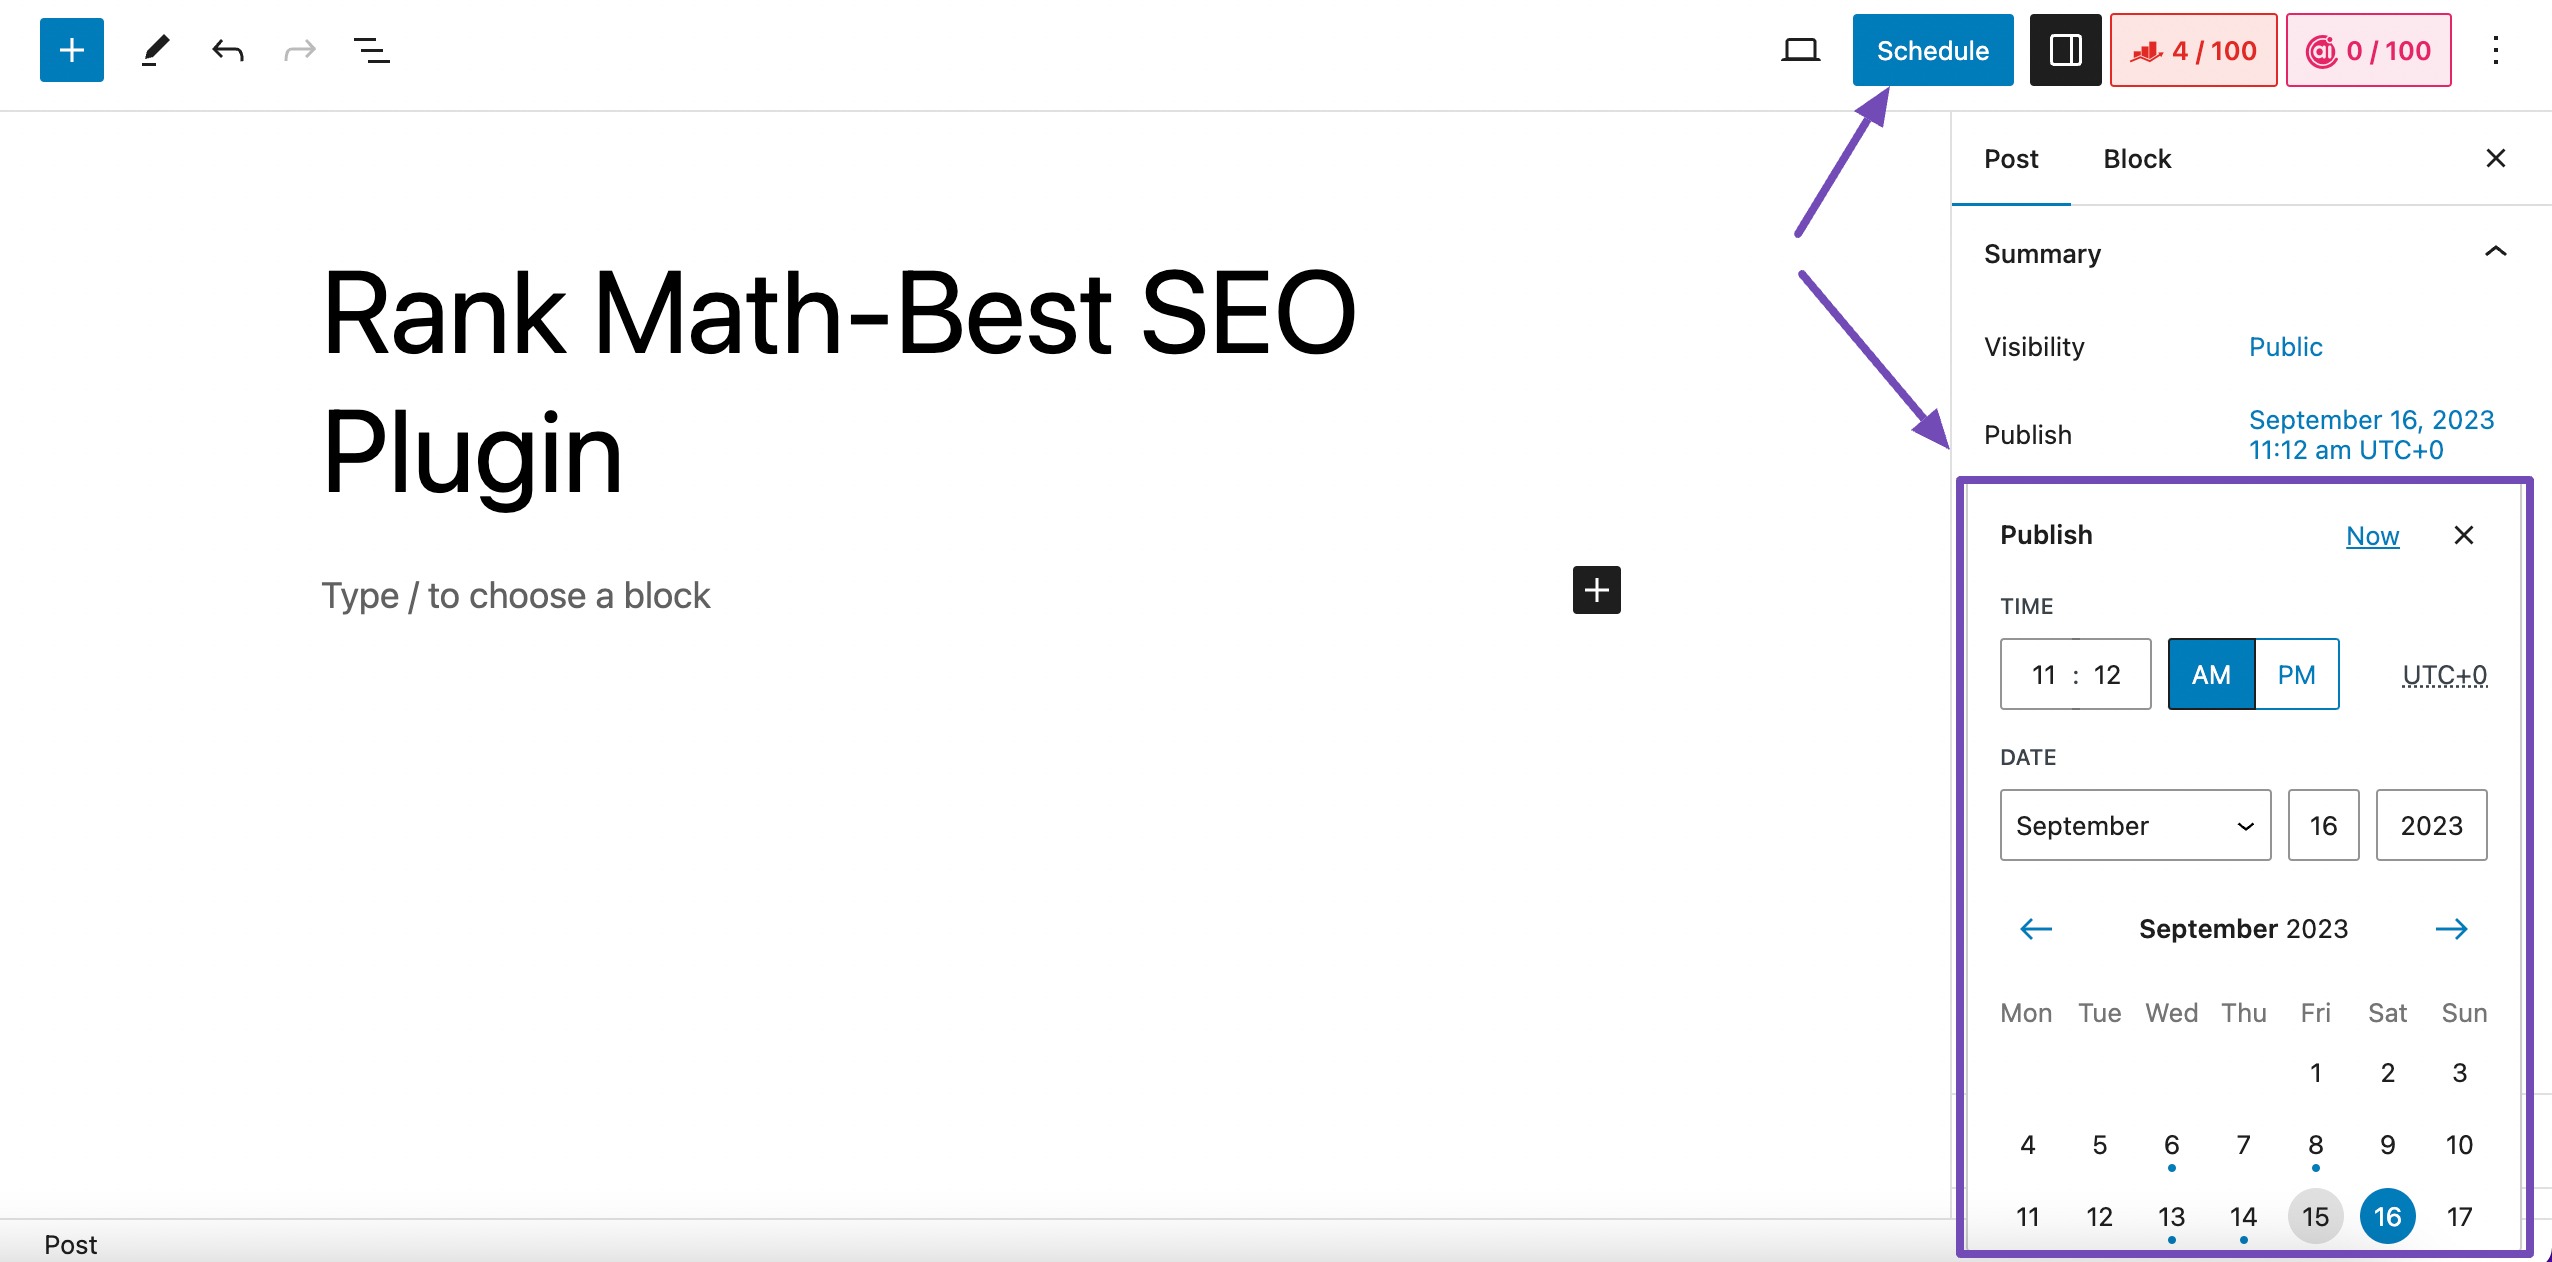
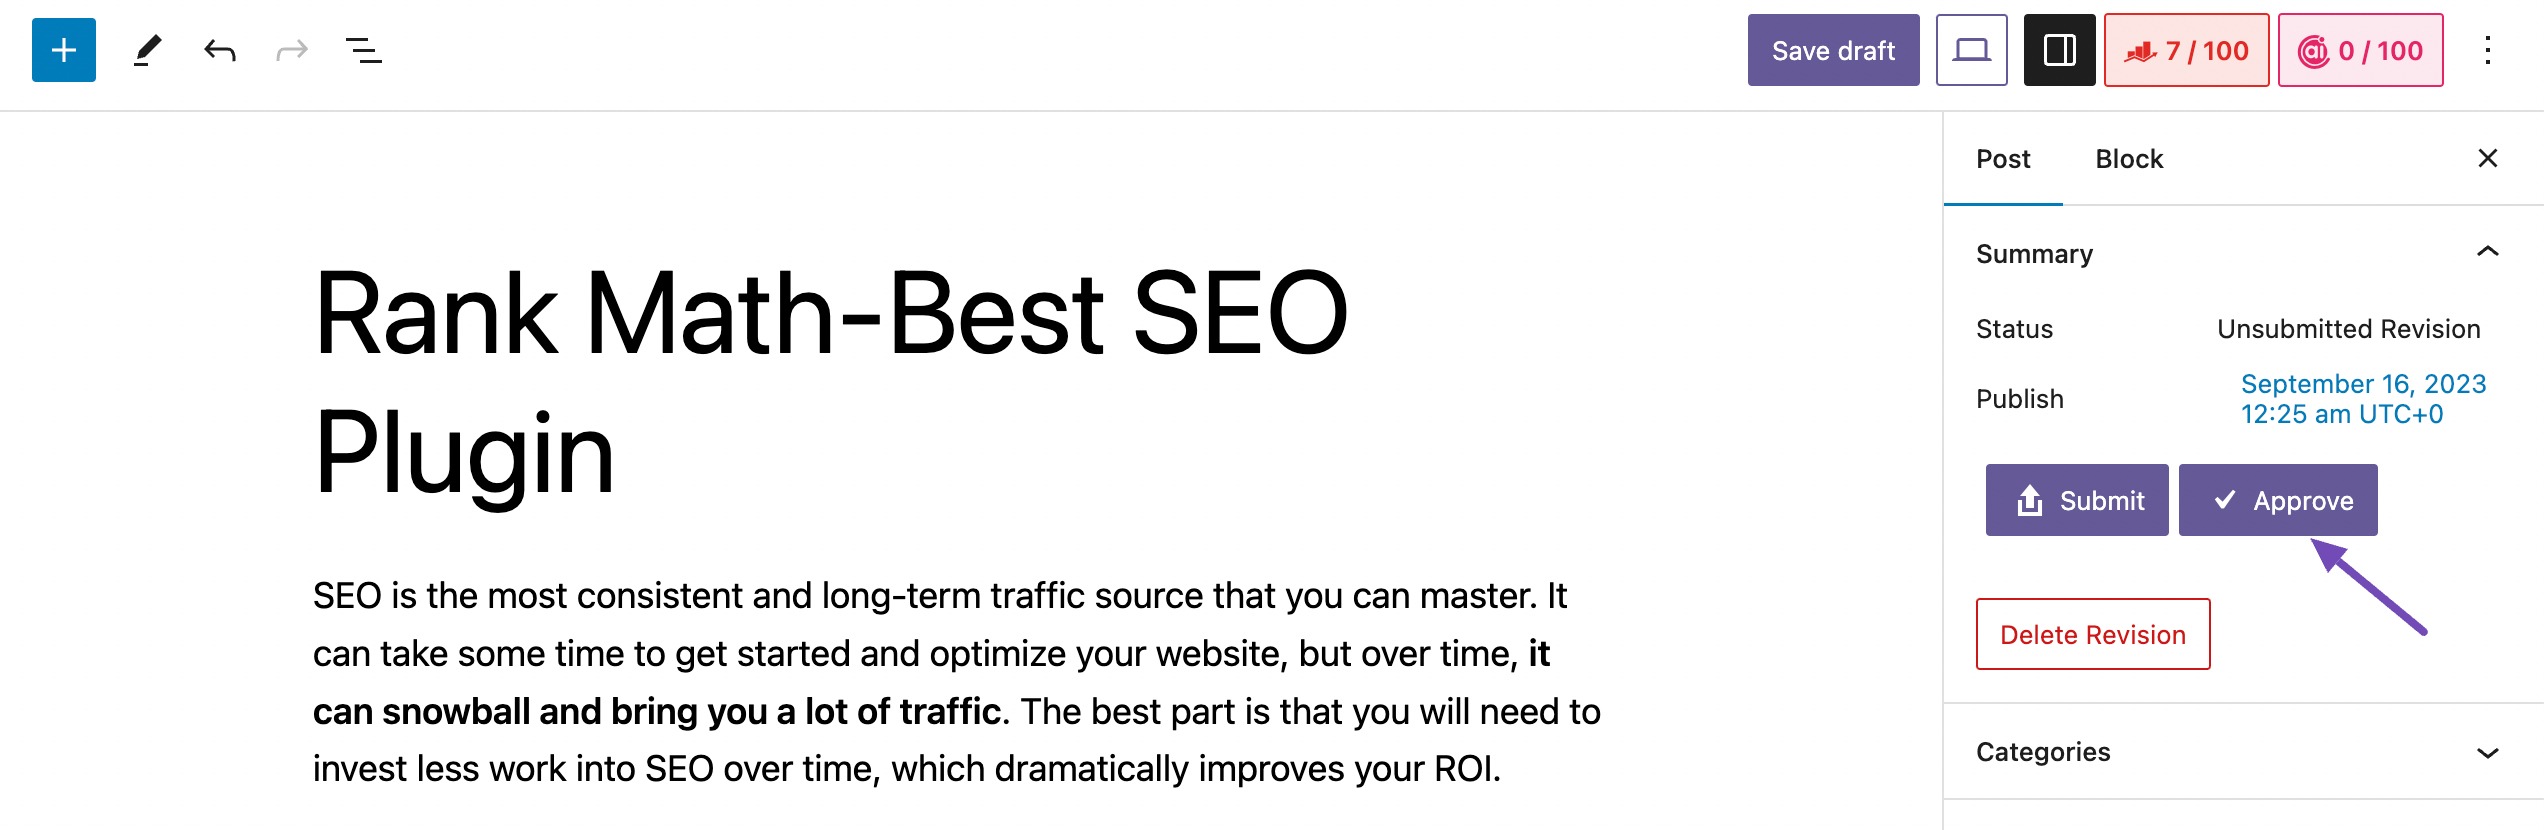
Let’s say you added a new section to your post, like a paragraph block. You can schedule the changes made in Block Editor by clicking on the Settings icon at the top. Then, in the Post tab, click the link showing the post’s publish **** and time.

Next, set the **** and time you want the draft to replace the current version.

Once done, click on the Submit button.

This allows the content editor of your team to double-check the changes you’ve made to the post before scheduling it. If you’re responsible for publishing content on the website and don’t need any approval about the changes made, you can click the Approve button.
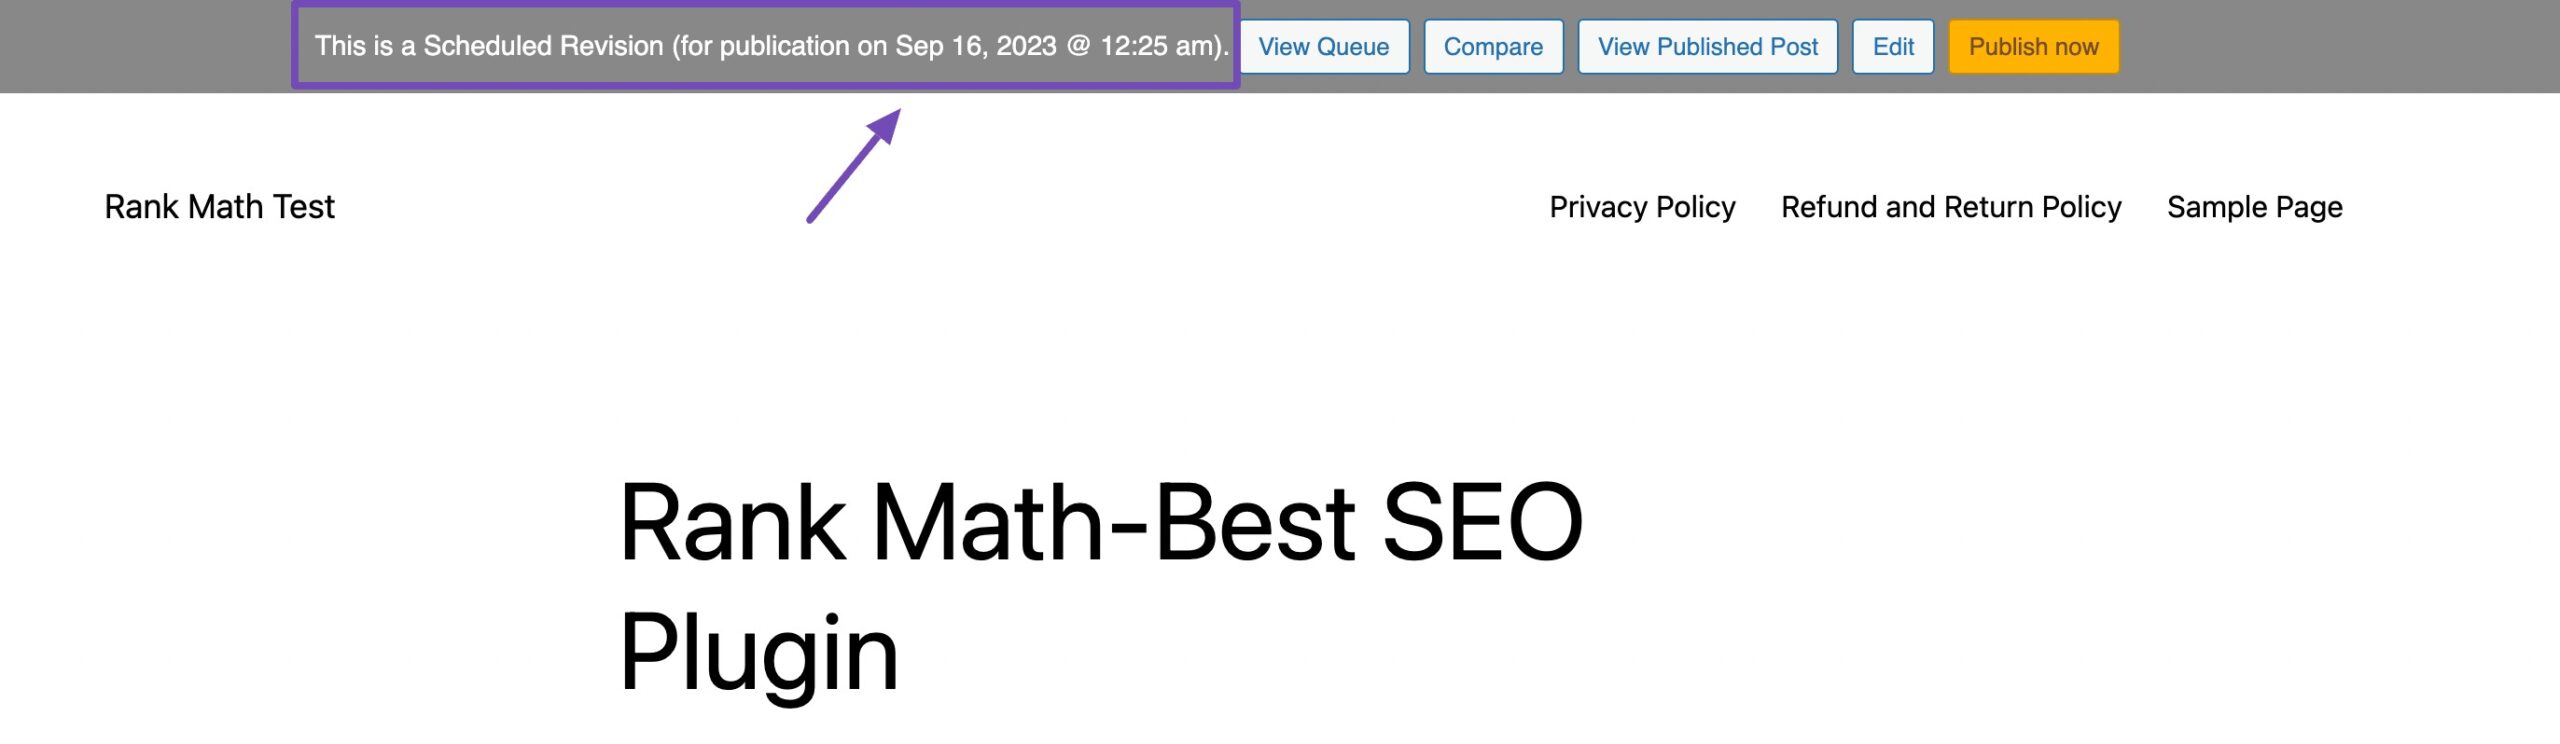
The plugin will then schedule the revision to be published at the specified **** and time.
Meanwhile, you’ll be redirected to a preview of your updated version, with a notification bar at the top of the page displaying the **** and time that your content revisions will be published.
2.2.2 Scheduling Content Updates in Classic Editor
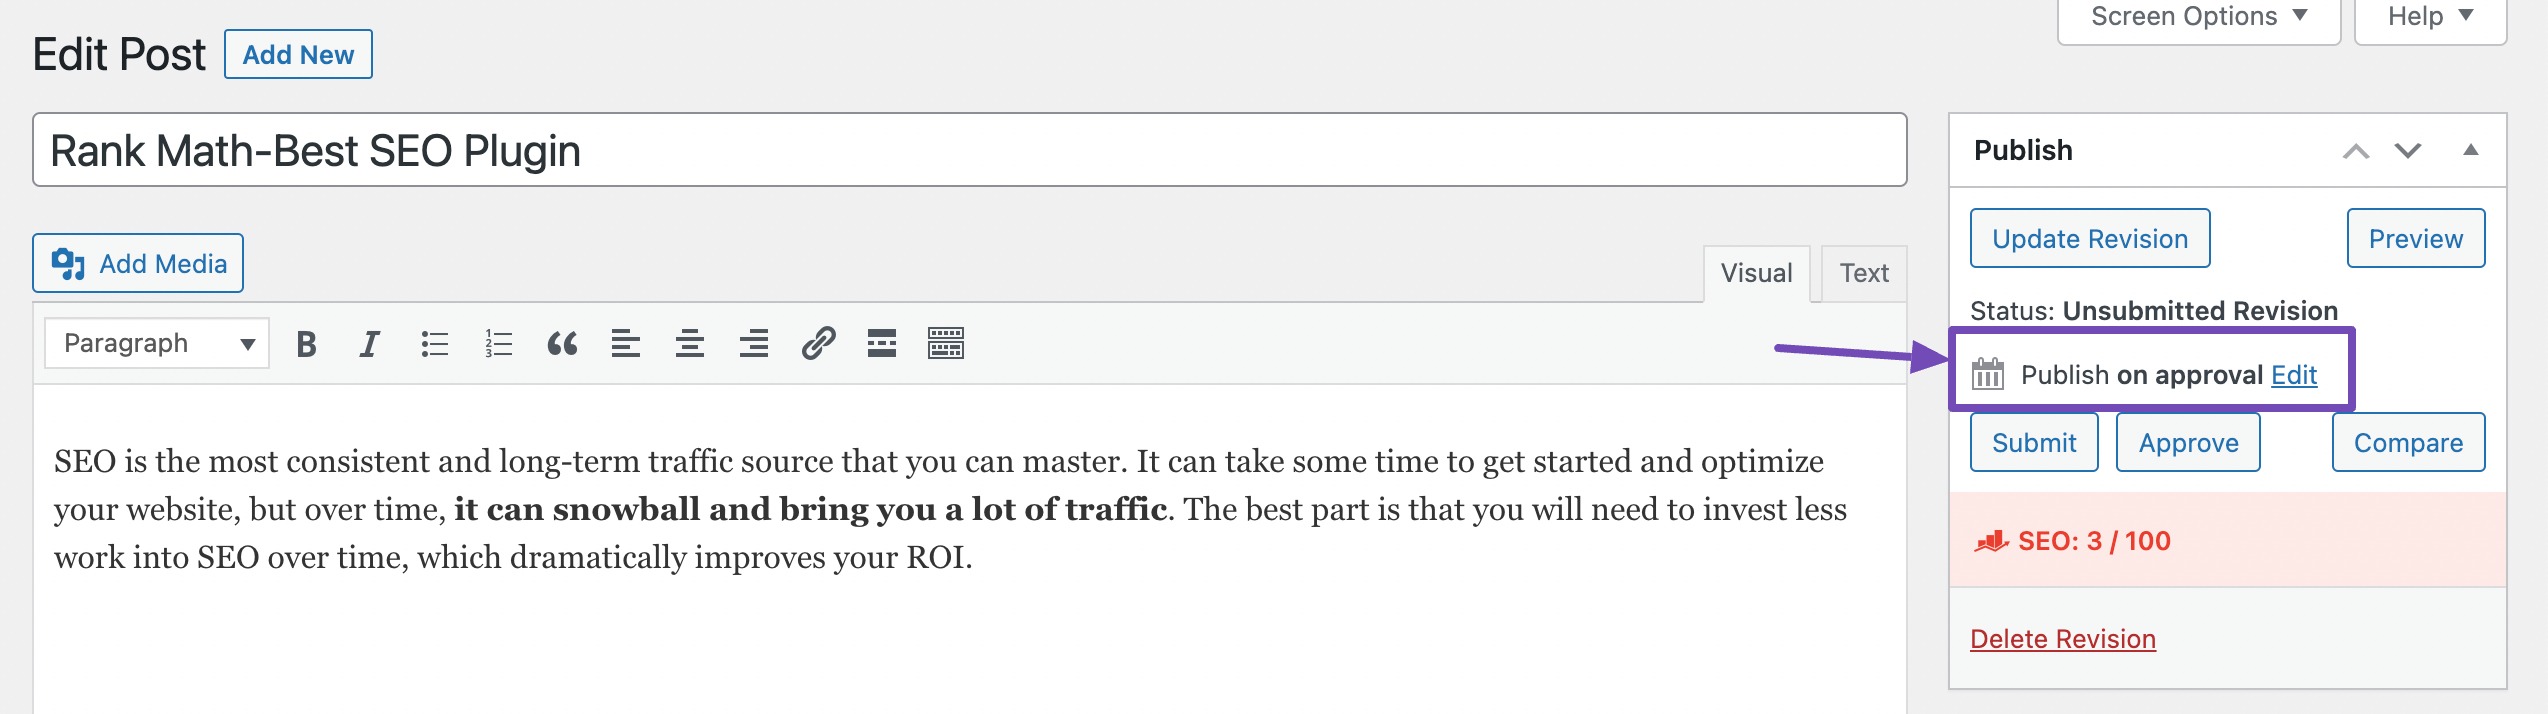
If you’re using the Classic Editor as your default text editing tool for your WordPress posts, you can also schedule your content update using the PublishPress Revisions plugin.
To do so navigate to the post you wish to update. In the Publish block, locate the Publish on approval section, and click on the Edit link.
Proceed and enter the **** and time you wish to publish your content updates, and once done, click on the OK button.
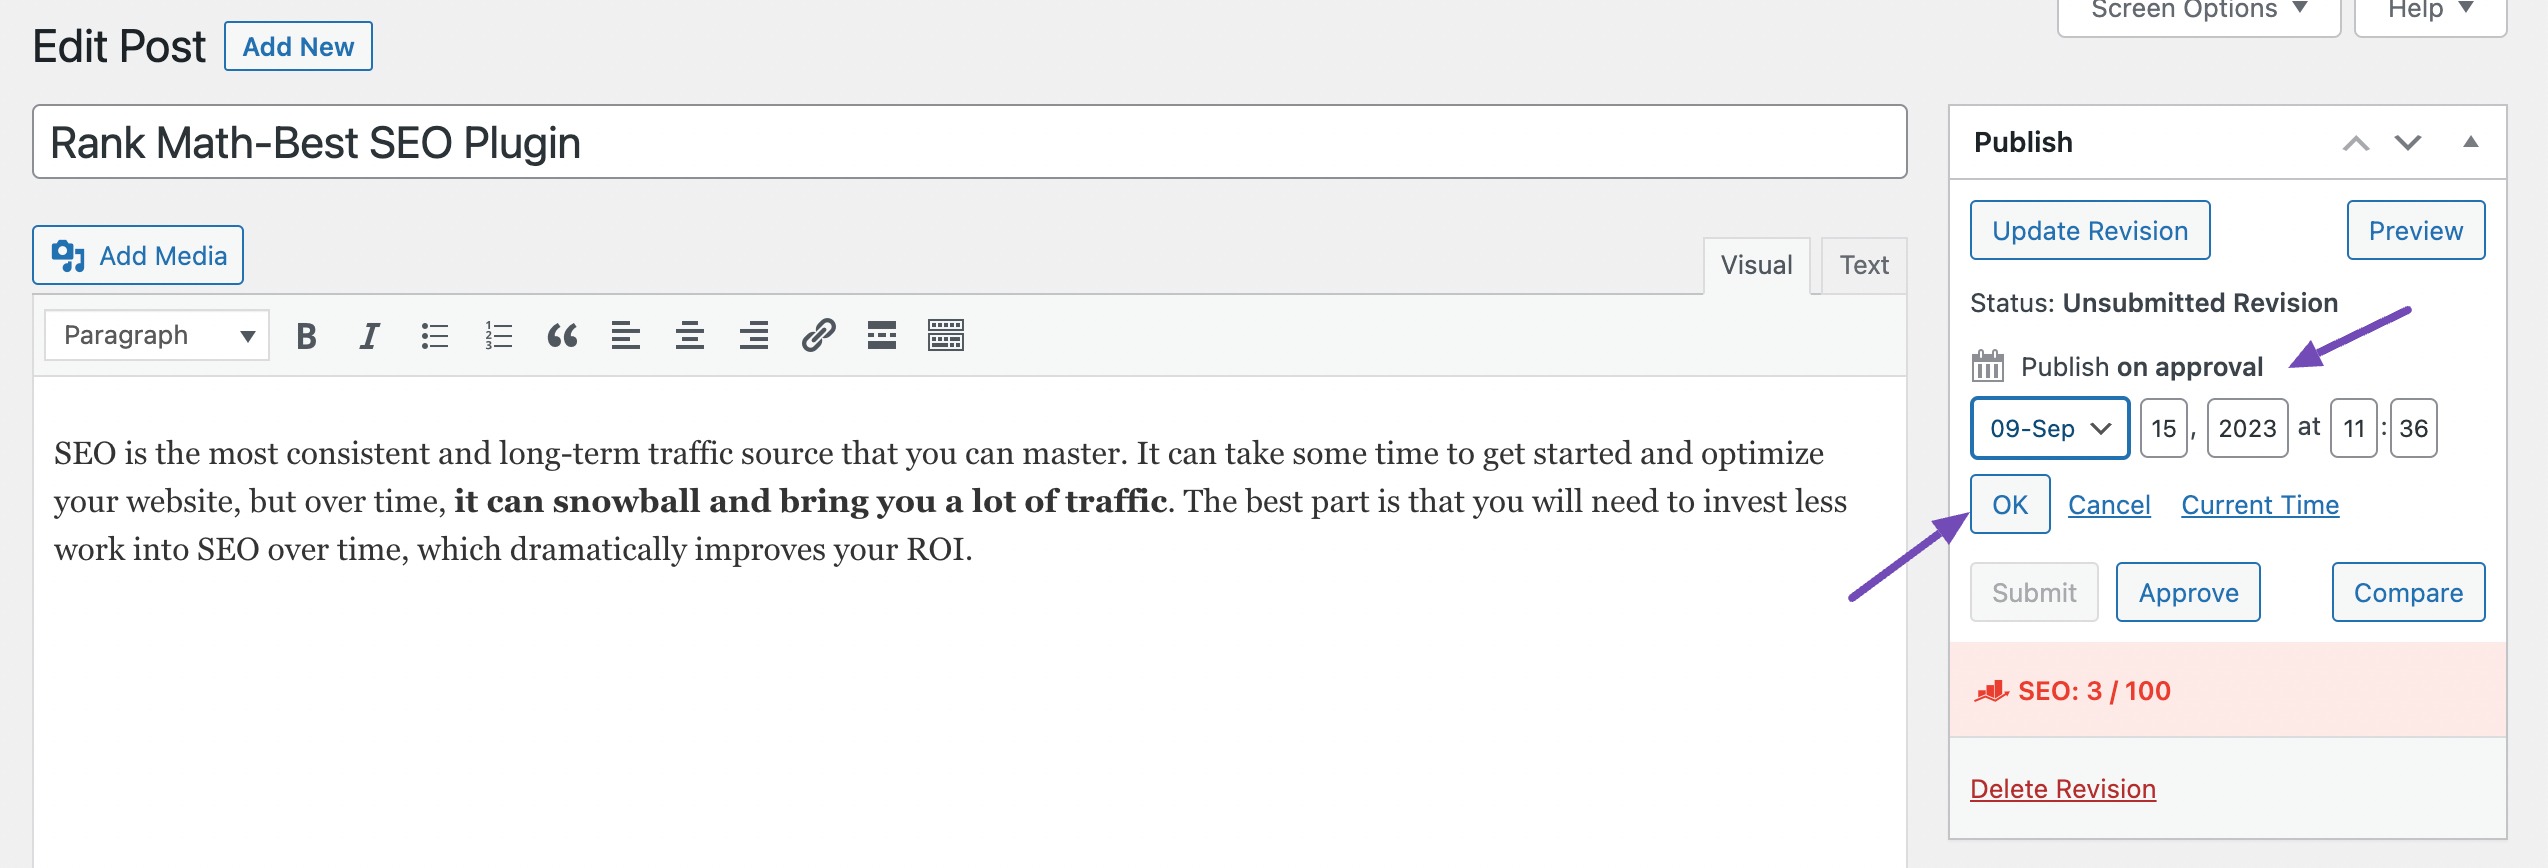
Click the Approve button to confirm the changes made to the post and schedule them.
2.3 Managing Scheduled Content Updates in the Revision Queue
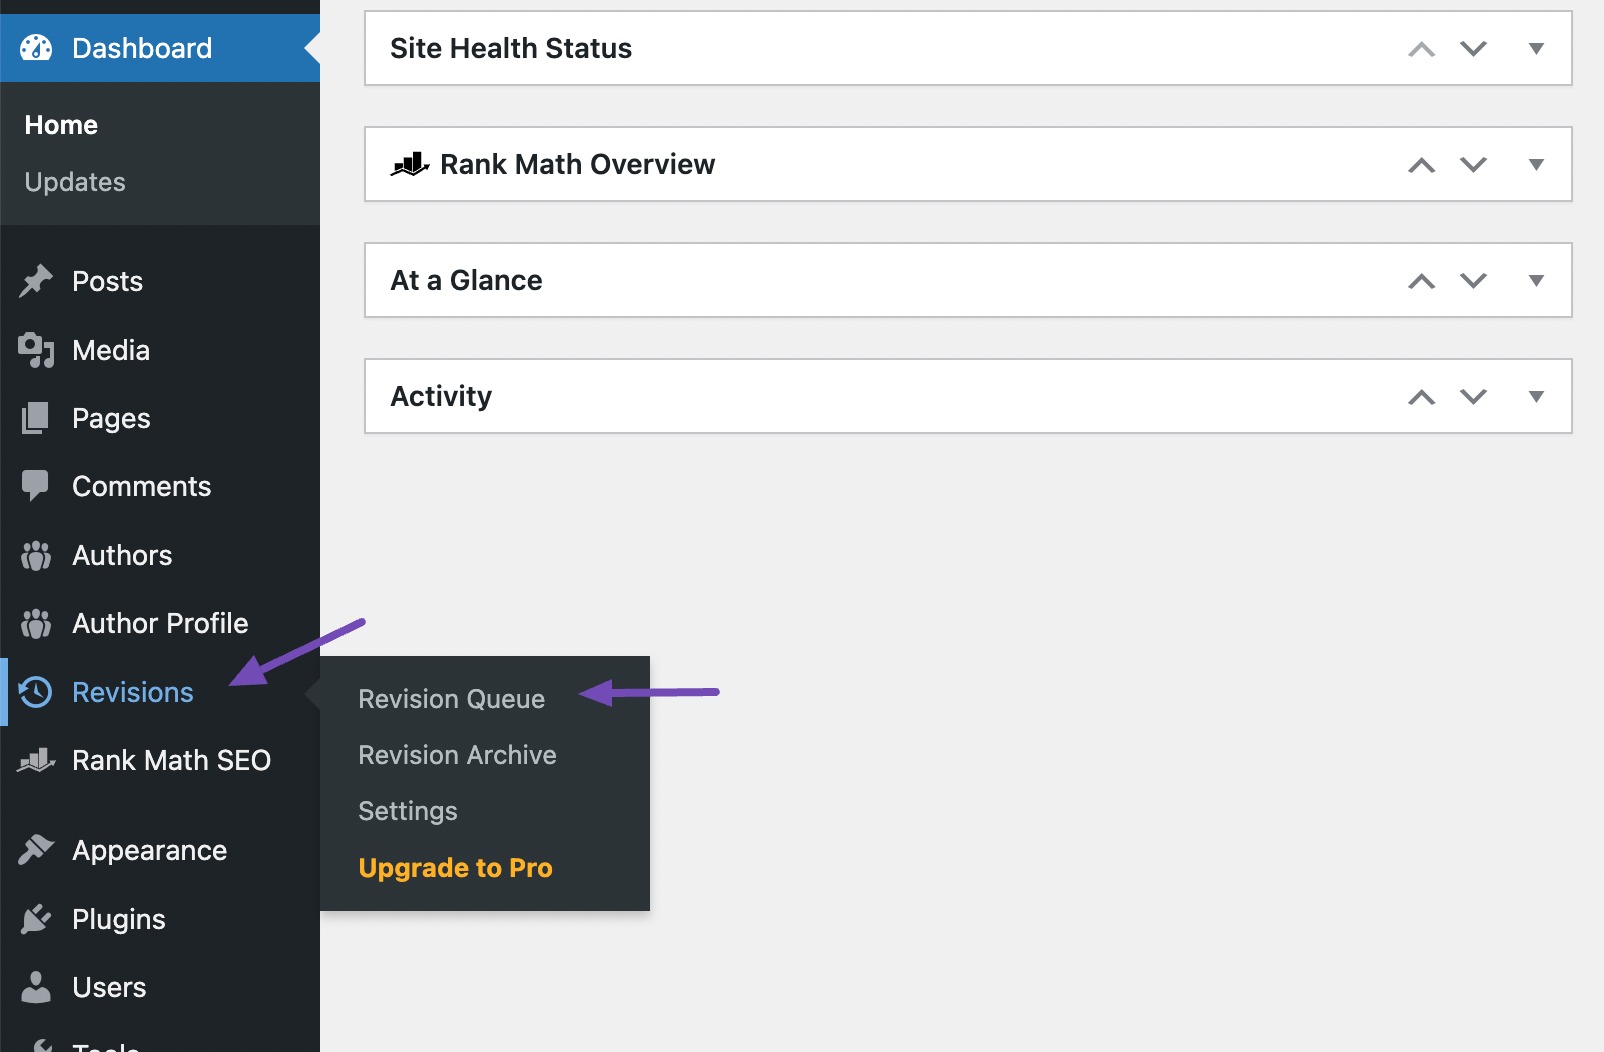
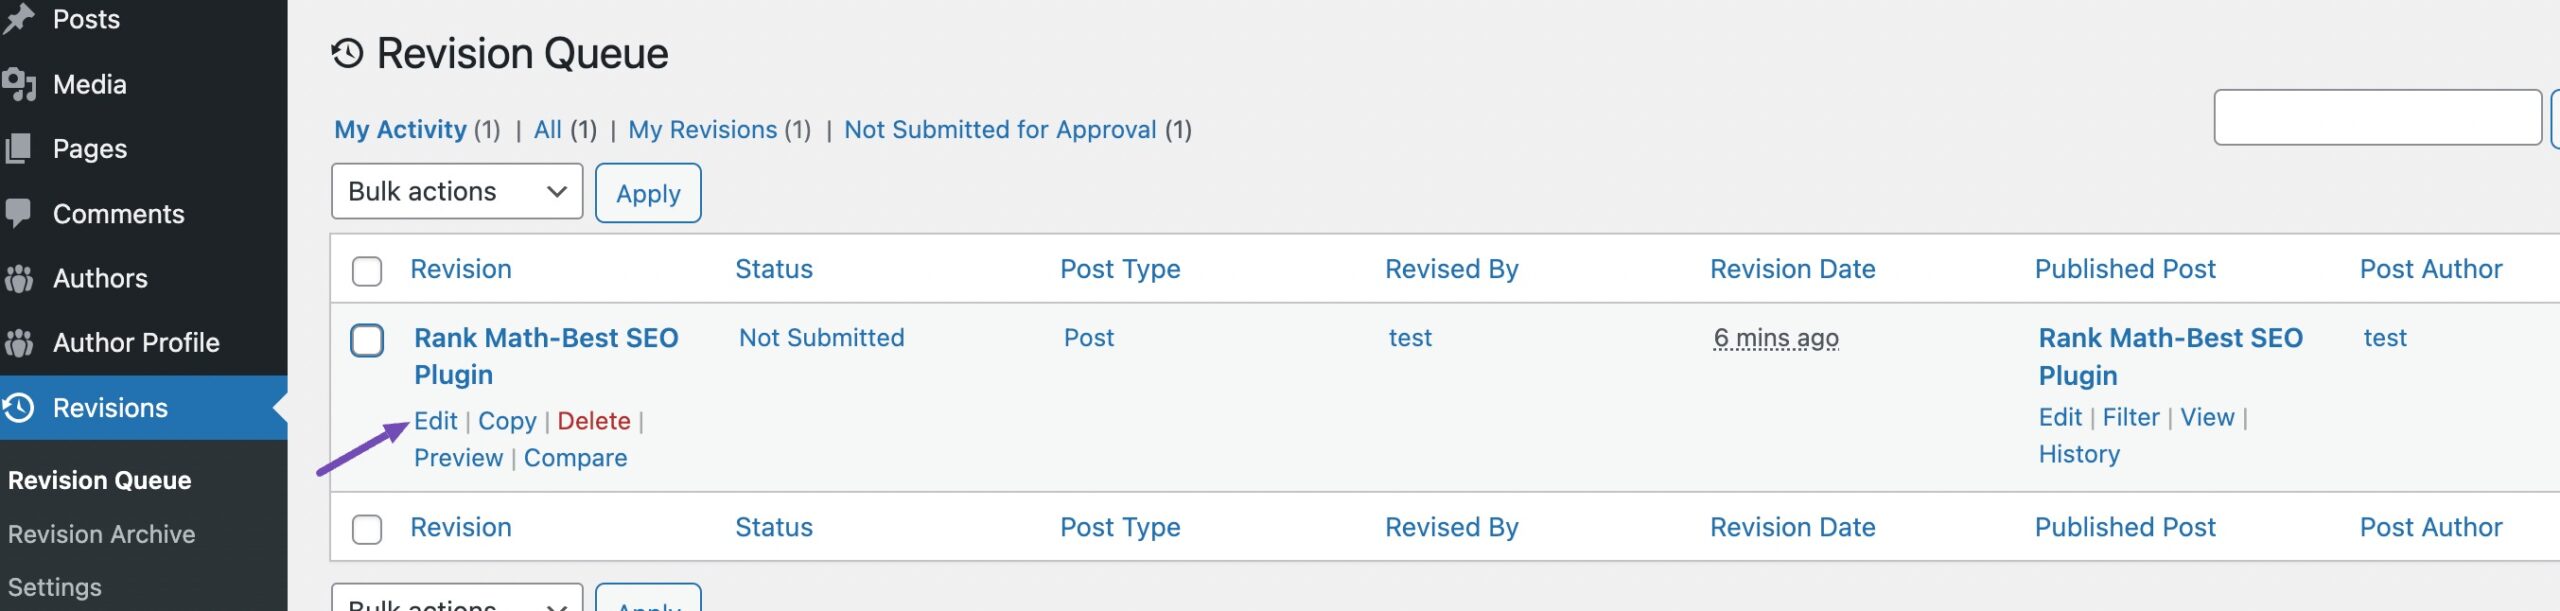
You can always check your scheduled revised posts by navigating to Revisions → Revision Queue from your WordPress dashboard.
If you want to make additional changes to your post, click the Edit link, as shown below.
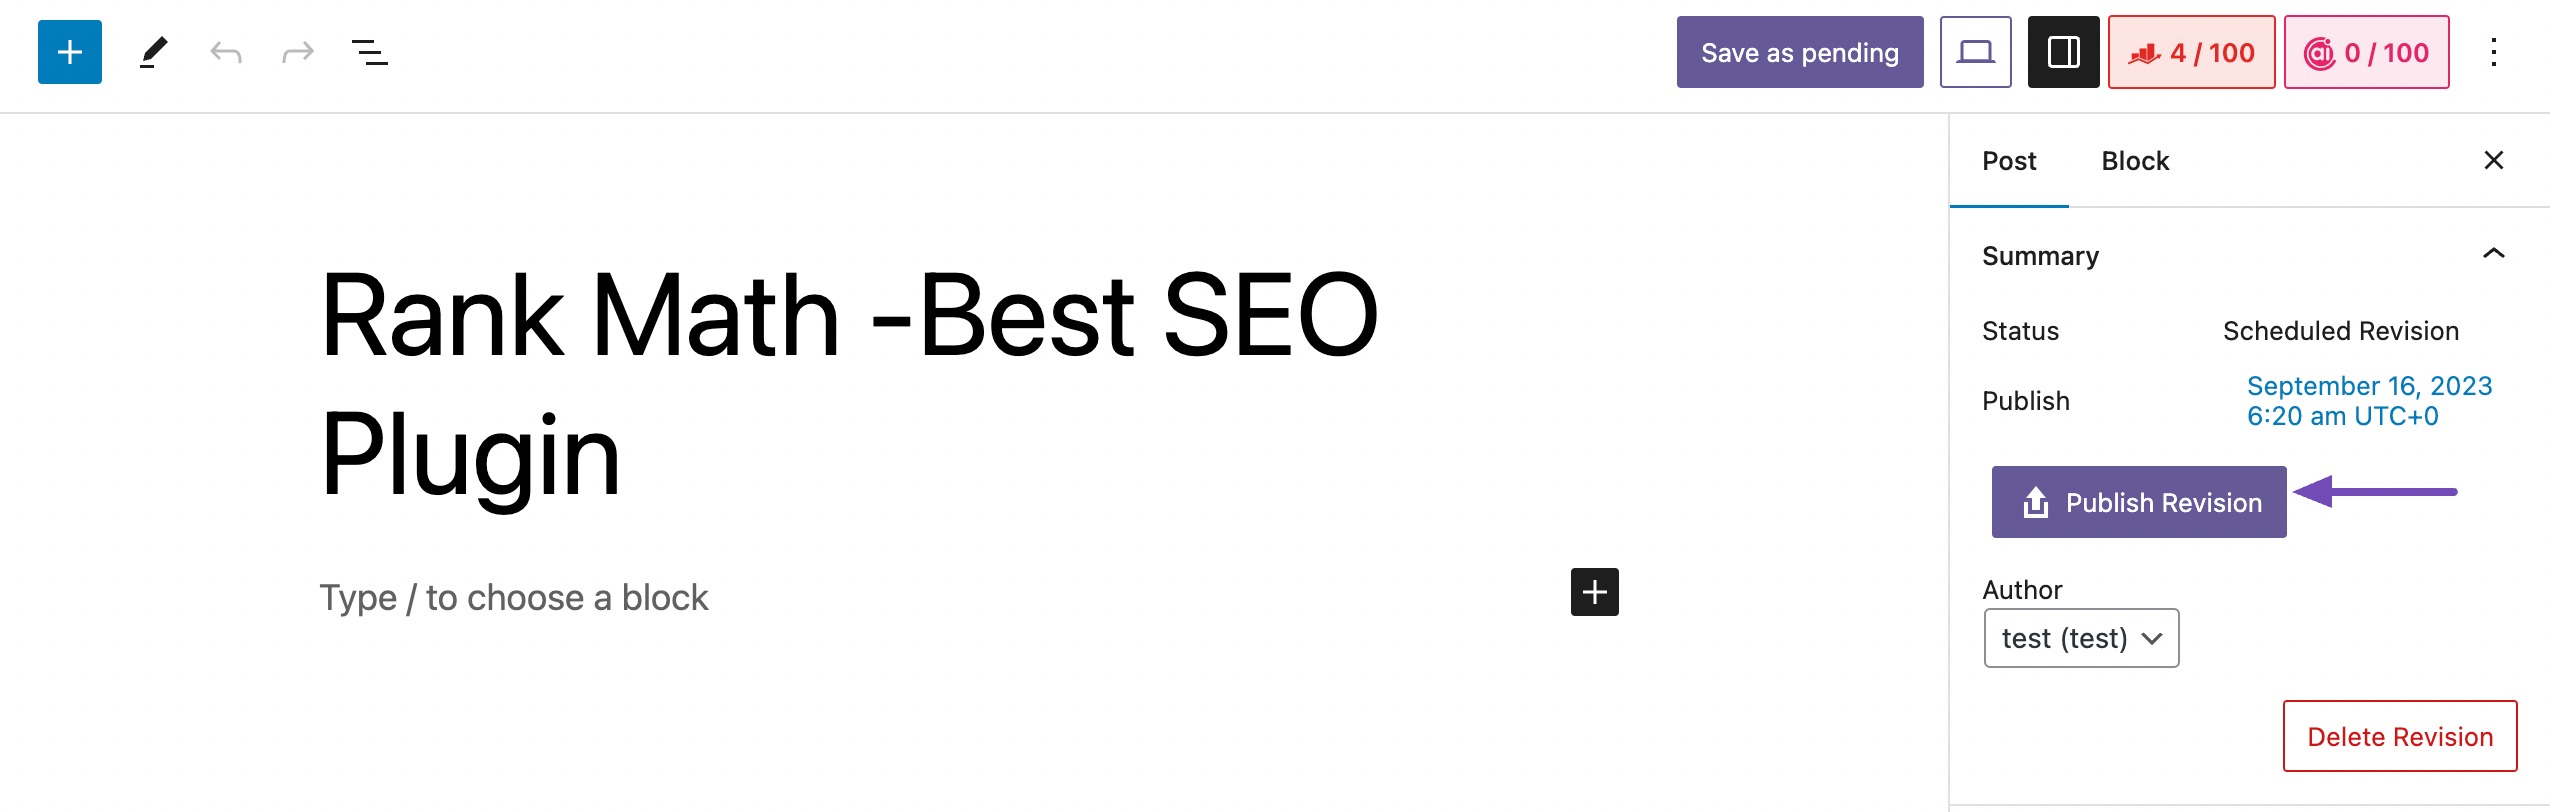
Once you’ve updated the post, click the Publish Revision button to save the changes.
3 Conclusion
Scheduling content updates in WordPress enables you to publish your updated version of the post at a specific time without logging in to your WordPress dashboard. This allows you to focus on other essential tasks, such as creating new content, managing your site, or promoting your brand.
How do you schedule your content updates for your WordPress site? Did it help you to improve your work performance in the long run? Let us know by Tweeting @rankmathseo.


