

(The robots.txt file).
Specifically, I’ll show you how to use robots exclusion protocols to block bots from particular pages, increase crawl frequency, optimize crawl budget, and ultimately get more of the right page’s ranking in SERPs.
I’m covering:
- What a robots.txt file is
- Why robots.txt is imporant
- How robots.txt works
- Robots.txt user-agents and directives
- Robots.txt Vs meta robots
- How to find your robots.txt
- Creating your robots.txt file
- Robots.txt file best practices
- Robots.txt examples
- How to audit your robots.txt for errors
Plus, a whole lot more. Let’s dive right in.
What is a Robots.txt file? And, Why You Need One
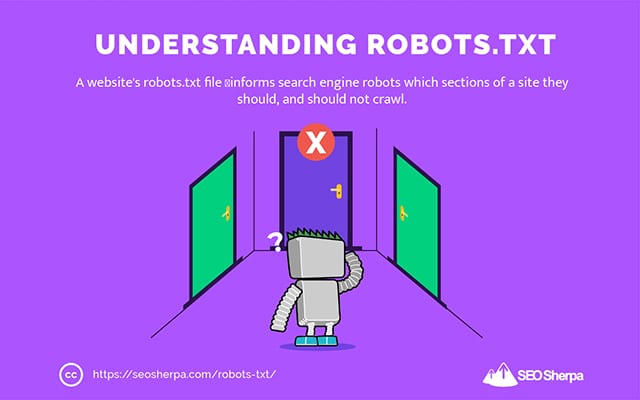
In simple terms, a robots.txt file is an instructional manual for web robots.
It informs bots of all types, which sections of a site they should (and should not) crawl.
That said, robots.txt is used primarily as a “code of conduct” to control the activity of search engine robots (AKA web crawlers).
The robots.txt gets checked regularly by every major search engine (including Google, Bing, and Yahoo) for instructions about how they should crawl the website. These instructions are known as directives.
If there are no directives – or no robots.txt file – search engines will crawl the entire website, private pages, and all.
Although most search engines are obedient, it’s important to note that abiding by robots.txt directives is optional. Should they wish, search engines can choose to ignore your robots.txt file.
Thankfully, Google isn’t one of those search engines. Google tends to obey the instructions in a robots.txt file.
Why is Robots.txt Important?
Having a robots.txt file isn’t critical for a lot of websites, especially tiny ones.
That’s because Google can usually find and index all of the essential pages on a site.
And, they’ll automatically NOT index duplicate content or pages that are unimportant.
But still, there’s no good reason not to have a robots.txt file – so I recommend you have one.
A robots.txt gives you greater control over what search engines can and can’t crawl on your website, and that’s helpful for several reasons:
Allows Non-Public Pages to be Blocked from Search Engines
Sometimes you have pages on your site that you don’t want indexing.
For example, you might be developing a new website on a staging environment that you want to be sure is hidden from users until launch.
Or you may have website login pages you don’t want showing up in SERPs.
If this were the case, you could use robots.txt to block these pages from search engine crawlers.
Controls Search Engine Crawl Budget
If you’re having a hard time getting all of your pages indexed in search engines, you might have a crawl budget problem.
Simply put, search engines are using up the time allotted to crawl your content on your website’s deadweight pages.

By blocking low utility URLs with robots.txt, search engine robots can spend more of their crawl budget on the pages that matter most.
Prevents Indexing of Resources
It’s best practice to use the “no-index” meta directive to stop individual pages from getting indexed.
The trouble is, meta directives don’t work well for multimedia resources, like PDFs and Word docs.
That’s where robots.txt is handy.
You can add a simple line of text to your robots.txt file, and search engines get blocked from accessing these multimedia files.
(I’ll be showing you exactly how to do that later in this post)
How (Exactly) Does a Robots.txt Work?
As I already shared, a robots.txt file acts as an instructional manual for search engine robots. It tells search bots where (and where not) they should crawl.
This is why a search crawler will look for a robots.txt file as soon as it arrives at a website.
If it finds the robots.txt, the crawler will read it first before continuing with its crawl of the site.
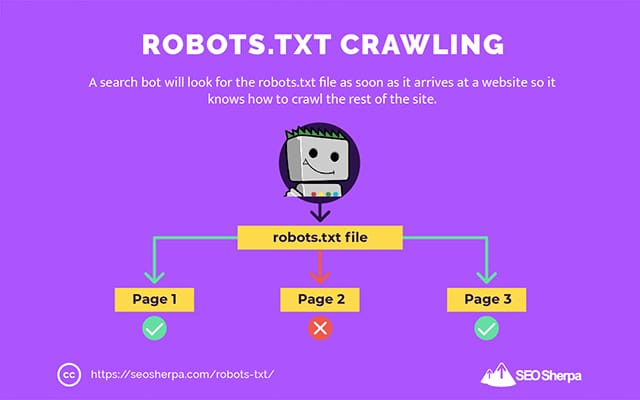
If the web crawler doesn’t find a robots.txt, or the file does not contain directives that disallow the search bots’ activity, the crawler will continue to spider the entire site as usual.
For a robots.txt file to be findable and readable by search bots, a robots.txt is formatted in a very particular way.
First, it is a text file with no HTML markup code (hence the .txt extension).
Second, it gets placed in the root folder of the website, e.g., https://seosherpa.com/robots.txt.
Third, it uses a standard syntax that is common to all robots.txt files, like so:
Sitemap: [URL location of sitemap]

User-agent: [bot identifier]
[directive 1]
[directive 2]
[directive ...]

User-agent: [another bot identifier]
[directive 1]
[directive 2]
[directive ...]
This syntax may look daunting at first glance, but it’s actually quite simple.
In brief, you define the bot (user-agent) the instructions apply to and then state the rules (directives) the bot should follow.
Let’s explore these two components in more detail.
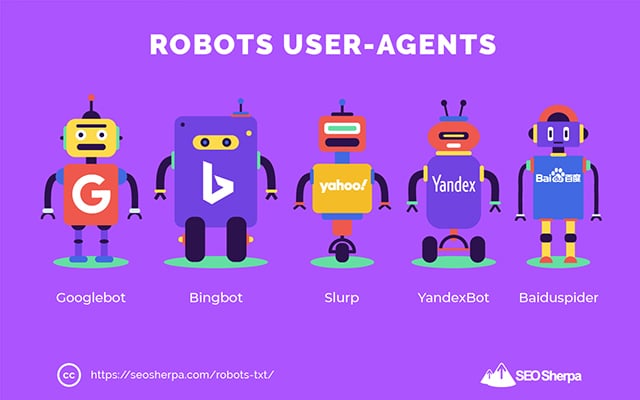
User-Agents
A user-agent is the name used to define specific web crawlers – and other programs active on the internet.
There are literally hundreds of user agents, including agents for device types and browsers.
Most are irrelevant in the context of a robots.txt file and SEO. On the other hand, these you should know:
- Google: Googlebot
- Google Images: Googlebot-Image
- Google Video: Googlebot-Video
- Google News: Googlebot-News
- Bing: Bingbot
- Bing Images & Videos: MSNBot-Media
- Yahoo: Slurp
- Yandex: YandexBot
- Baidu: Baiduspider
- DuckDuckGo: DuckDuckBot
By stating the user agent, you’re able to set different rules for different search engines.
For instance, if you wanted a certain page to show up in Google search results but not Baidu searches, you could include two sets of commands in your robots.txt file: one set preceded by “User-agent: Bingbot” and one set preceded by “User-agent: Baiduspider.”
You can also use the star (*) wildcard if you want your directives to apply to all user agents.
For example, let’s say you wanted to block all search engine robots from crawling your site except DuckDuckGo. Here’s how you’d do it:
User-agent: *
Disallow: /

User-agent: DuckDuckBot
Allow: /
Sidenote: If there are contradictory commands in the robots.txt file, the bot will follow the more granular command.
That’s why in the above example, DuckDuckBot knows to crawl the website, even though a previous directive (applying to all bots) said do not crawl. In short, a bot will follow the instruction that most accurately applies to them.
Directives
Directives are the code of conduct you want the user-agent to follow. In other words, directives define how the search bot should crawl your website.
Here are directives GoogleBot currently supports, along with their use within a robots.txt file:
Disallow
Use this directive to disallow search bots from crawling certain files and pages on a specific URL path.
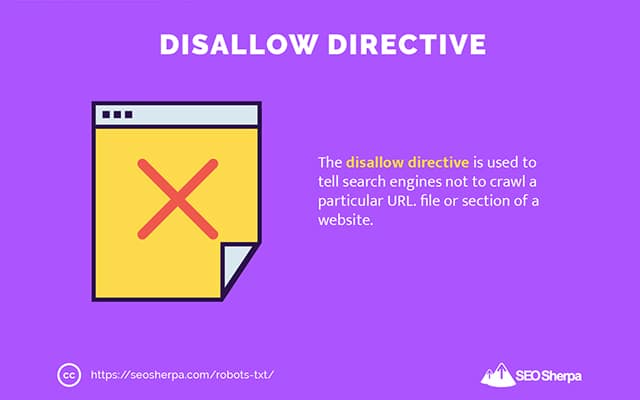
For example, if you wanted to block GoogleBot from accessing your wiki and all its pages, your robots.txt should contain this directive:
User-agent: GoogleBot
Disallow: /wiki
You can use the disallow directive to block the crawling of a precise URL, all files and pages within a certain directory, and even your entire website.
Allow
The allow directive is useful if you want to permit search engines to crawl a specific subdirectory or page – in an otherwise disallowed section of your site.
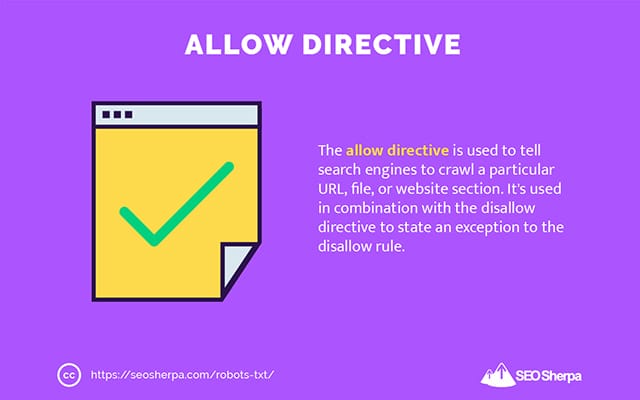
Let’s say you wanted to prevent all search engines from crawling posts on your blog except for one; then you would use the allow directive like this:
User-agent: *
Disallow: /blog
Allow: /blog/allowable-post
Since search bots always follow the most granular instruction given in a robots.txt file, they know to crawl /blog/allowable-post, but they won’t crawl other posts or files in that directory like;
- /blog/post-one/
- /blog/post-two/
- /blog/file-name.pdf
Both Google and Bing support this directive. But other search engines do not.
Sitemap
The sitemap directive is used to specify the location of your XML sitemap(s) to search engines.
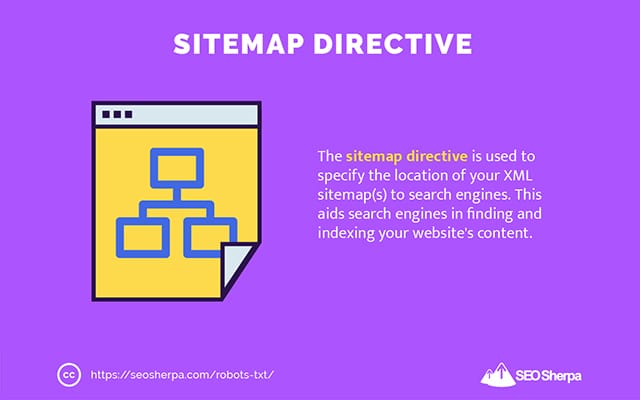
If you’re new to sitemaps, they’re used to list the pages you want to be crawled and indexed in search engines.
By including the sitemap directive in robots.txt, you help search engines find your sitemap and, in turn, crawl and index your website’s most important pages.
With that said, if you’ve already submitted your XML sitemap through Search Console, adding your sitemap(s) in robots.txt is somewhat redundant for Google. Still, it is best practice to use the sitemap directive since it tells search engines like Ask, Bing, and Yahoo where your sitemap(s) can be found.
Here’s an example of a robots.txt file using the sitemap directive:
Sitemap: https://www.website.com/sitemap.xml

User-agent: *
Disallow: /wiki/
Allow: /wike/article-title/
Notice the placement of the sitemap directive in the robots.txt file. It’s best placed at the very top of your robots.txt. It can also be placed at the bottom.
If you have multiple sitemaps, you should include all of them in your robots.txt file. Here’s how the robots.txt file might look if we had separate XML sitemaps for pages and posts:
Sitemap: http://website.com/post-sitemap.xml
Sitemap: http://website.com/page-sitemap.xml

User-agent: *
Disallow: /wiki/
Allow: /wike/article-title/
Either way, you only need to mention each XML sitemap once since all supported user agents will follow the directive.
Note that, unlike other robots.txt directives, which list paths, the sitemap directive must state the absolute URL of your XML sitemap, including the protocol, domain name, and top-level domain extension.
Comments
The comment “directive” is useful for humans but is not used by search bots.
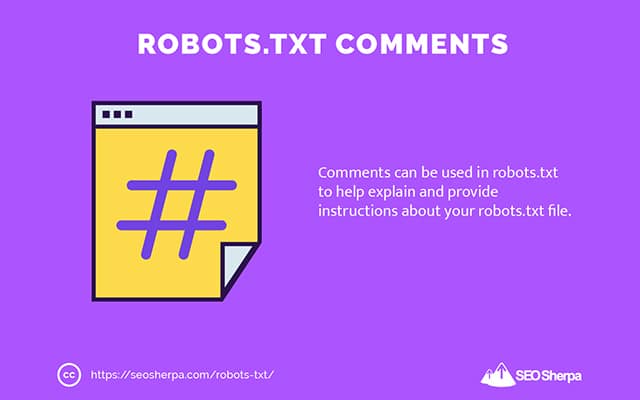
You can add comments to remind you why certain directives exist or stop those with access to your robots.txt from deleting important directives. In short, comments are used to add notes to your robots.txt file.
To add a comment, type.”#" followed by the comment text.
# Don't allow access to the /wp-admin/ directory for all robots.
User-agent: *
Disallow: /wp-admin/
You can add a comment at the start of a line (as shown above) or after a directive on the same line (as shown below):
User-agent: * #Applies to all robots
Disallow: /wp-admin/ # Don't allow access to the /wp-admin/ directory.
Wherever you choose to write your comment, everything after the hash will be ignored.
Following along so far?
Great! We’ve now covered the main directives you’ll need for your robots.txt file – these also happen to be the only directives supported by Google.
But what about other search engines? In the case of Bing, Yahoo, and Yandex, there is one more directive you can use:
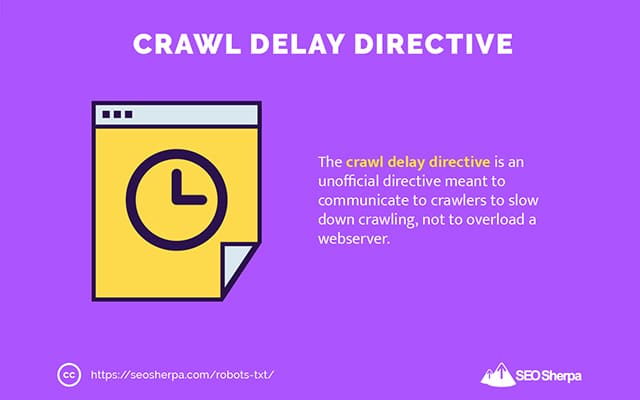
Crawl Delay
The Crawl-delay directive is an unofficial directive used to prevent servers from overloading with too many crawl requests.
In other words, you use it to limit the frequency a search engine can crawl your site.
Mind you, if search engines can overload your server by crawling your website frequently, adding the Crawl-delay directive to your robots.txt file will only fix the issue temporarily.
The case may be, your website is running on crappy hosting or a misconfigured hosting environment, and that’s something you should fix swiftly.
The crawl delay directive works by defining the time in seconds between which a Search Bot can crawl your website.
For example, if you set your crawl delay to 5, search bots will slice the day into five-second windows, crawling only one page (or none) in each window, for a maximum of around 17,280 URLs during the day.
With that being so, be careful when setting this directive, especially if you have a large website. Just 17,280 URLs crawled per day is not very helpful if your site has millions of pages.
The way each search engine handles the crawl-delay directive differs. Let’s break it down below:
Crawl-delay and Bing, Yahoo, and Yandex
Bing, Yahoo, and Yandex all support the crawl-delay directive in robots.txt.
This means you can set a crawl-delay directive for the BingBot, Slurp, and YandexBot user-agents, and the search engine will throttle its crawling accordingly.
Note that each search engine interprets crawl-delay in a slightly different way, though, so be sure to check their documentation:
That said, the format of the crawl-delay directive for each of these engines is the same. You must place it right after a disallow OR allow directive. Here is an example:
User-agent: BingBot
Allow: /widgets/
Crawl-delay: 5
Crawl-delay and Google
Google’s crawler does not support the crawl-delay directive, so there’s no point in setting a crawl-delay for GoogleBot in robots.txt.
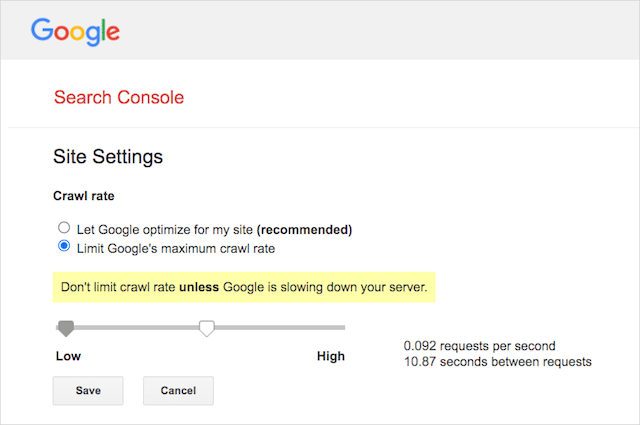
However, Google does support defining a crawl rate in Google Search Console. Here’s how to do it:
- Go to the settings page of Google Search Console.
- Choose the property you want to define the crawl rate for
- Click “Limit Google’s maximum crawl rate.”
- Adjust the slider to your preferred crawl rate. By default, the crawl rate has the setting “Let Google optimize for my site (recommended).”
Crawl-delay and Baidu
Like Google, Baidu does not support the crawl delay directive. However, it’s possible to register a Baidu Webmaster Tools account in which you can control the crawl frequency, similar to Google Search Console.
The bottom line? Robots.txt tells search engine spiders not to crawl specific pages on your website.
Robots.txt vs meta robots vs x-robots
There are a helluva lot of “robots” instructions out there. What are the differences, or are they the same?
Let me offer up a brief explanation:
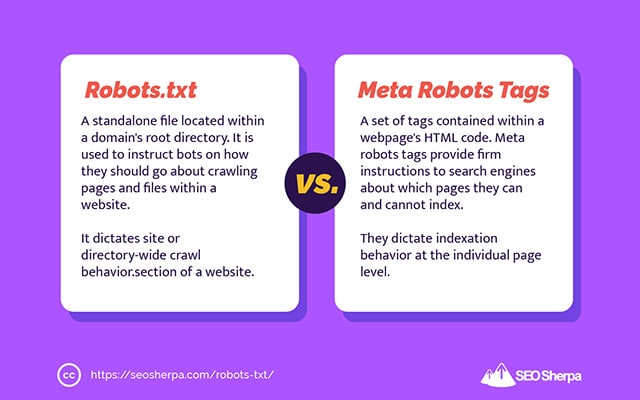
First off, robots.txt is an actual text file, whereas meta and x-robots are tags within a webpage’s code.
Secondly, robots.txt gives bots suggestions for how to crawl a website’s pages. On the other hand, robots’ meta directives provide very firm instructions on crawling and indexing a page’s content.
Beyond what they are, the three all serve different functions.
Robots.txt dictates site or directory-wide crawl behavior, whereas meta and x-robots can dictate indexation behavior at the individual page (or page element) level.
In general:
If you want to stop a page from getting indexed, you should use the “no-index” meta robots tag. Disallowing a page in robots.txt doesn’t guarantee it won’t get shown in search engines (robots.txt directives are suggestions, after all). Plus, a search engine robot could still find that URL and index it if it’s linked from another website.
On the contrary, if you want to stop a media file from being indexed, robots.txt is the way to go. You cannot add meta robots tags to files like jpegs or PDFs.
How to Find Your Robots.txt
If you already have a robots.txt file on your website, you’ll be able to access it at yourdomain.com/robots.txt.
Navigate to the URL in your browser.
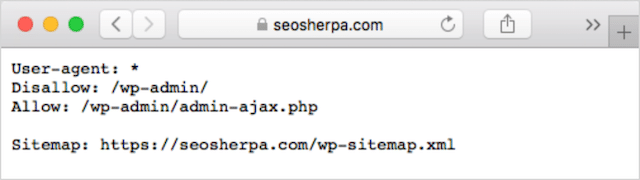
If you see a text-based page like the one above, then you have a robots.txt file.
How to Create a Robots.txt File
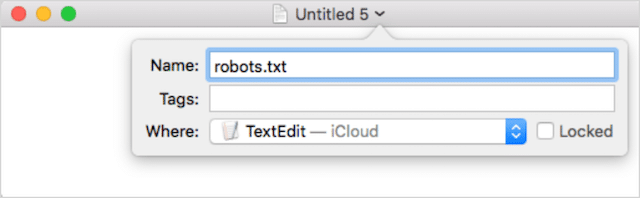
If you don’t already have a robots.txt file, creating one is simple.
First, open Notepad, Microsoft Word, or any text editor and save the file as ‘robots.’
Be sure to use lowercase, and choose .txt as the file type extension:
Second, add your directives. For example, if you wanted to disallow all search bots from crawling your /login/ directory, you’d type this:
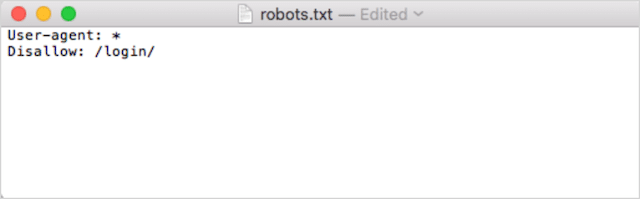
Continue to add directives until you’re satisfied with your robots.txt file.
Alternatively, you can generate your robots.txt with a tool like this one from Ryte.
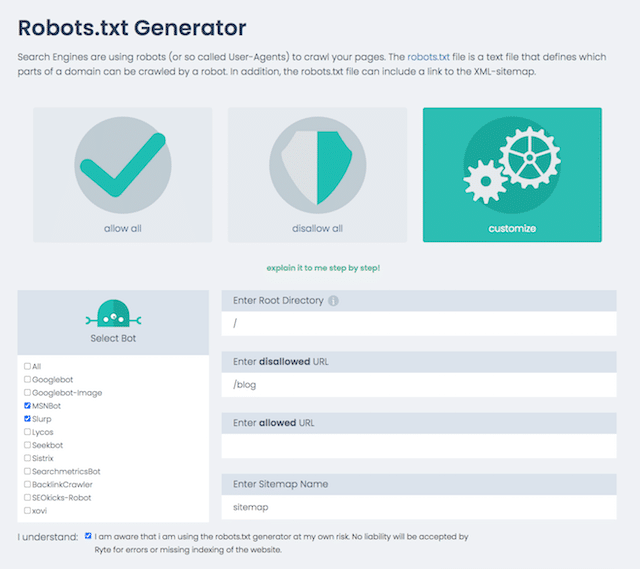
One advantage of using a tool is that it minimizes human error.
Just one small mistake in your robots.txt syntax could end in an SEO disaster.
That said, the disadvantage of using a robots.txt generator is that the opportunity for customization is minimal.
That’s why I recommend you learn to write a robot.txt file yourself. You can then build a robots.txt exactly to your requirements.
Where to Put Your Robots.txt File
Add your robots.txt file in the top-level directory of the subdomain to which it applies.
For example, to control crawling behavior on yourdomain.com, the robots.txt file should be accessible on the yourdomain.com/robots.txt URL path.
On the other hand, if you want to control crawling on a subdomain like shop.yourdomain.com, the robots.txt should be accessible on the shop.yourdomain.com/robots.txt URL path.
The golden rules are:
- Give every subdomain on your website its own robots.txt file.
- Name your file(s) robots.txt all in lowercase.
- Place the file in the root directory of subdomain it references.
If the robots.txt file cannot be found in the root directory, search engines will assume there are no directives and will crawl your website in its entirety.
Robots.txt File Best Practices
Next, let’s cover the rules of robots.txt files. Use these best practices to avoid common robots.txt pitfalls:
Use a new line for each directive
Each directive in your robots.txt must sit on a new line.
If not, search engines will get confused about what to crawl (and index).
This, for instance, is incorrectly configured:
User-agent: * Disallow: /folder/ Disallow: /another-folder/This, on the other hand, is a correctly set up robots.txt file:
User-agent: *
Disallow: /folder/
Disallow: /another-folder/Specifity “almost” always wins
When it comes to Google and Bing, the more granular directive wins.
For example, this Allow directive wins over the Disallow directive because its character length is longer.
User-agent: *
Disallow: /about/
Allow: /about/company/
Google and Bing know to crawl /about/company/ but not any other pages in the /about/ directory.
However, in the case of other search engines, the opposite is true.
By default, for all major search engines other than Google and Bing, the first matching directive always wins.
In the example above, the search engines will follow the Disallow directive and ignore the Allow directive meaning the /about/company page will not be crawled.
Keep this in mind when you are creating rules for all search engines.
Just one group of directives per user-agent
If your robots.txt contained multiple groups of directives per user agent, boh-oh-boy, could it get confusing?
Not necessarily for robots, because they will combine all rules from the various declarations into one group and follow them all, but for you.
To avoid the potential for human error, state the user-agent once and then list all directives that apply to that user agent below.
By keeping things neat and simple, you are less likely to make a blunder.
Use wildcards (*) to simplify instructions
Did you notice the wildcards (*) in the example above?
That’s right; you can use wildcards (*) to apply rules to all user-agents AND to match URL patterns when declaring directives.
For example, if you wanted to prevent search bots from accessing parameterized product category URLs on your website, you could list each category out like so:
User-agent: *
Disallow: /products/watches?
Disallow: /products/handbags?
Disallow: /products/shoes?
Or, you could use a wildcard that would apply the rule to all categories. Here’s how it would look:
User-agent: *
Disallow: /products/*?
This example blocks search engines from crawling all URLs within the /product/ subfolder that contain a question mark. In other words, any product category URLs that are parameterized.
Google, Bing, Yahoo support the use of wildcards within robots.txt directives and Ask.
Use “$” to specify the end of a URL
To indicate the end of a URL, use the dollar sign ($) after the robots.txt path.
Let’s say you wanted to stop search bots accessing all .doc files on your website; then you would use this directive:
User-agent: *
Disallow: /*.doc$
This would stop search engines from accessing any URLs finishing with .doc.
This means they wouldn’t crawl /media/file.doc, but they would crawl /media/file.doc?id=72491 because that URL doesn’t end with “.doc.”
Each subdomain gets it’s own robots.txt
Robots.txt directives only apply to the (sub)domain the robots.txt file is hosted on.
This means if your site has multiple subdomains like:
- domain.com
- tickets.domain.com
- events.domain.com
Each subdomain will require its own robots.txt file.
The robots.txt should always be added in the root directory of each subdomain. Here’s what the paths would look like using the above example:
- domain.com/robots.txt
- tickets.domain.com/robots.txt
- events.domain.com/robots.txt
Don’t use noindex in your robots.txt
Simply put, Google does not support the no-index directive in robots.txt.
While Google did follow it in the past, as of July 2019, Google stopped supporting it entirely.
And if you are thinking of using the no-index robots.txt directive to no-index content on other search engines, think again:
The unofficial no-index directive never worked in Bing.
By far, the best method to no-index content in search engines is to apply a no-index meta robots tag to the page you want to exclude.
Keep your robots.txt file below 512 KB
Google currently has a robots.txt file size limit of 500 kibibytes (512 kilobytes).
This means any content after 512 KB may be ignored.

That said, given one character consumes just one byte, your robots.txt would need to be HUGE to hit that file size limit (512,000 characters, to be exact). Keep your robots.txt file lean by focussing less on individually excluded pages and more on broader patterns that wild cards can control.
It’s unclear whether other search engines have the maximum allowable file size for robots.txt files.
Robots.txt Examples
Below are a few examples of robots.txt files.
They include combinations of the directives our SEO agency most uses in the robots.txt files for clients. Keep in mind, though; these are for inspiration purposes only. You’ll always need to customize the robots.txt file to meet your requirements.
Allow all robots access to everything
This robots.txt file provides no disallow rules for all search engines:
User-agent: *
Disallow:
In other words, it allows search bots to crawl everything. It serves the same purpose as an empty robots.txt file or no robots.txt at all.
Block all robots from accessing everything
The example robots.txt file tells all search engines not to access anything after the trailing slash. In other words, the entire domain:
User-agent: *
Disallow: /
In short, this robots.txt file blocks all search engine robots and may stop your site from being shown on search results pages.
Block all robots from crawling one file
In this example, we block all search bots from crawling a particular file.
User-agent: *
Disallow: /directory/this-is-a-file.pdf
Block all robots from crawling one file type (doc, pdf, jpg)
Since no-indexing, a file like ‘doc’ or ‘pdf’ cannot be done using a meta robot “no-index” tag; you can use the following directive to stop a particular file type from being indexed.
User-agent: *
Disallow: /*.doc$
Disallow: /*.pdf$
Disallow: /*.jpg$
This will work to deindex all files of that type, as long as no individual file is linked to from elsewhere on the web.
Block Google from crawling multiple directories
You may wish to block the crawling of multiple directories for a particular bot or all bots. In this example, we are blocking Googlebot from crawling two subdirectories.
User-agent: Googlebot
Disallow: /admin/
Disallow: /private/
Note, there is no limit on the number of directories you can use bock. Just list each one below the user agent the directive applies to.
Block Google from crawling all parameterized URLs
This directive is particularly useful for websites using faceted navigation, where many parameterized URLs can get created.
User-agent: Googlebot
Disallow: /*?
This directive stops your crawl budget from being consumed on dynamic URLs and maximizes the crawling of important pages. I use this regularly, particularly on e-commerce websites with search functionality.
Block all bots from crawling one subdirectory but allowing one page within to be crawled
Sometimes you may want to block crawlers from accessing a complete section of your site, but leave one page accessible. If you do, use the following combination of ‘allow’ and ‘disallow’ directives:
User-agent: *
Disallow: /category/
Allow: /category/widget/
It tells search engines not to crawl the complete directory, excluding one particular page or file.
Robots.txt for WordPress
This is the basic configuration I recommend for a WordPress robots.txt file. It blocks the crawling of admin pages and tags and authors’ URLs which can create unnecessary cruft on a WordPress website.
User-Agent: *
Allow: /wp-content/uploads/
Disallow: /wp-content/plugins/
Disallow: /wp-admin/
Disallow: /readme.html
Disallow: /refer/
Disallow: /tag/
Disallow: /author/
Disallow: /404-error/

Sitemap: http://www.example.com/post-sitemap.xml
Sitemap: http://www.example.com/page-sitemap.xml
This robots.txt file will work well for most WordPress websites, but of course, you should always adjust it to your own requirements.
How to Audit Your Robots.txt File for Errors
In my time, I’ve seen more rank-impacting errors in robots.txt files than perhaps any other aspect of technical SEO. With so many potentially conflicting directives, issues can and do occur.
So, when it comes to robots.txt files, it pays to keep an eye out for issues.
Thankfully, the “Coverage” report inside Google Search Console provides a way for you to check and monitor robots.txt issues.
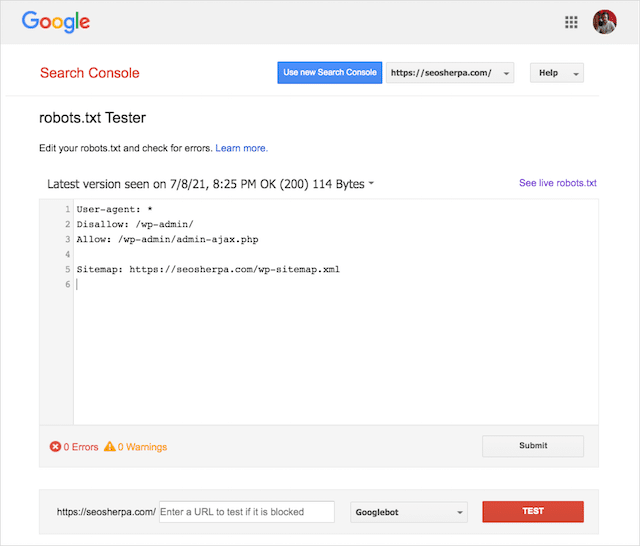
You can also use Google’s nifty Robots.txt Testing Tool to check for errors within your live robots file or test a new robots.txt file before you deploy it.
We’ll finish up by covering the most common issues, what they mean and how to address them.
Submitted URL blocked by robots.txt
This error means that at least one of the URLs in your submitted sitemap(s) is blocked by robots.txt.
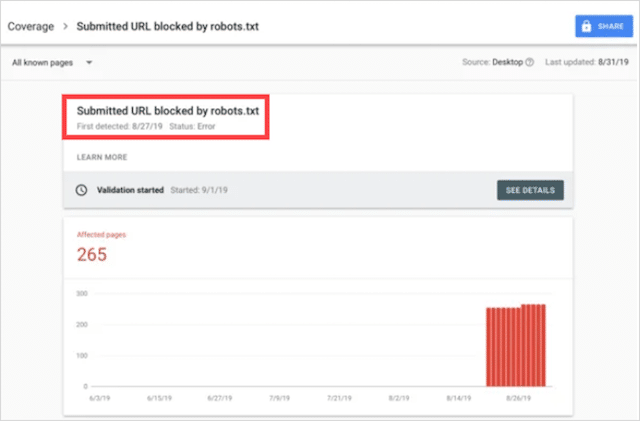
A sitemap that’s set up correctly should include only the URLs you want indexing in search engines. As such, it should not contain any no-indexed, canonicalized, or redirected pages.
If you’ve followed these best practices, then no pages submitted in your sitemap should be blocked by robots.txt.
If you see “Submitted URL blocked by robots.txt” in the coverage report, you should investigate which pages are affected, then switch up your robots.txt file to remove the block for that page.
You can use Google’s robots.txt tester to see which directive is blocking the content.
Blocked by Robots.txt
This “error” means you have pages blocked by your robots.txt that aren’t currently in Google’s index.
If this content has utility and should be indexed, remove the crawl block in robots.txt.
A short word of warning:
“Blocked by robots.txt” isn’t necessarily an error. Infact, it may be precisely the outcome you want.
For instance, you may have blocked certain files in robots.txt intending to exclude them from Google’s index. On the other hand, if you’ve blocked the crawling of certain pages with the intention of no-indexing them, consider removing the crawl block and use a robot’s meta tag instead.
That’s the only way to guarantee the exclusion of content from Google’s index.
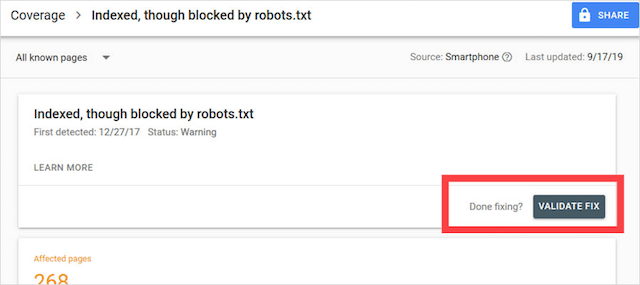
Indexed, Though Blocked by Robots.txt
This error means that some of the content blocked by robots.txt is still indexed in Google.
It happens when the content is still discoverable by Googlebot because it is linked to from elsewhere on the web. In short, Googlebot lands upon that content crawls and then indexes it before visiting your website’s robots.txt file, where it sees the disallowed directive.
By then, it’s too late. And it gets indexed:

Let me drill this one home:
If you’re trying to exclude content from Google’s search results, robots.txt isn’t the correct solution.
I recommend removing the crawl block and using a meta robots no-index tag to prevent indexing instead.
On the contrary, if you blocked this content by accident and want to keep it in Google’s index, remove the crawl block in robots.txt and leave it at that.
This may help to improve the visibility of the content in Google search.
Final Thoughts
Robots.txt can be used to improve the crawling and indexing of your website’s content, which helps you become more visible in SERPs.
When used effectively, it’s the most important text on your website. But, when used carelessly, it’ll be the Achilles heel in your website’s code.
The good news, with just a basic understanding of user agents and a handful of directives, better search results are within your reach.
The only question is, which protocols will you put to use in your robots.txt file?
Let me know in the comments below.
The post Robots.txt: The Ultimate Guide for SEO (2021 Edition) appeared first on SEO Sherpa.