WordPress, with its user-friendly interface and extensive customization options, is a powerful platform for creating and managing websites.
However, like any software, it can encounter occasional problems, and one common frustration is the “Upload: Failed to Write File to Disk” error.
In this post, we’ll show you ways to fix the “Upload: Failed to Write File to Disk” error. So, without any further ado, let’s get started.
1 What Causes the Failed to Write File to Disk Error in WordPress?
One common cause of the “Upload: Failed to Write File to Disk” error is insufficient file permissions, where the server lacks the necessary rights to write files to specific directories.
Low or full disk space on the server can also trigger the error, hindering the upload process. Incorrect ownership settings of WordPress directories and files may disrupt file writing, as well as server configuration issues such as misconfigurations or limitations.
Additionally, conflicts between plugins or themes and the WordPress core can contribute to upload failures.
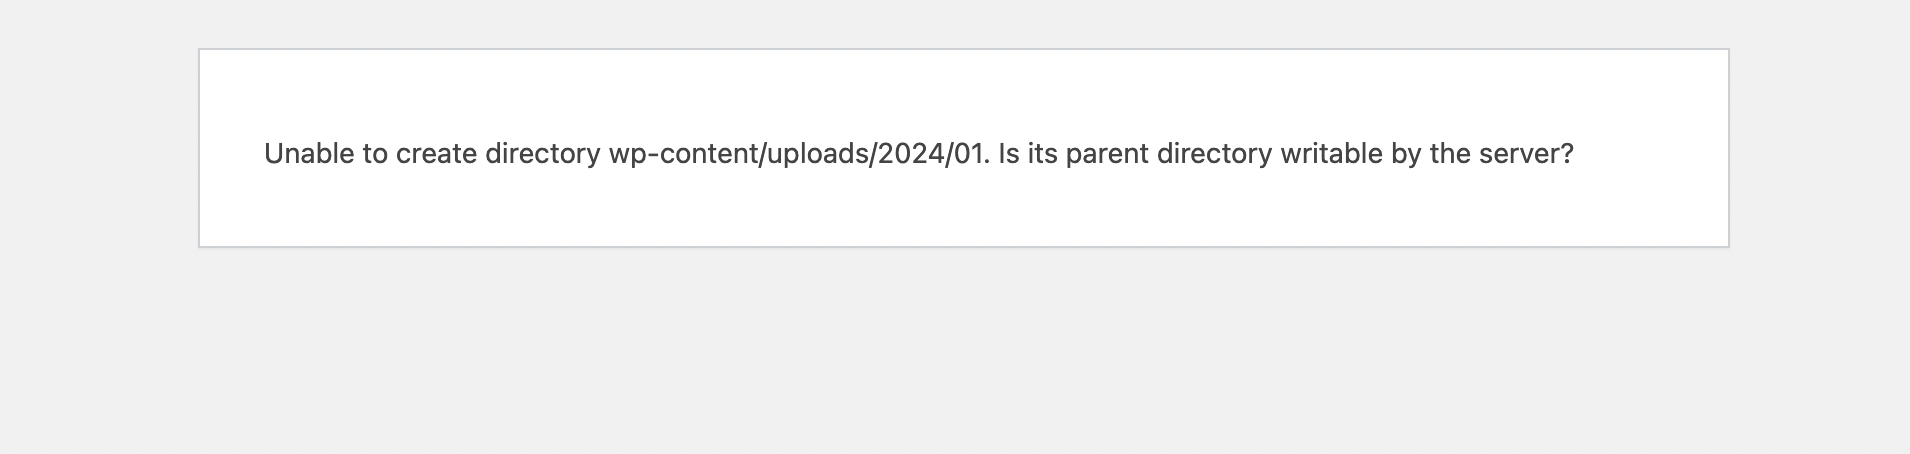
When attempting to upload images or other files through your WordPress admin area, you might come across one of the following error messages:
- WordPress failed to write to disk.
- WordPress has failed to upload due to an error: failed to write file to disk.
- Unable to create directory wp-content/uploads/2016/03. Is its parent directory writable by the server?
Identifying and systematically addressing these potential causes is necessary for resolving the Failed to Write File to Disk error and ensuring smooth media uploads in WordPress.
3 Fixing the “Upload: Failed to Write File to Disk” Error
Let us now discuss the methods to solve the “Upload: Failed to Write File to Disk” error.
3.1 Change the File Permissions
There are two methods for modifying the folder permissions on your web server. Let’s discuss them in detail.
Changing Permissions With FTP Client
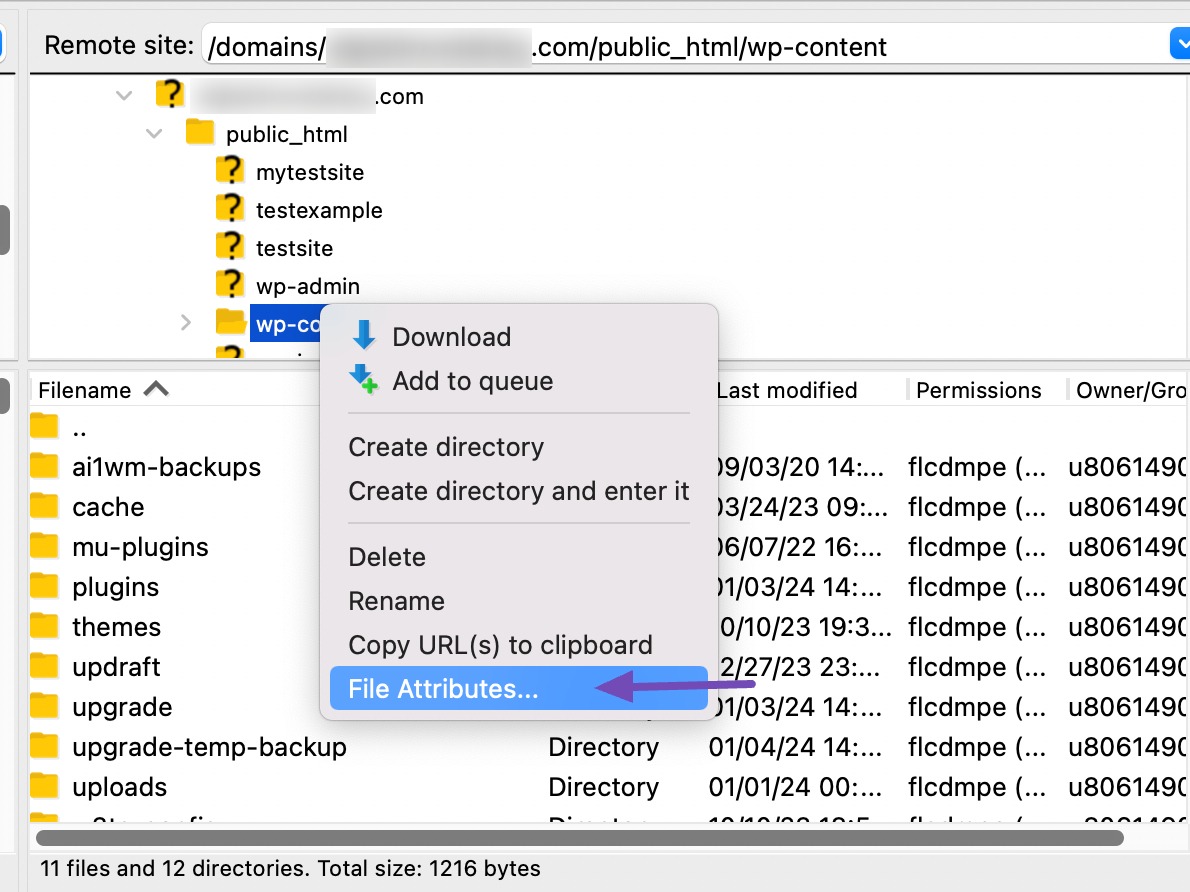
You can change the file permissions with an FTP client like FileZilla.
Once connected with the FTP client, right-click on the wp-content folder and select File permissions/ File Attributes, as shown below.
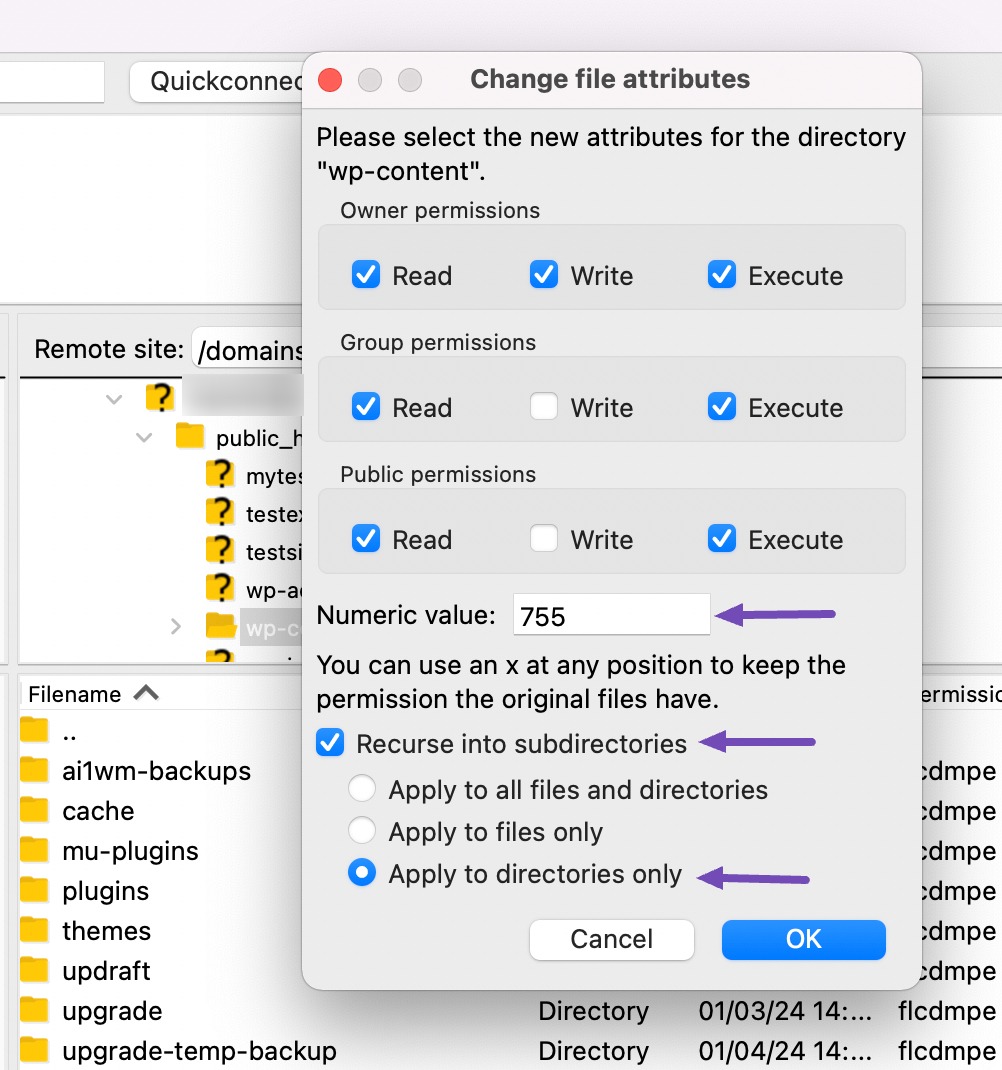
This will bring up the file permissions dialog box in your FTP client. It will show you file permissions for the owner, group, and public.
Here, input 755 in the Numeric value field.
Ensure the box next to Recurse into subdirectories is checked, and choose the Apply to directories only option before clicking OK to confirm. This action ensures the FTP client establishes appropriate permissions, including the uploads folder where your images are stored.
To adjust permissions for individual files within the wp-content folder, repeat the process by right-clicking on the wp-content folder and selecting File Permissions/ File Attributes.
This time, input 644 in the Numeric value field, check the Recurse into subdirectories box, and select Apply to files only before finalizing the changes.
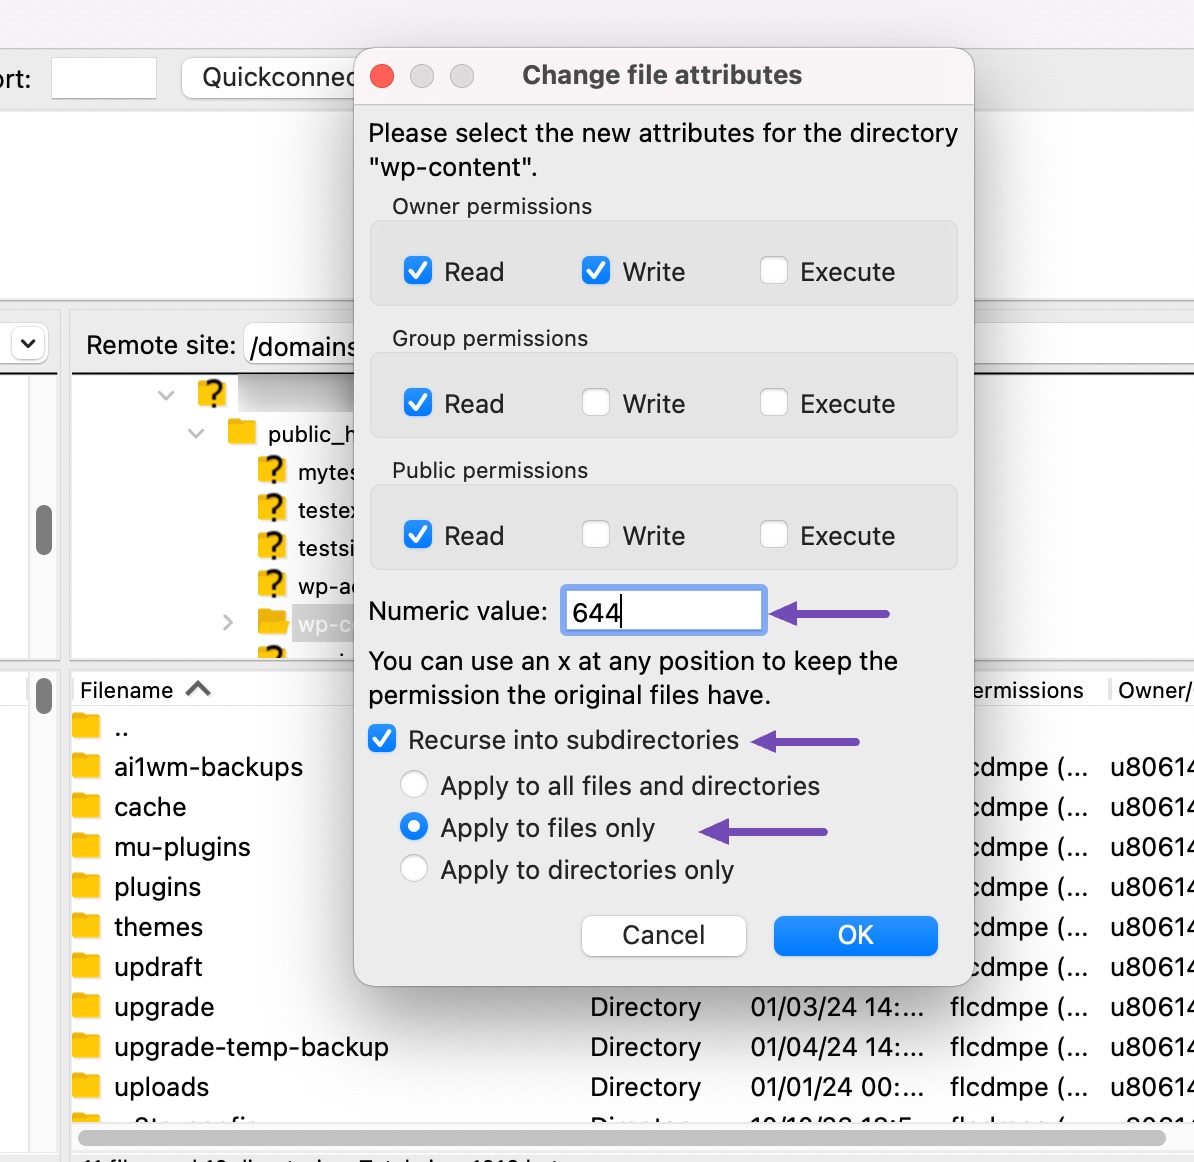
Once done, click on the OK button.
Changing Permissions With File Manager
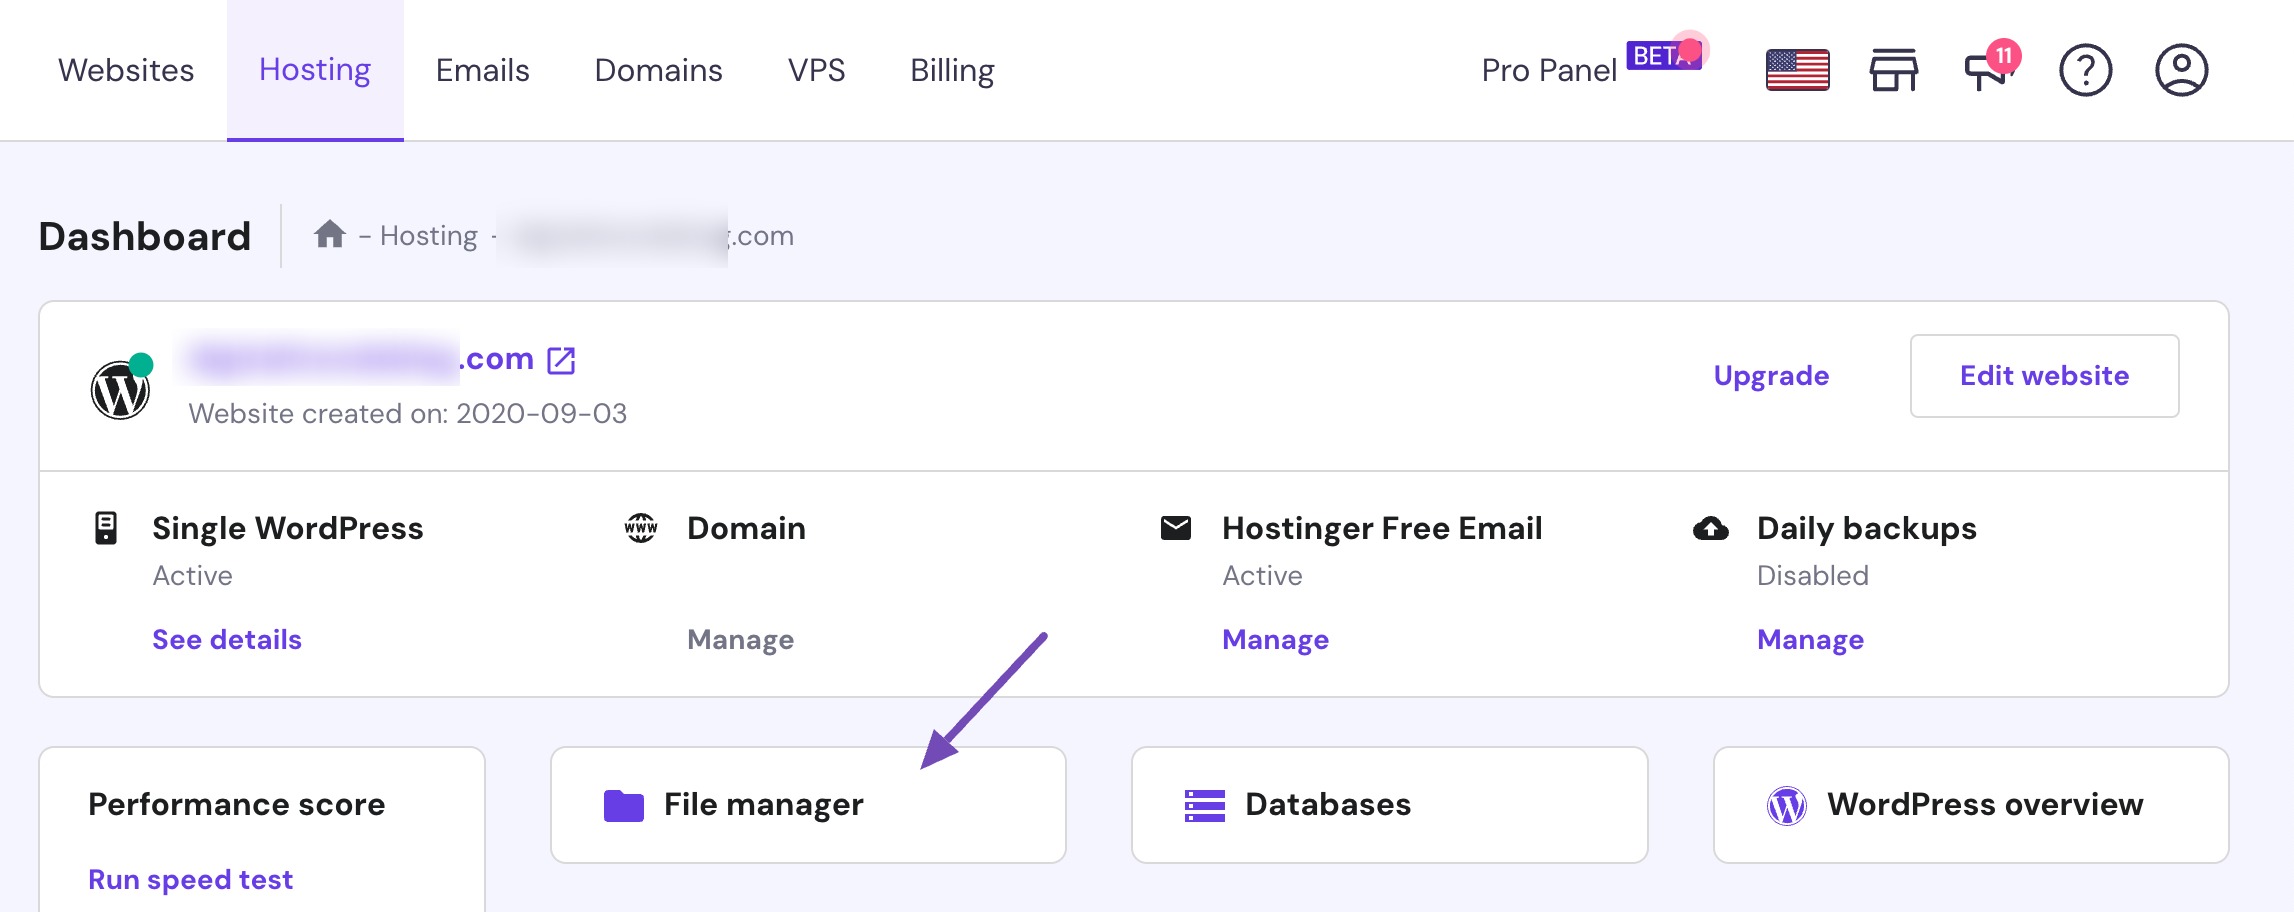
To change the file permissions, log in to your web hosting account and navigate to the File manager, as shown below.
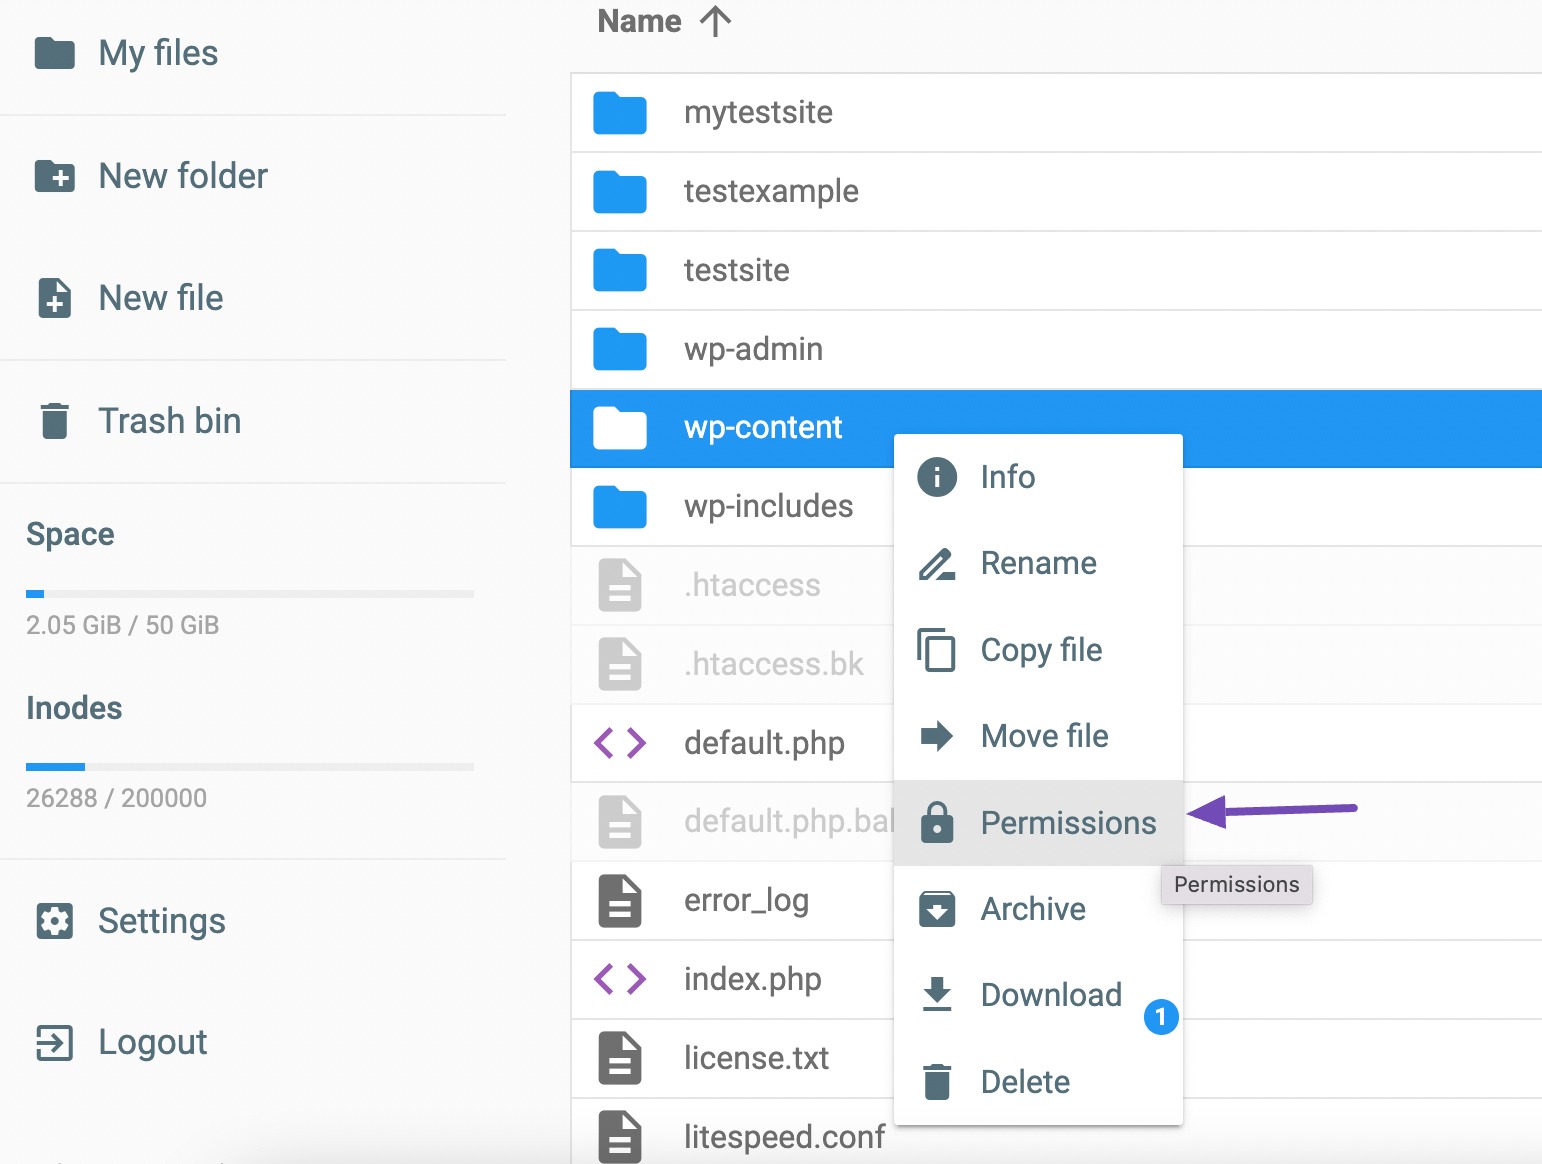
Next, navigate to the public_html → wp-content directory. Right-click on this folder and select the Permissions option.
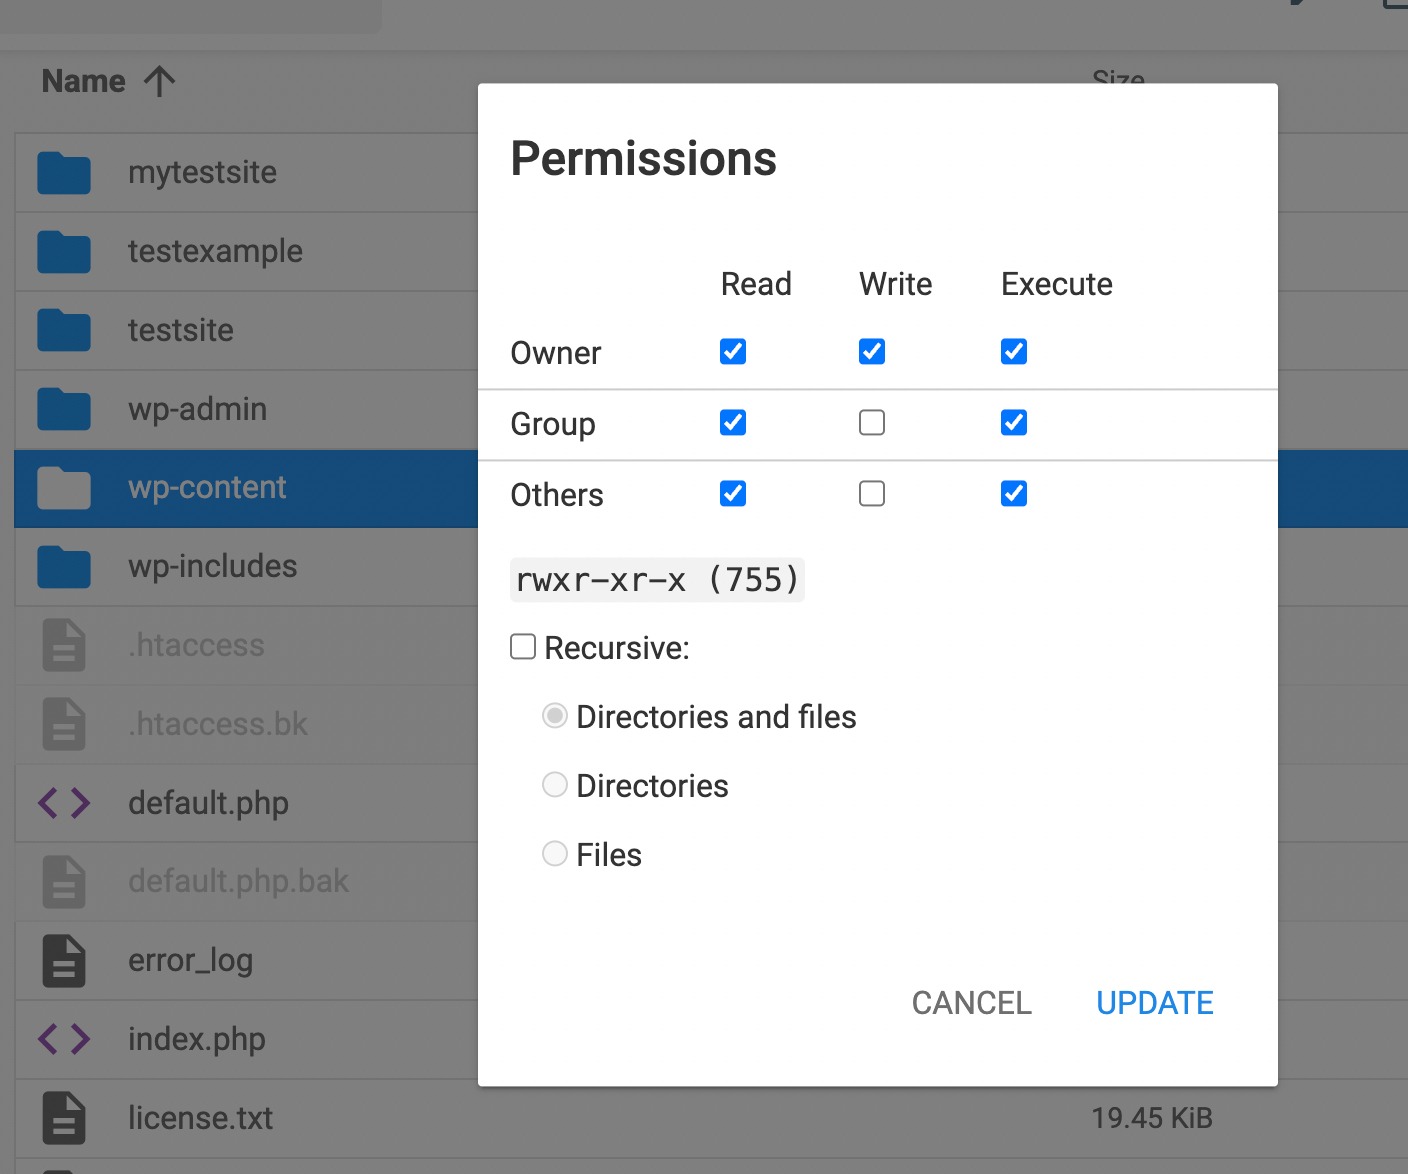
Subsequently, adjust the permissions to 755 (read and write) for this folder if it’s not already configured as such. Click on the UPDATE button to save your settings.
Once done, attempt to upload the image again. If the error persists, proceed to modify the permissions on individual files, similar to the process outlined in the previous step.
3.2 Clearing the WordPress Temporary Folder
If file permissions aren’t the problem, consider clearing the temporary folder that WordPress utilizes for uploading files to your site. It’s important to note that accessing this directory via FTP is not possible.
To address this, reach out to your hosting provider for assistance. The support team can check a hidden file on your server to see if it’s full and causing the “Upload: Failed to Write File to Disk” error.
3.3 Upgrade Your Hosting Plan to Access More Disk Space
Disk space is necessary for storing website files, databases, and other content. If you find that your existing hosting plan has limitations on disk space, upgrading allows you to accommodate more data, media files, and website content without facing constraints.
By upgrading your hosting plan, you ensure that your website has the necessary room to grow and expand. This is particularly important if your current plan is reaching its storage limits, which may result in performance issues, restricted functionalities, or the inability to upload additional files.
Additionally, the hosting provider’s support team can provide guidance on selecting the most suitable plan and assist with a smooth transition to ensure uninterrupted website operation.
4 Conclusion
Dealing with the “Upload: Failed to Write File to Disk” error in WordPress might be frustrating, but with the right steps, you can tackle it successfully.
Remember to check and adjust file permissions, keep an eye on your server’s disk space, and be mindful of any plugin or theme conflicts. If you’ve tried everything and the error persists, consider reaching out to your hosting provider for assistance.
Additionally, emptying the WordPress temporary folder or upgrading your hosting plan for more disk space are advanced options to explore.
If you like this post, let us know by Tweeting @rankmathseo.