As a WordPress user, you may have encountered the frustrating “HTTP error” message while uploading images to your website.
This error can be a major obstacle, especially if you rely on visual content for your website’s design or blog posts.
But don’t worry!
In this article, we’ll explore the common causes of WordPress HTTP error and provide practical solutions to help you upload your images seamlessly.
So, whether you are a seasoned WordPress user or a beginner, read on to learn how to troubleshoot this issue and get back to creating stunning visual content for your website.
Without further ado, let’s get started.
1 Fixing HTTP Error in WordPress When Uploading Images
Numerous factors can contribute to an HTTP error in WordPress when attempting to upload a file through the WordPress media uploader.
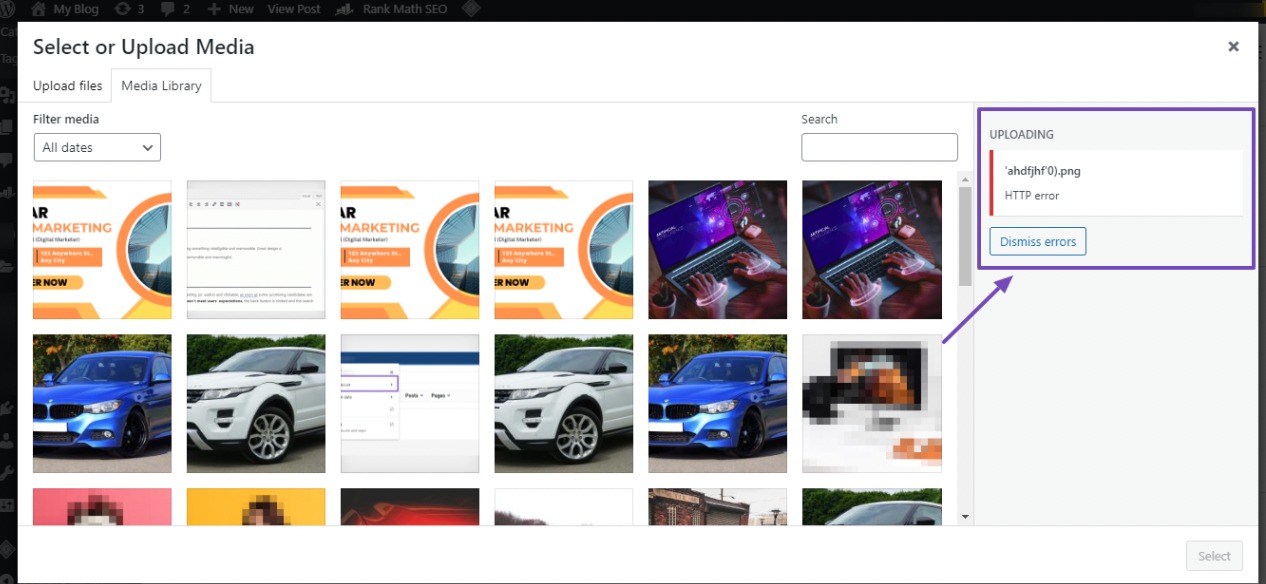
Encountering an HTTP error during media file uploads can be frustrating, particularly because WordPress often fails to explain the issue clearly. This lack of detailed guidance from WordPress complicates identifying and resolving the underlying problem.
To address this, we’ve compiled different methods to resolve the HTTP error during image uploads on your WordPress website.
We recommend reviewing each method individually, as one is likely to resolve the HTTP error you are facing effectively.
Ready to tackle the error? Let’s get started with these solutions.
1.1 Verify if the Error is Temporary
If you’re facing an HTTP error in your WordPress installation, it might be a temporary issue unrelated to specific problems. In such cases, start by refreshing the page to see if the error persists. If it does, wait a few minutes before attempting to upload the image file again.
Keep in mind that server glitches caused by unusual traffic or low resources can be the culprit. Reputable hosting companies typically handle such issues automatically.
Additionally, the error might be related to a browser disconnection. To troubleshoot, try clearing the cookies and cache in your browser. Alternatively, consider switching to a different browser, such as Mozilla Firefox or Safari.
If these initial solutions don’t resolve the HTTP error, it’s an indication that the issue is no longer temporary. In that case, explore the other solutions below to address and fix the problem.
1.2 Check File Size and Format
The HTTP error often occurs from factors related to file size and format. In most cases, WordPress sets a maximum file size limit for uploads, typically around 2MB, as determined by your hosting provider.
Encountering an HTTP error is probable when the image file size exceeds this predefined limit. Additionally, if WordPress does not support the image file format, it can trigger the error.
To address this issue, consider the following steps:
- Compress the image file size using a WordPress plugin or a compression tool.
- Convert the image file format to a supported format such as JPEG, PNG, or GIF.
- Rename or remove any special characters, like apostrophes or semi-colons, from the image file name before re-uploading.
1.3 Disable Plugins and Themes
If you’ve recently installed a new WordPress plugin, it might be incompatible with your existing plugins, causing disruptions in the image upload process. Identify the problematic plugin and deactivate it.
In cases where the HTTP error appears without a recent plugin installation, conflicts between your site’s plugins or themes can be the underlying issue.
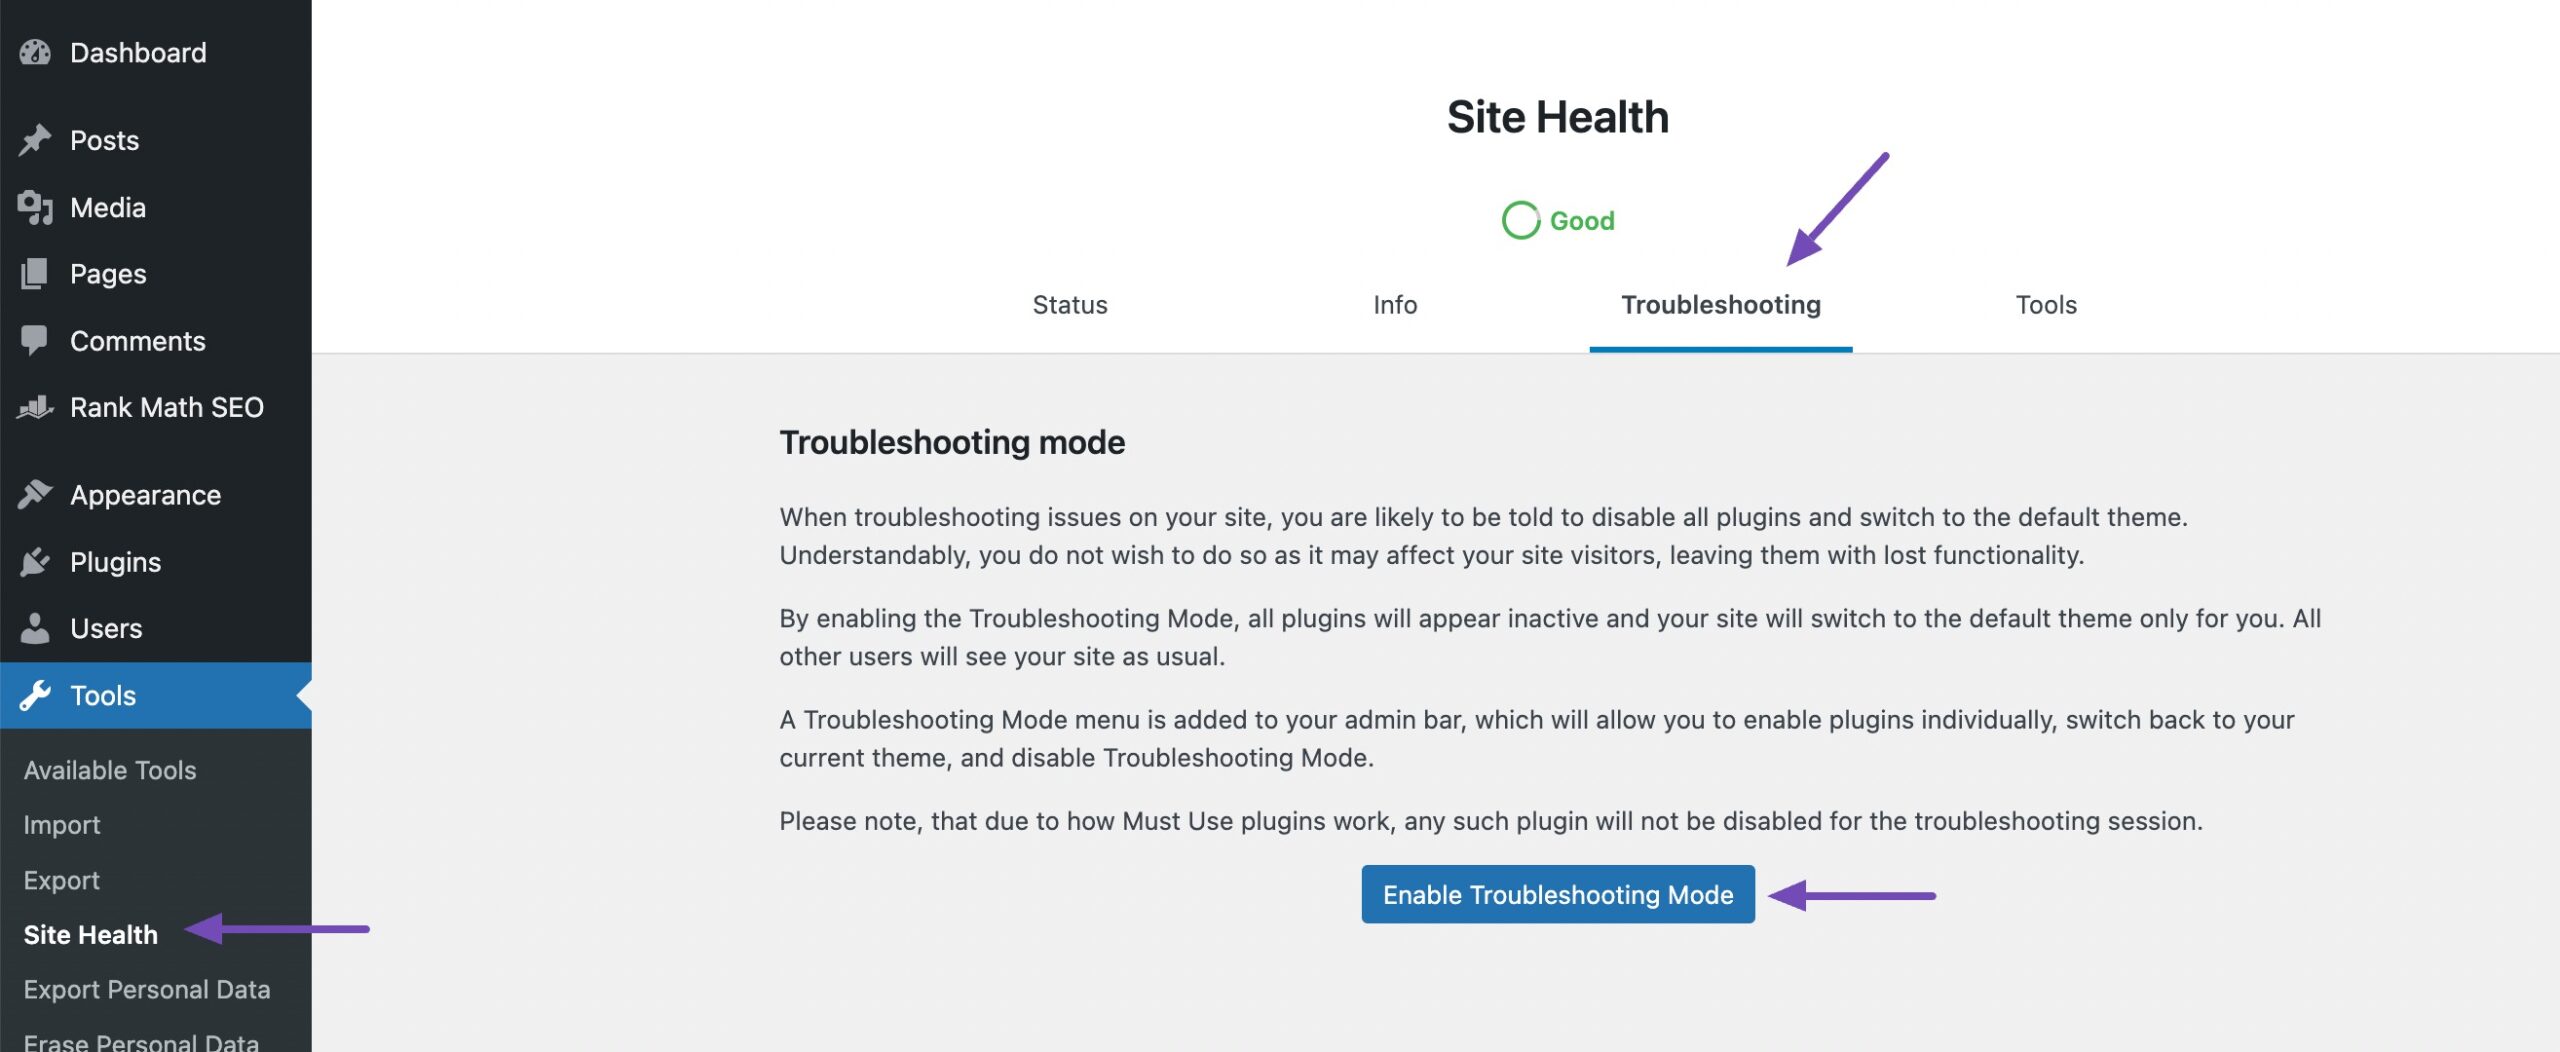
To pinpoint the source of the problem, temporarily deactivate all plugins and switch to the default WordPress theme. You can consider using the Health Check & Troubleshooting plugin for a convenient troubleshooting experience.
Refer to our dedicated tutorial on installing WordPress plugins.
Once the plugin is installed and activated, navigate to Tools → Site Health from your WordPress dashboard and access the Troubleshooting tab. Click the Enable Troubleshooting Mode button to initiate the process, as shown below.
All the plugins will be deactivated in the troubleshooting mode and switched to the default theme. You can now enable one plugin at a time to check which plugin is causing the error and find a replacement.
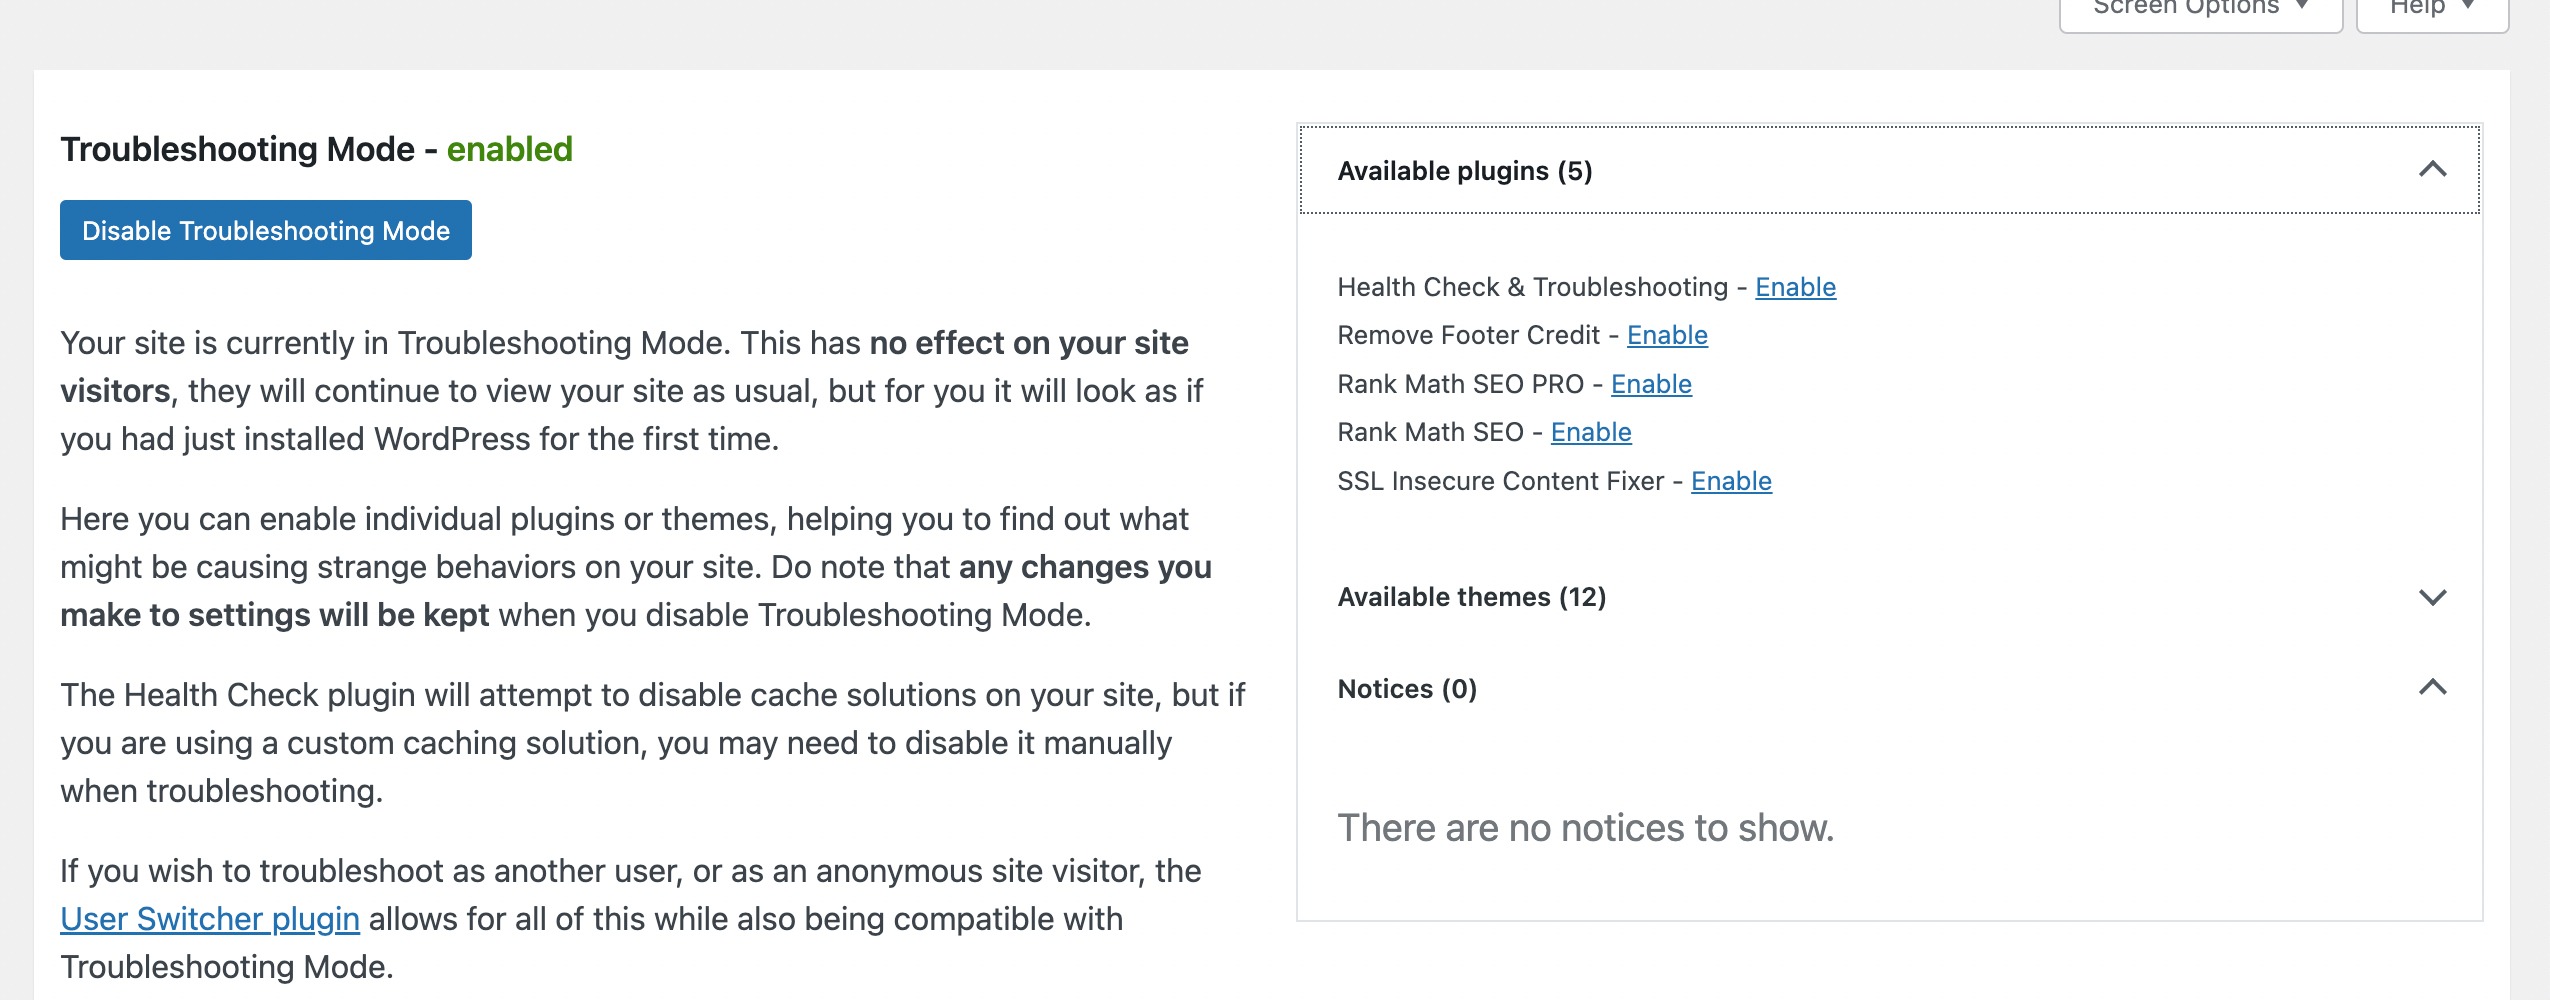
Upon identifying the problematic theme or plugin, disable the Troubleshooting Mode.
1.4 Increase Server Memory Limit
Another cause of HTTP errors during image uploads in WordPress is an inadequate PHP memory limit.
To resolve this issue, you can enhance the PHP memory limit by modifying your website’s wp-config.php file.
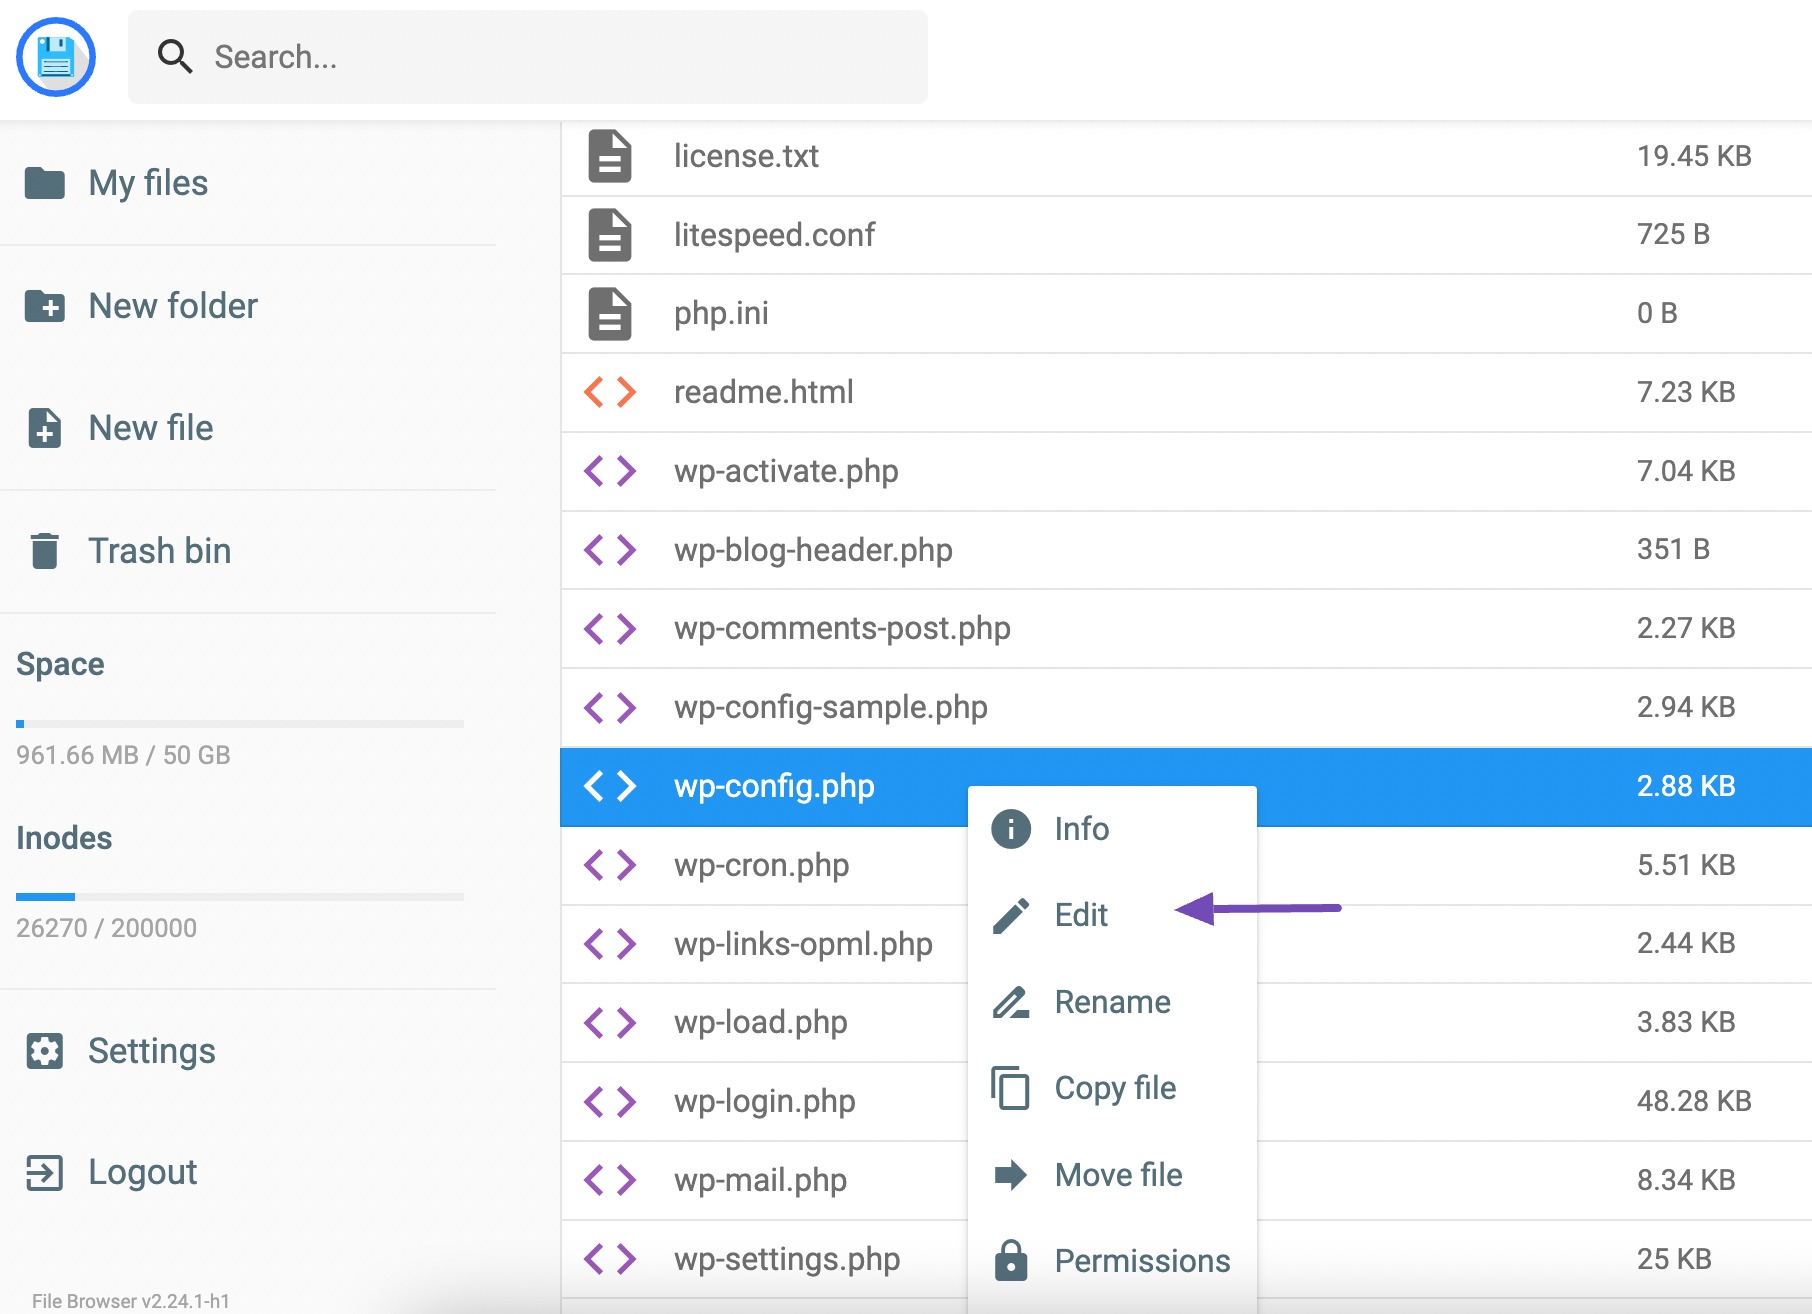
Access your site’s files using an FTP client or the File Manager app in your web hosting panel. Navigate to the public_html directory.

Once there, locate the wp-config.php file, right-click, and choose the Edit option, as shown below.
Next, insert the following code into the editor.
define('WP_MEMORY_LIMIT', '256M');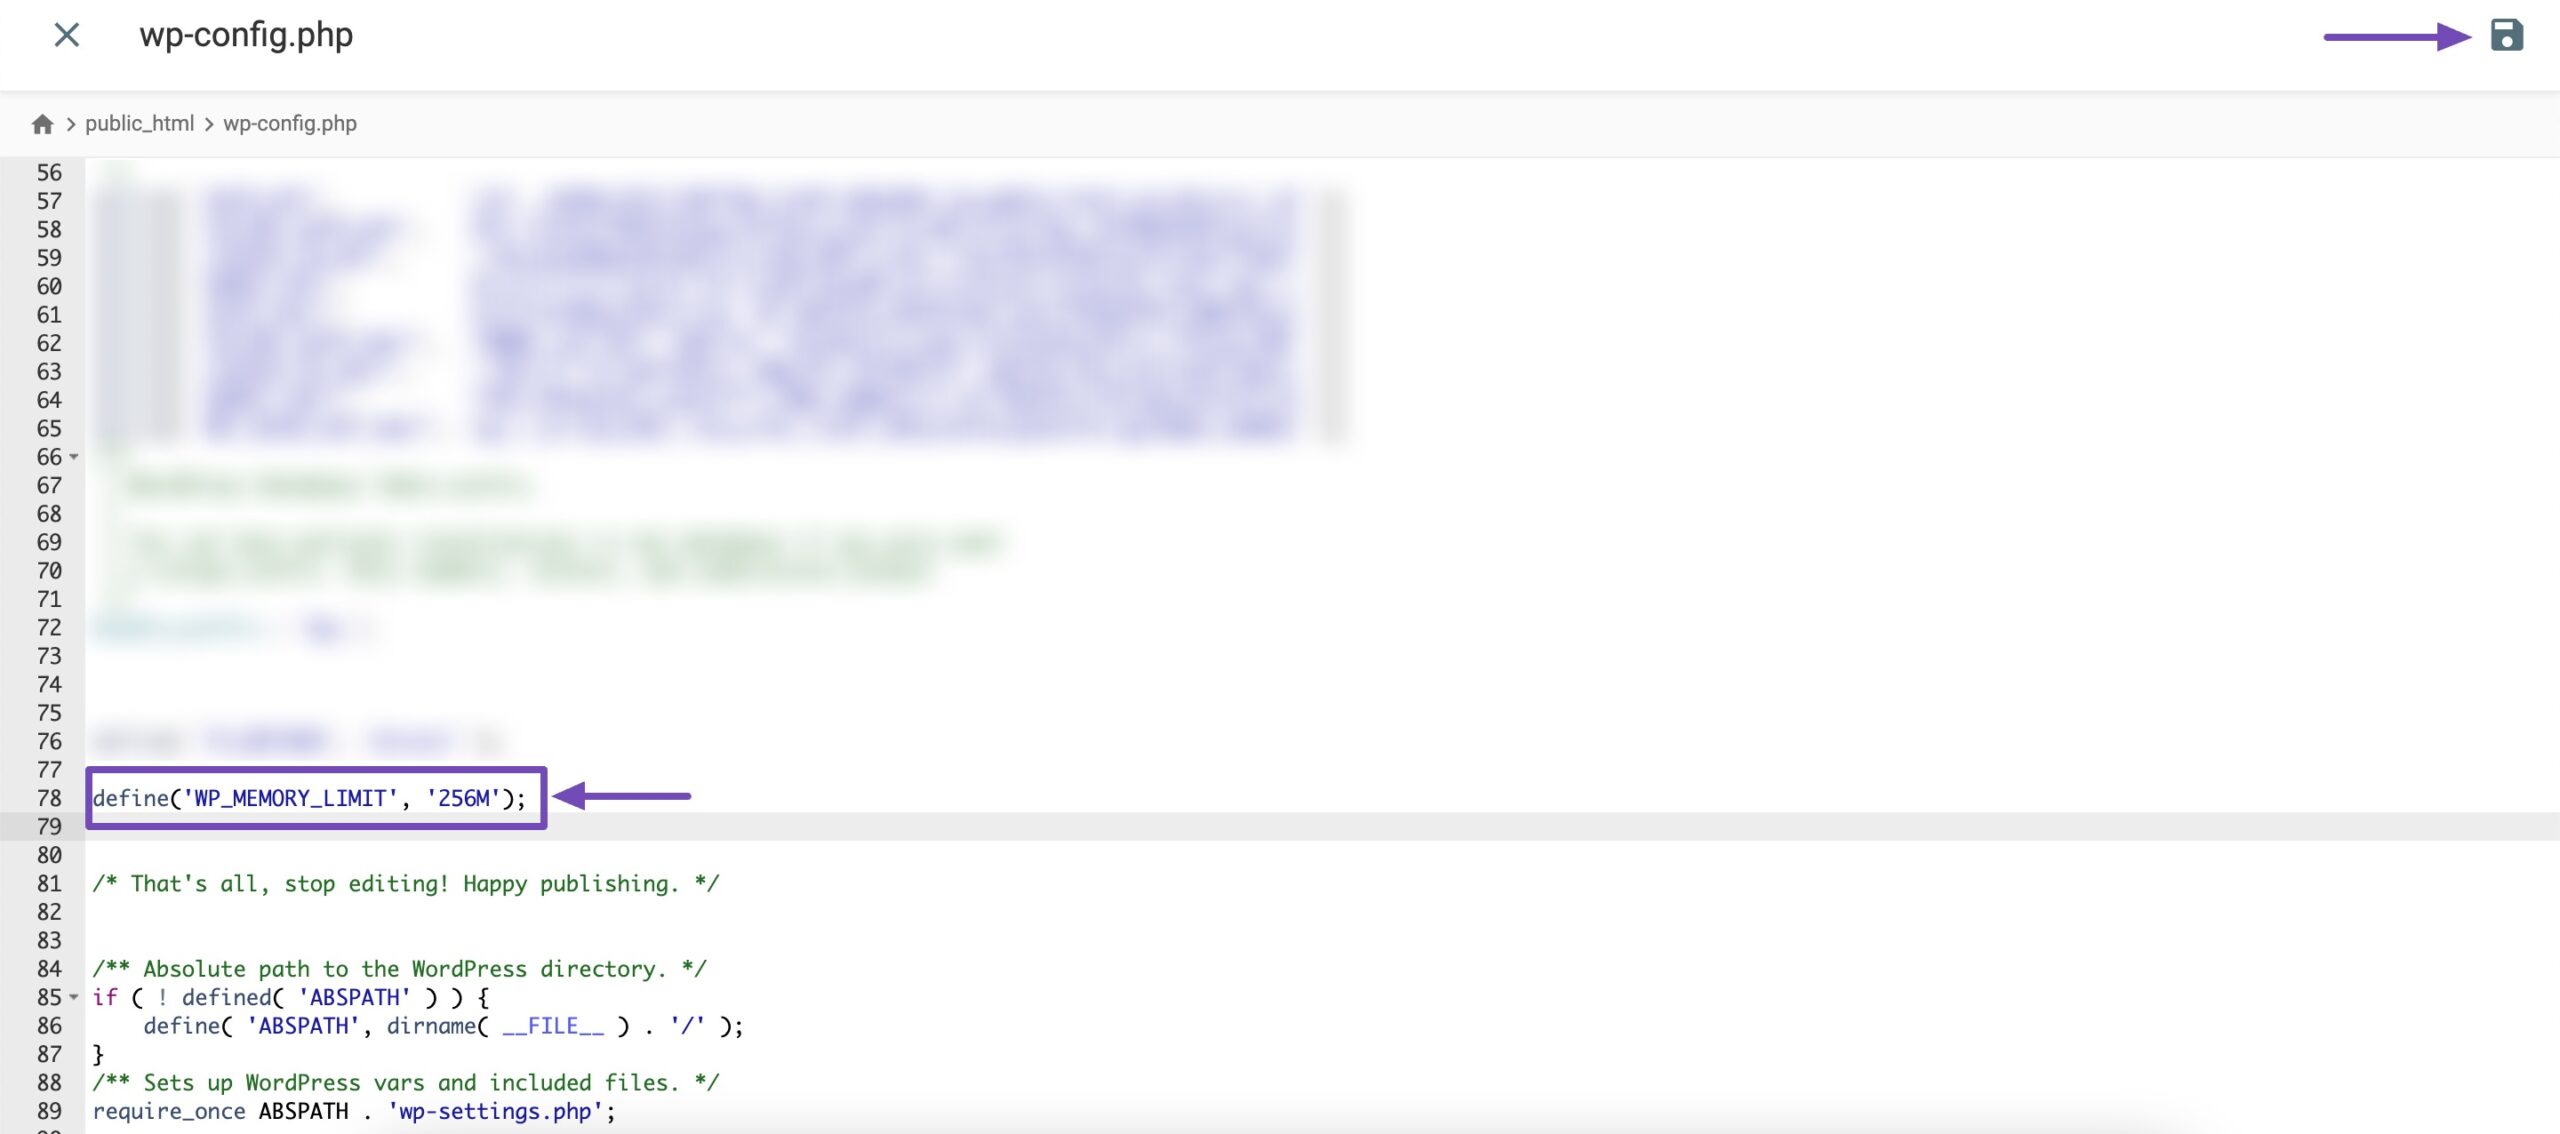
This code increases the WordPress memory limit to 256MB, sufficient to fix any memory limit issues. Don’t forget to save your changes.
1.5 Change the Image Editor Library Used by WordPress
WordPress relies on PHP for its functionality, and when it comes to processing images, PHP uses two modules: the GD Library and Imagick.
WordPress has the flexibility to use either of these modules based on their availability.
However, Imagick often faces memory problems, resulting in HTTP errors during image uploads. To tackle this issue, you can switch to using the GD Library as the default image editor.
To make this change, simply add the following code snippet to your WordPress theme’s functions.php file.
function wpb_image_editor_default_to_gd( $editors ) {
$gd_editor="WP_Image_Editor_GD";
$editors = array_diff( $editors, array( $gd_editor ) );
array_unshift( $editors, $gd_editor );
return $editors;
}
add_filter( 'wp_image_editors', 'wpb_image_editor_default_to_gd' );
By incorporating this code, you’ll be directing WordPress to give precedence to the GD Library for image processing, avoiding the memory-related challenges commonly linked to Imagick.
After adding the code, try uploading files again through the media uploader.
If the issue persists, you can simply remove the code and explore other methods suggested in the article.
1.6 Editing .htaccess to Fix the Imagick Issue
Many shared hosting providers limit Imagick’s ability to use multiple threads for faster image processing. However, this can result in an HTTP error when uploading images.
To address this issue, add the following code to your .htaccess file:
SetEnv MAGICK_THREAD_LIMIT 1Save the changes and try uploading the image again.
Note: Editing the .htaccess file requires technical expertise, as errors can disrupt your website. It is advisable to create a backup before making any modifications to your site or consider seeking assistance from your web hosting provider.
1.7 Check Your PHP Version
Verifying your PHP version is another solution to tackle the WordPress HTTP error that may occur during image uploads.
Some hosting providers may not utilize the recommended PHP version for WordPress, leading to conflicts and problems with image uploads.
Fortunately, checking and updating the PHP version of your website is simple.
Refer to our dedicated tutorial on updating your PHP version in WordPress.
1.8 Contact Your Hosting Provider
If none of the above-mentioned solutions yield the desired results, consider contacting your hosting provider for assistance. Alternatively, you can opt to contact them before attempting the suggested solutions.
Your hosting provider possesses the expertise to investigate potential server-related issues causing the HTTP error and can provide valuable guidance on resolving them.
2 Conclusion
Resolving the WordPress HTTP error during image uploads is necessary for ensuring your website’s smooth functioning.
The solutions provided, like checking your PHP version, reaching out to your hosting provider, etc., will help you fix the issue.
Remember, the key is taking it step by step and keeping things up to ****.
Doing so ensures a smooth experience when adding images to your WordPress site.
So, fear not—follow these steps, and you’ll be uploading images hassle-free in no time! If you like this post, let us know by Tweeting @rankmathseo.