
Enhancing the visual appeal of your WordPress website can be effectively achieved by incorporating a slideshow.
A slideshow allows you to showcase multiple images or diverse content types dynamically and engagingly, contributing to prolonged visitor engagement on your site.
The good news is that integrating a slideshow into your WordPress site is a straightforward process, accessible even for those without advanced technical skills.
This article is designed to walk you through seamlessly adding a slideshow to your WordPress site, enabling you to present your content aesthetically pleasingly.
So, without any further ado, let’s get started.
1 Why Add a Slideshow to Your WordPress Websites?
We’ve listed a few reasons to add a slideshow to your WordPress site.
Increase Engagement and Capture Users’ Attention
A slideshow is a valuable tool to showcase your essential content, products, or videos, enabling you to create a favorable initial impact.
When browsing online stores, mainly those selling electronics, groceries, gadgets, or fashion, you’ll likely come across slideshows featuring their top-selling items, which can be quite enticing.

You can boost engagement, which is crucial for accomplishing the objectives of your website, by encouraging visitors to stay on your page longer by showcasing slideshows.
Increase Conversions
Incorporating slideshows to showcase your products or services can motivate website visitors to engage in specific actions, such as purchasing.
If, as mentioned earlier, you were pursuing online slideshows and encountered a product that captured your interest, you will likely proceed with the purchase.
Furthermore, you can integrate links on your social media profiles within your slideshows, enhancing conversion rates.
Highlighting Testimonials and Reviews
Slideshows are valuable for showcasing satisfied customers’ positive reviews and testimonials. Particularly if you have a substantial number of reviews, showcasing the volume of feedback you’ve received is beneficial.
This approach improves credibility and helps build trust with potential customers. By visually presenting a collection of favorable testimonials, you create a compelling narrative that resonates with your audience and enhances their confidence in your products or services.
Showcasing Promotions and Events
By incorporating vibrant visuals and smooth transitions, slideshows help capture your audience’s attention and efficiently communicate key information.
For instance, a homepage slideshow can feature images highlighting exclusive deals, limited-time promotions, or upcoming events, creating an immediate visual impact.
The use of countdowns within slideshows builds anticipation for time-sensitive promotions, creating a sense of urgency.
2 How to Add a Slideshow to Your WordPress Website
Now that you know why you should add a slideshow, let’s look at the various methods for adding it to your WordPress website.
2.1 Add a Slideshow in WordPress Using Slideshare
You can integrate Slideshare slideshows seamlessly into your WordPress website by creating a Slideshare account and uploading your presentation.
After successful upload, login to your Slideshare account, locate the desired presentation, click the three dots below it, and choose the Share option to embed it on your WordPress site.

The presentation’s URL will now be displayed. Copy this link for further use.

Access your WordPress dashboard and locate the post or page where you will incorporate the slideshow.
Search for the Slideshare block in the post or page editing screen and add it to your post/page.
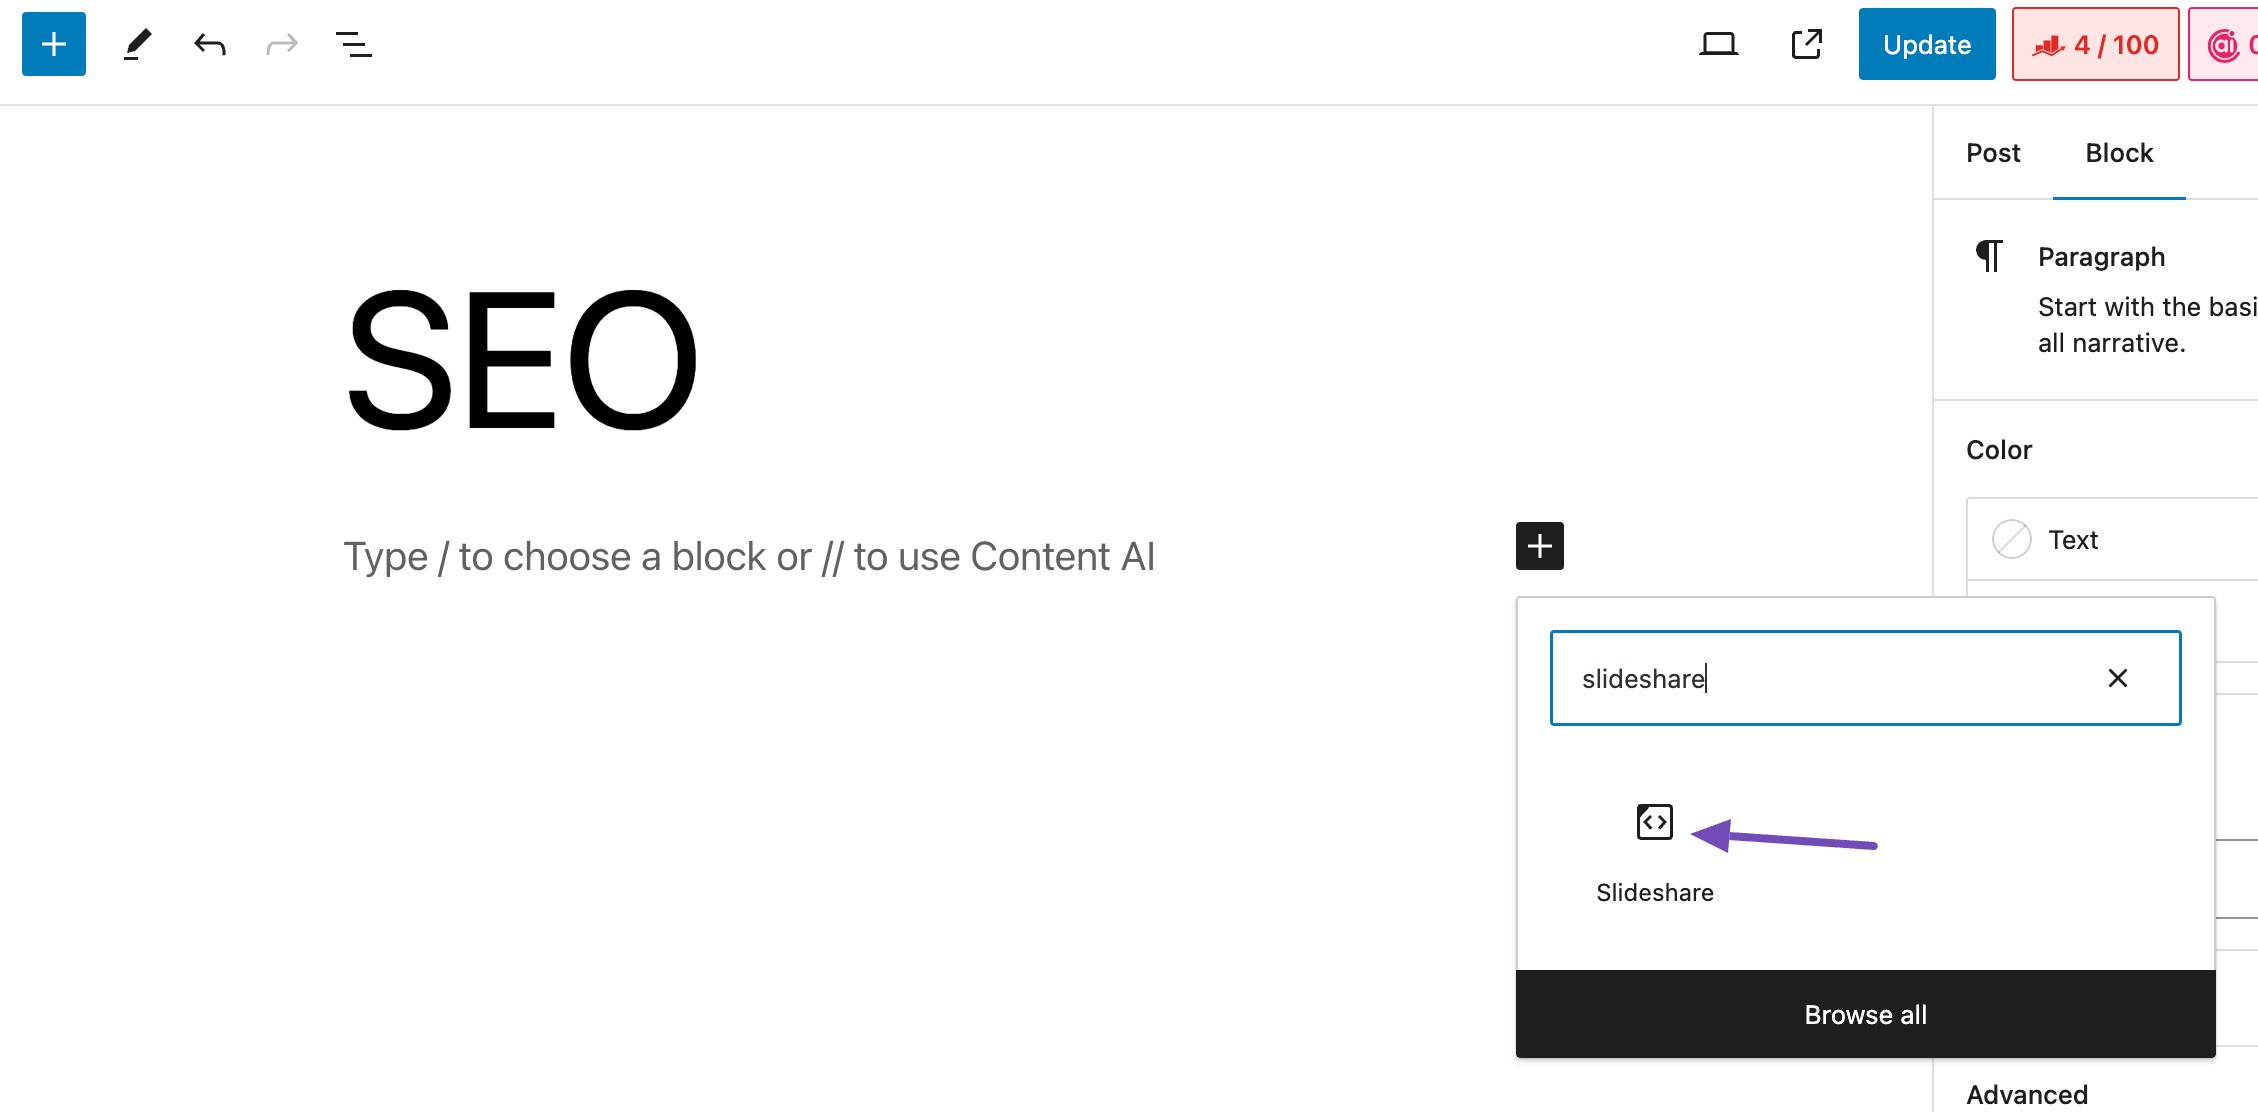
Next, paste the Slideshare link in the provided field and click the Embed button, as shown below.

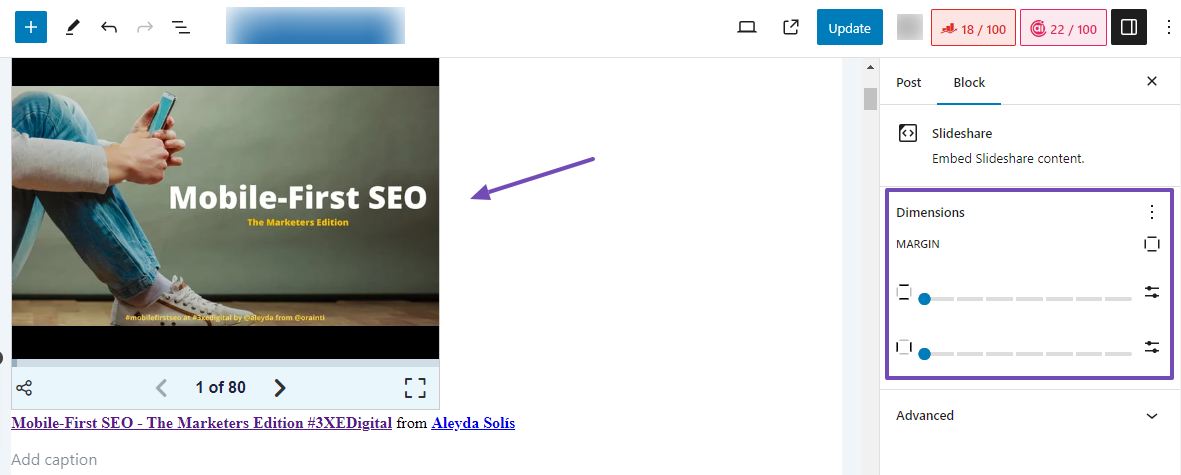
After clicking the Embed button, the slideshow will promptly appear.
Customize the margin to suit your preferences by clicking on the slideshow and navigating to the Block tab, as shown below.
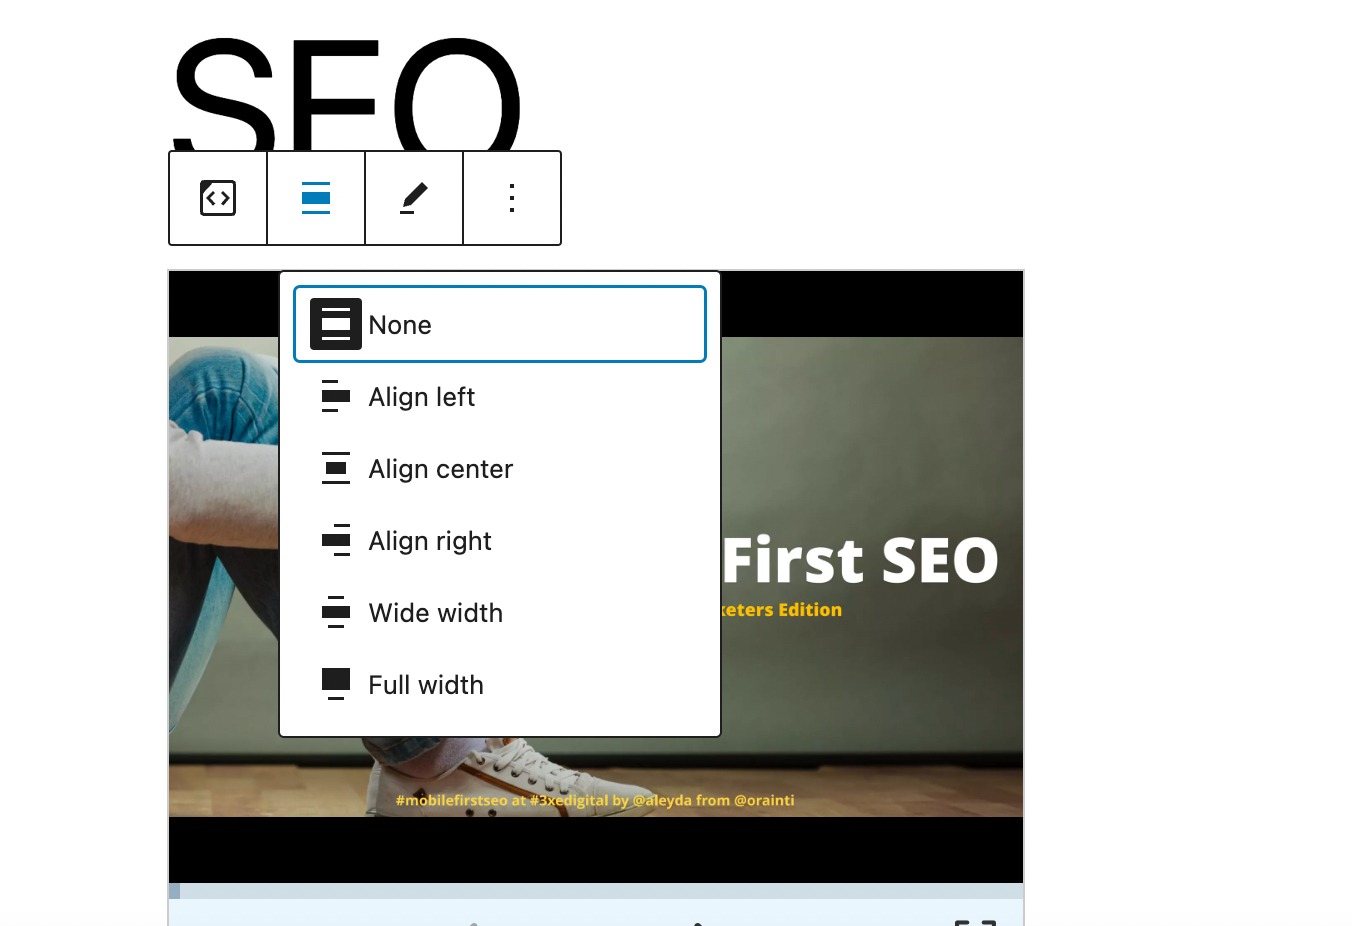
You can also modify the alignment of the Slideshow, as shown below.
Once satisfied with the modifications, click the Publish/Update button to save your changes.
2.2 Create a Slideshow in WordPress Using a Plugin
If you want to create attractive, responsive slideshows on desktops, tablets, and mobiles, we recommend these two WordPress plugins.
- Jetpack (faster)
- Depicter Slider (greater features)
Add a Slideshow Using the Jetpack Plugin
The Jetpack plugin simplifies the creation of responsive slideshows on your website’s pages or posts despite not being originally designed for this purpose.
To create slideshows using Jetpack, follow our guide on installing and activating WordPress plugins.
Jetpack now integrates slideshow functionality directly into the WordPress blocks within your post editor. Once Jetpack is installed, navigate to the post where you want to add a slideshow.
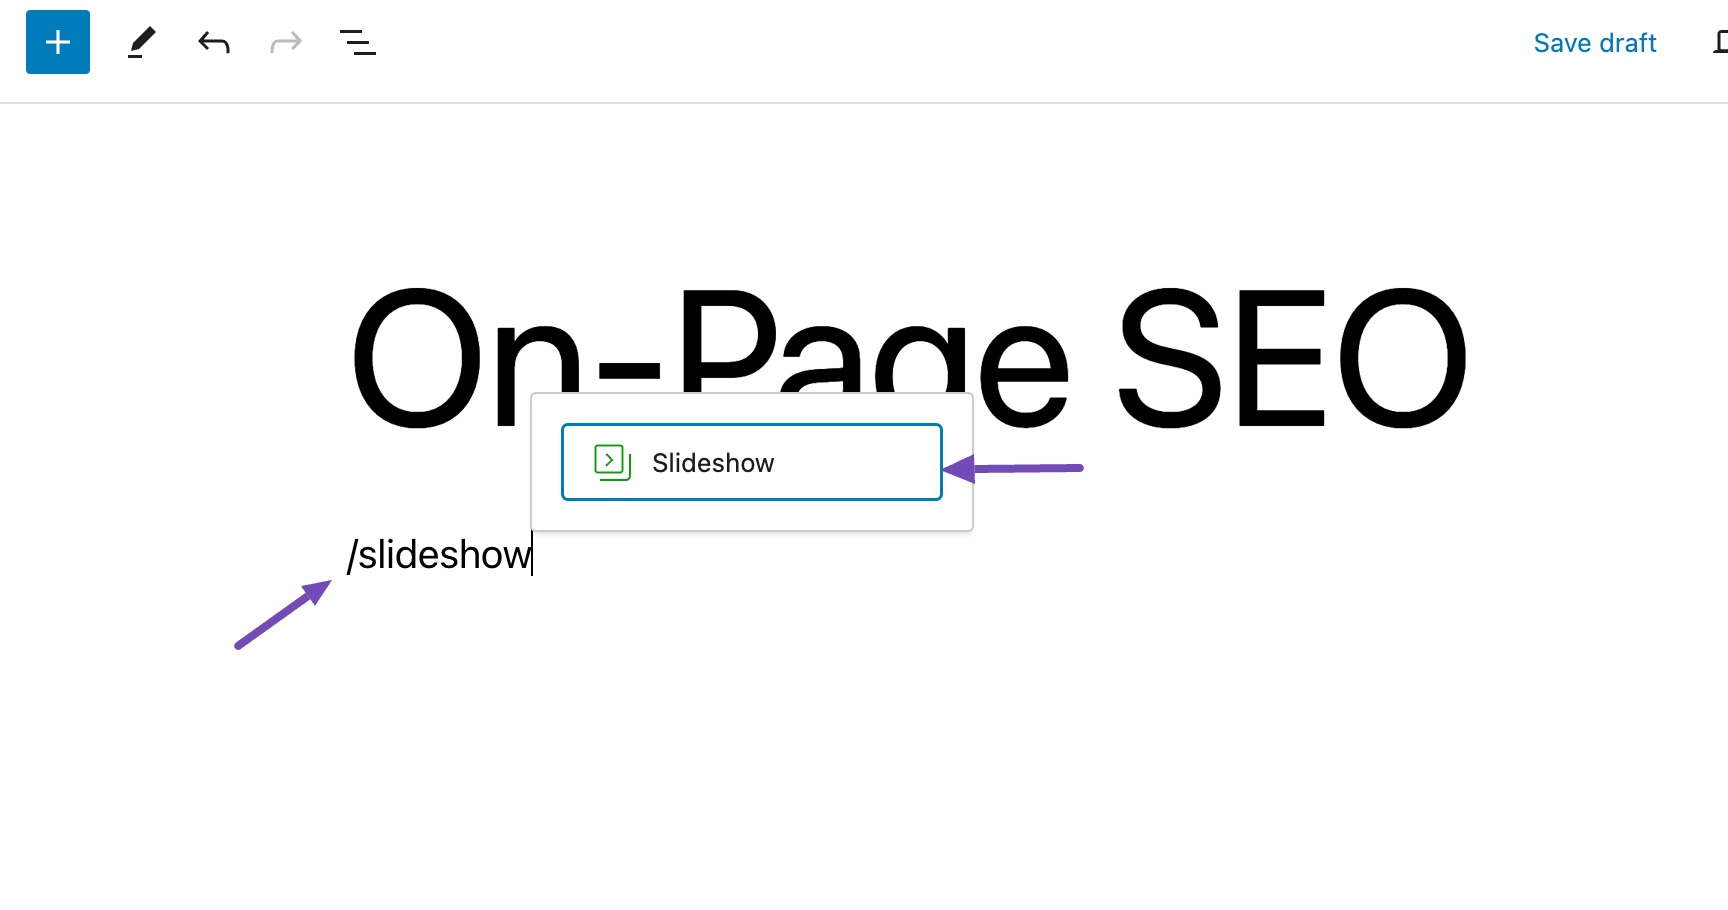
To use the Jetpack slideshow, in the post-editing screen, search for Slideshow, as shown below.
You’ll find the Jetpack Slideshow block, drag and drop it into your post.

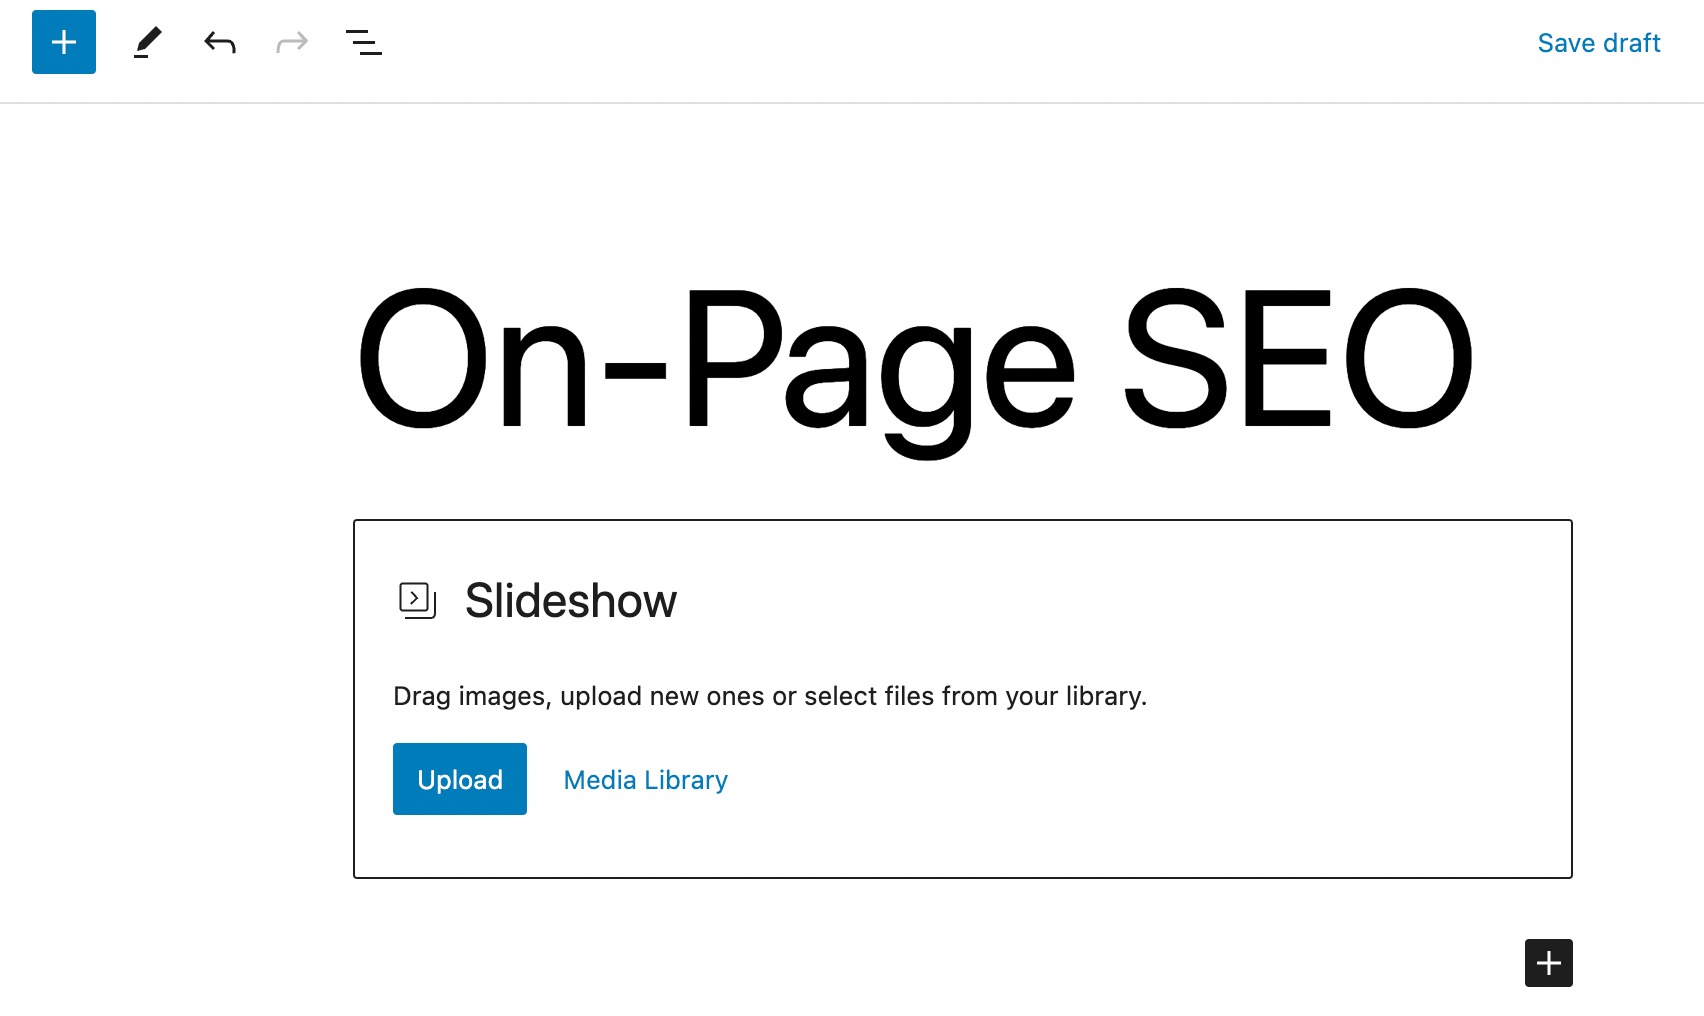
Alternatively, you can type “/Slideshow” in your post editor, and the Slideshow block will appear immediately. Next, click on it as shown below.
You can add images to the Slideshow by selecting the Upload button to access your local files on the computer.
If you’ve already uploaded images, select them from the Media Library option.
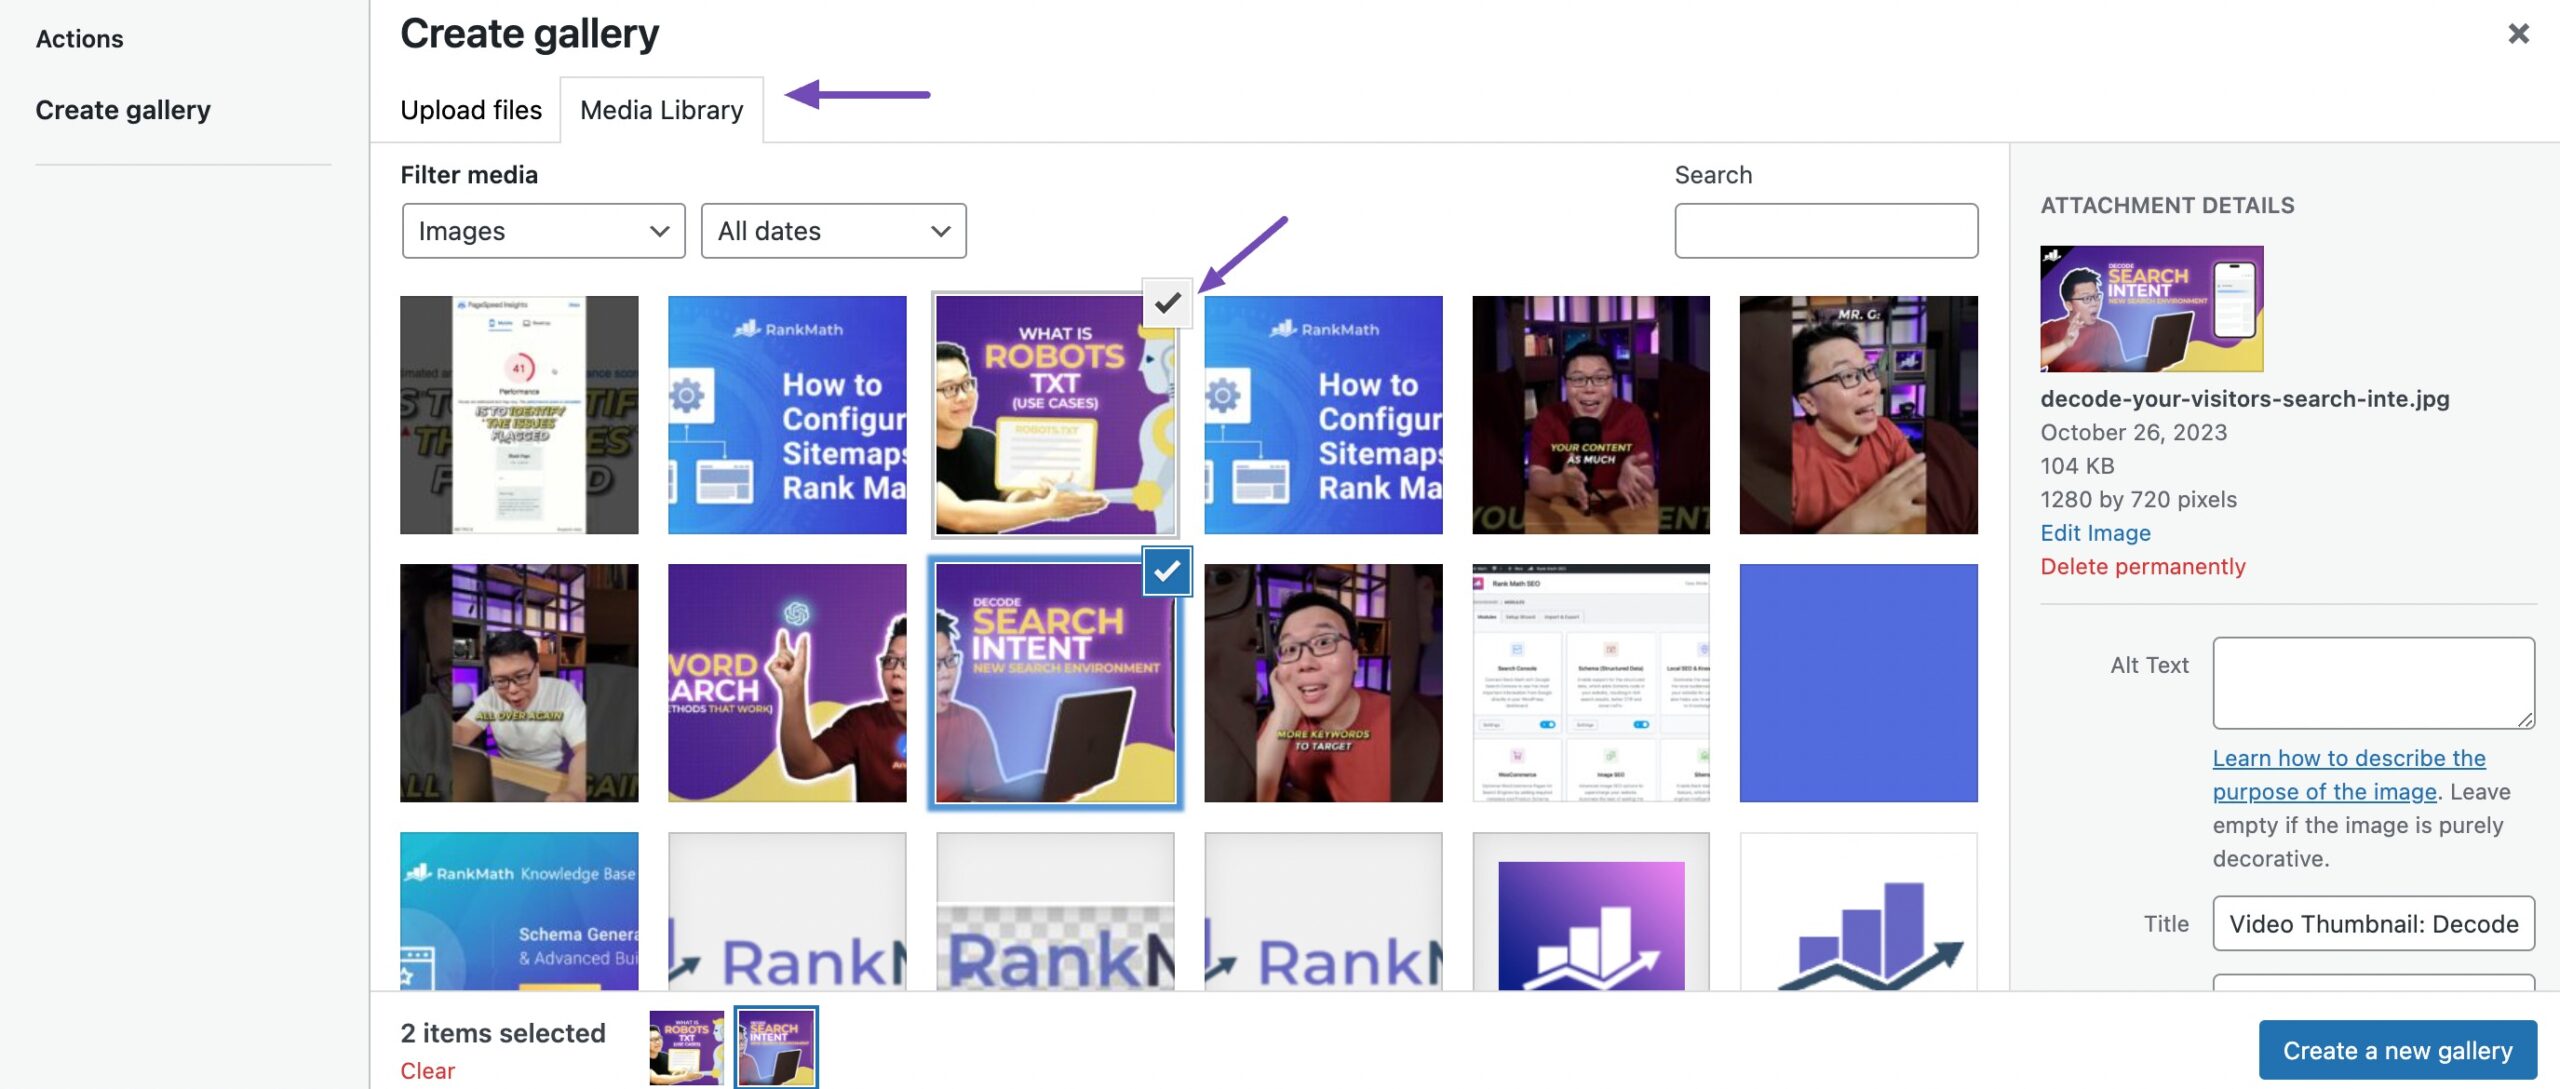
A check icon will appear over your chosen image files, and you can click on the icon to deselect any image.
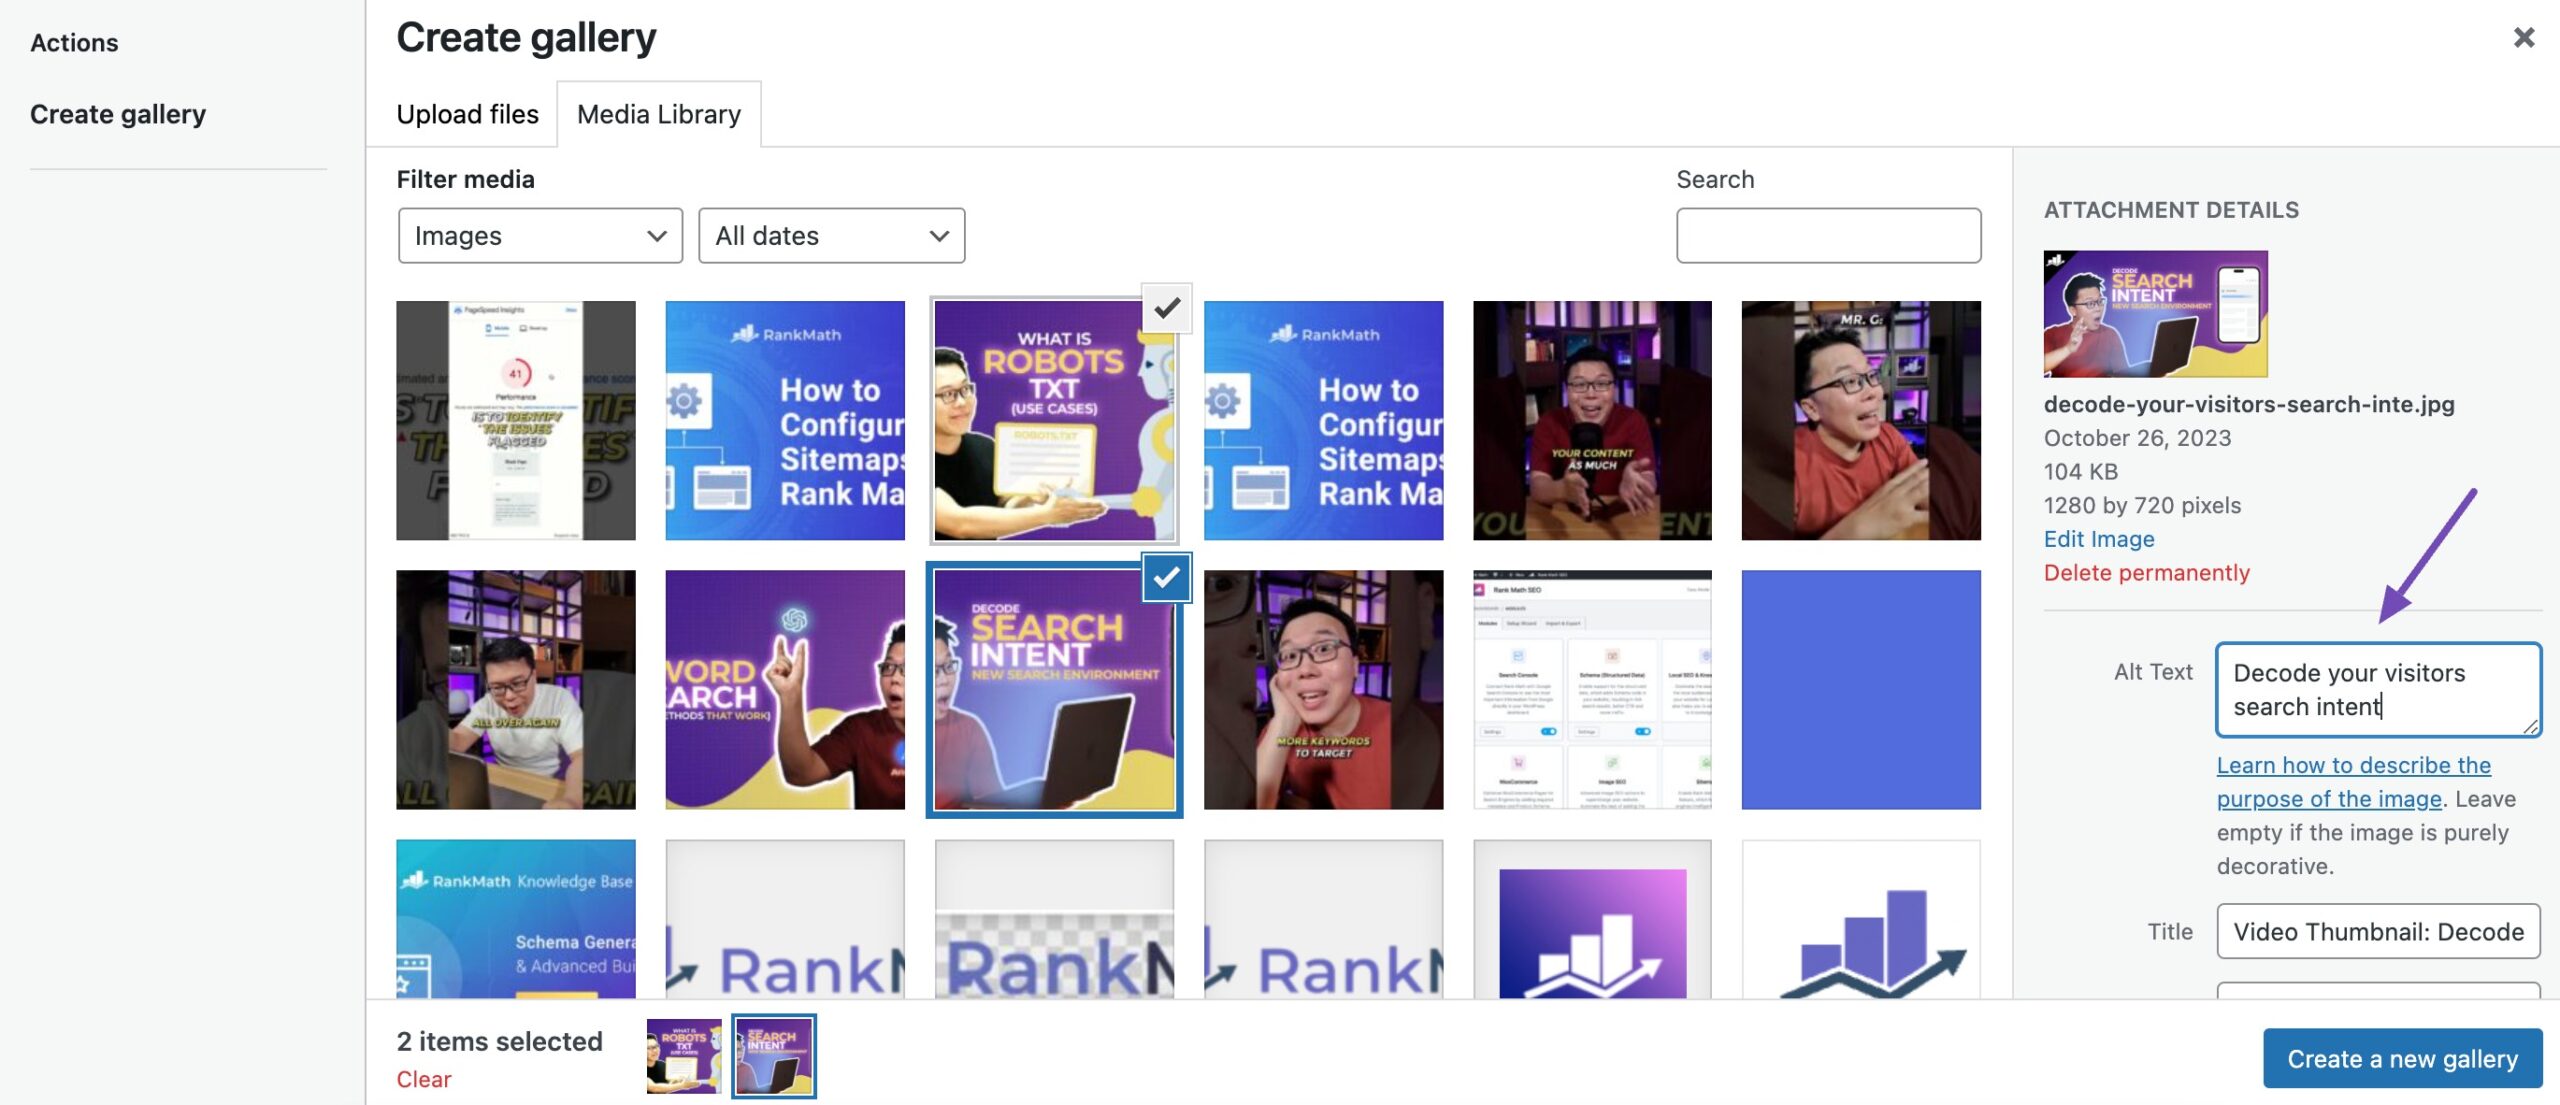
However, optimize each image’s alt text, title, caption, and description for search engine optimization, as shown below.
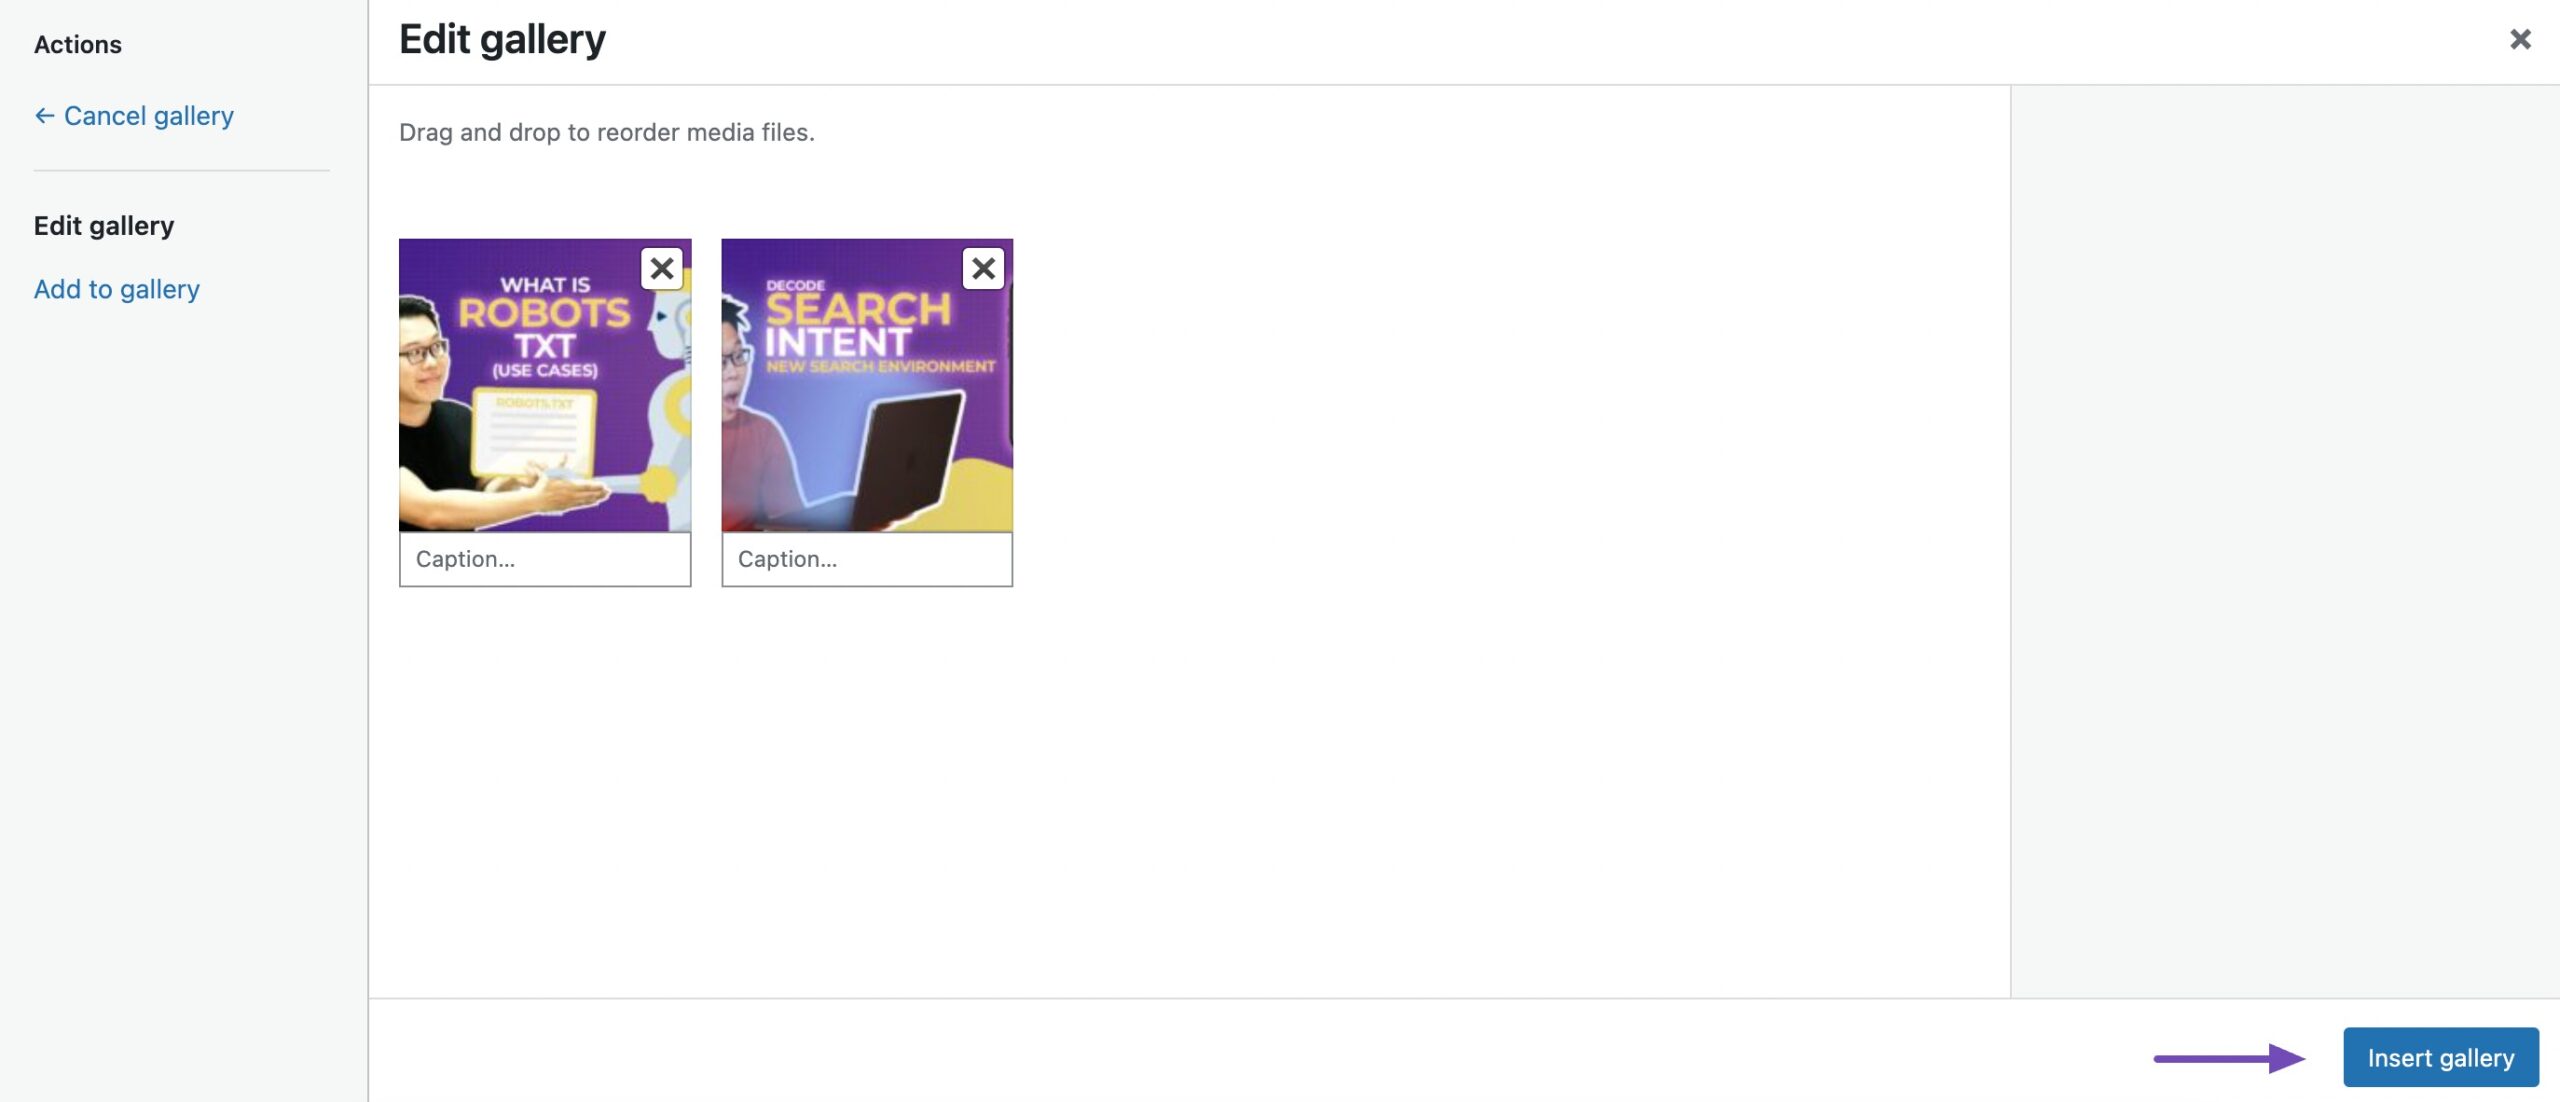
After finalizing your selections, preview your edits by clicking the Create a new gallery button. On the preview page, you can further refine the selected gallery before clicking the Insert gallery button to integrate the slideshow into your post.
Once added to your post, the slideshow adopts the appearance defined by your selected images.
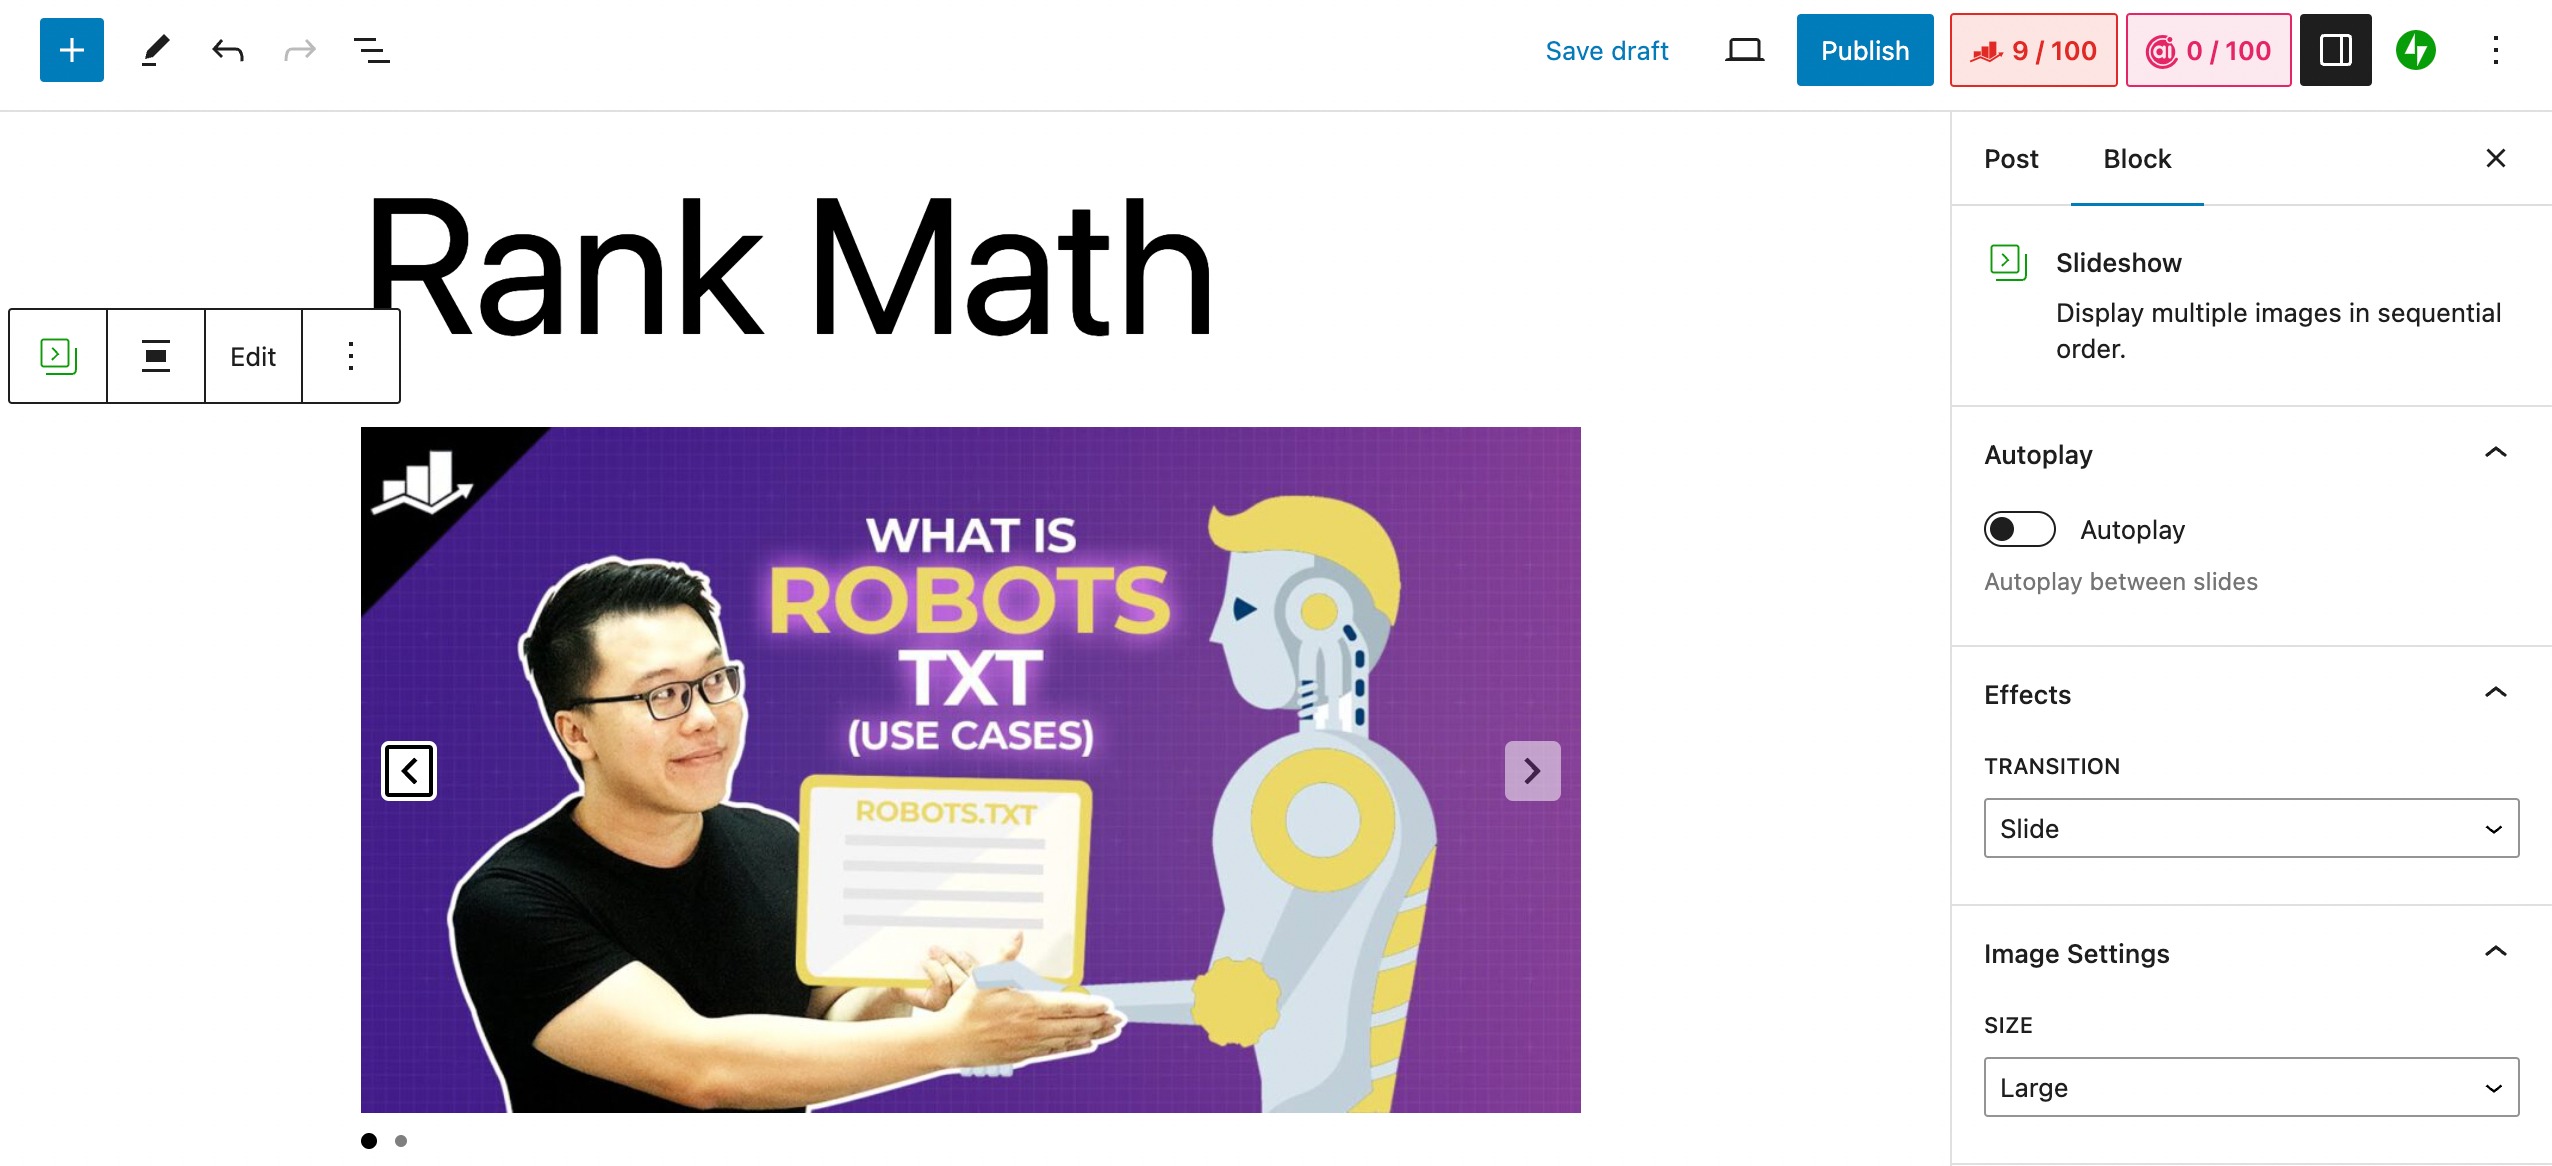
For additional edits to the slideshow, simply click on it and access the Settings panel, as shown below.
To enable automatic playback between slides, go to the Block tab in the Settings panel and select Autoplay.
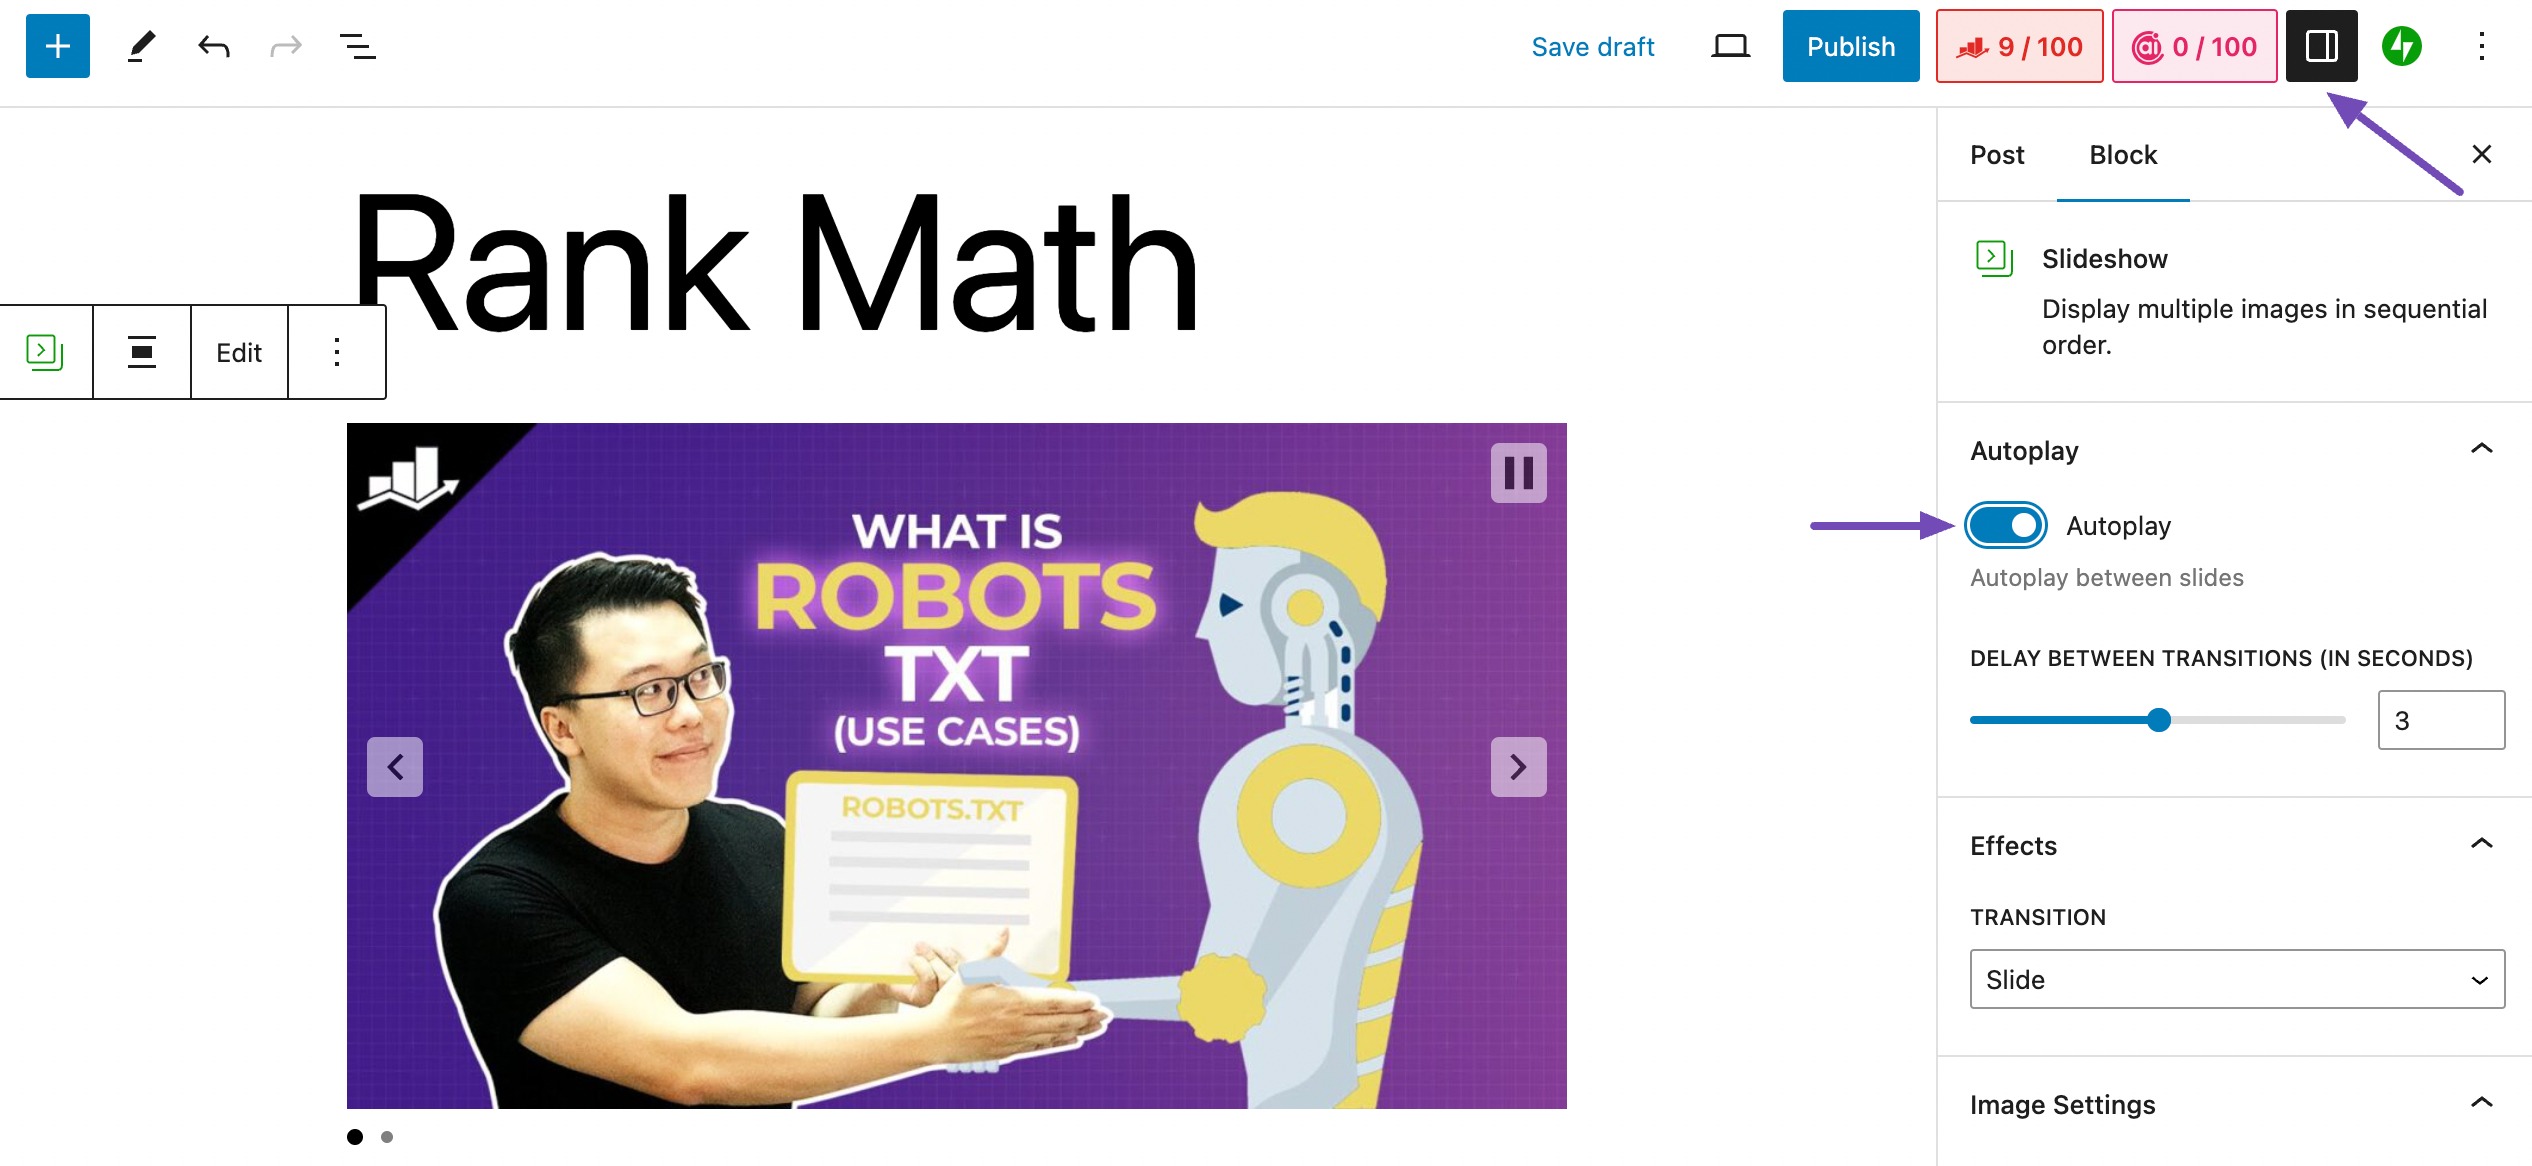
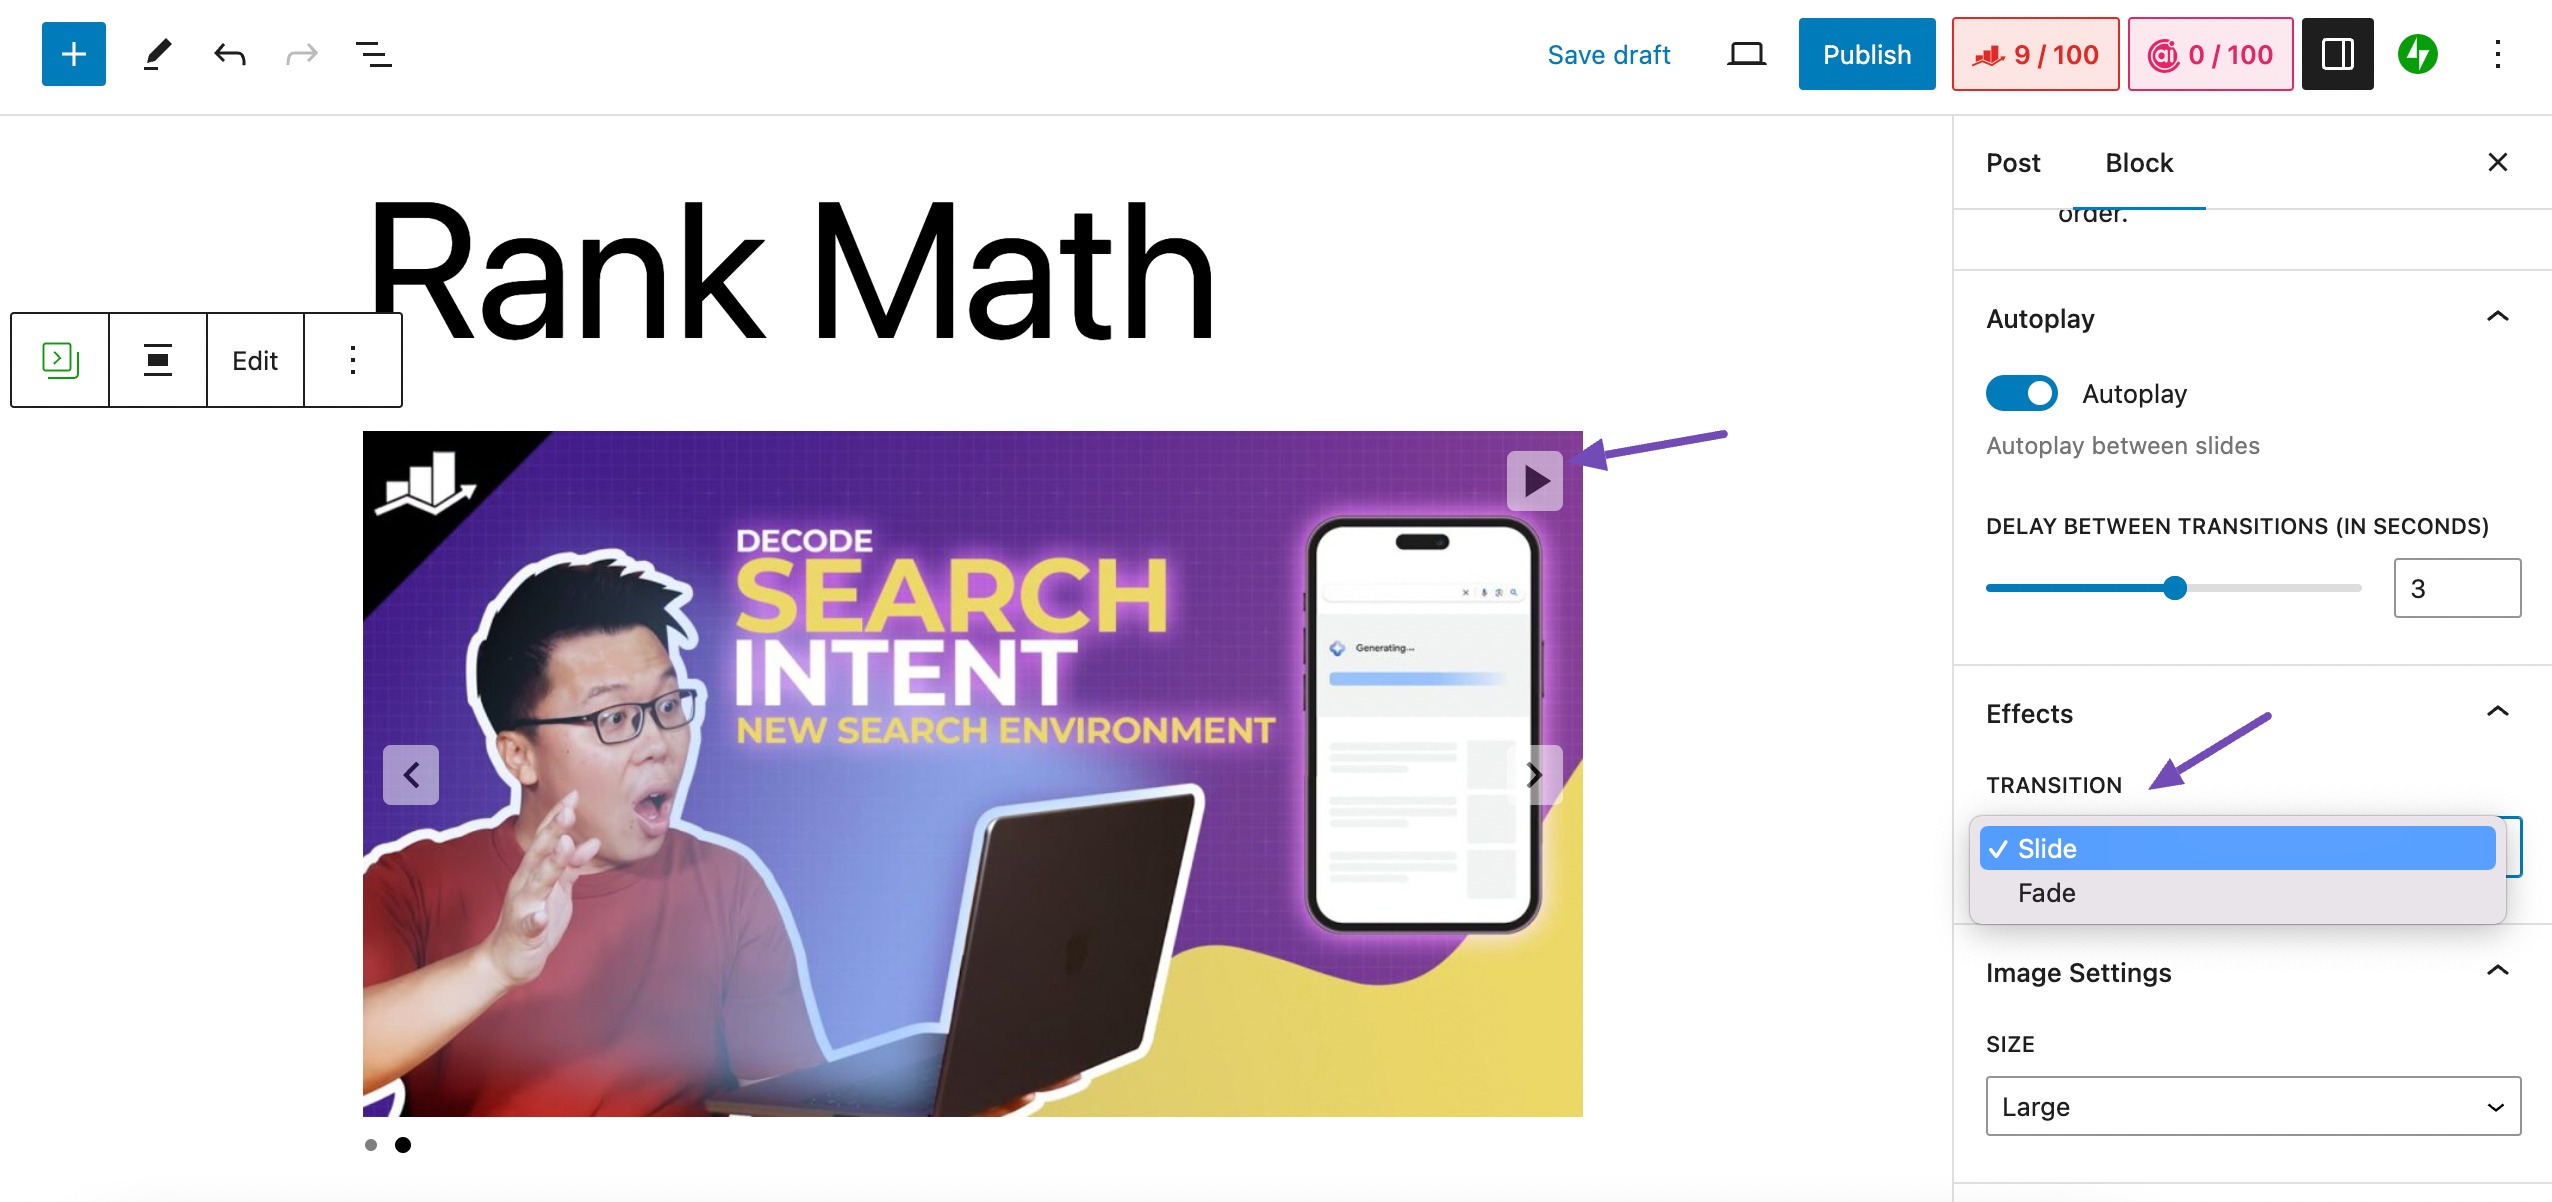
In the Settings panel, you can adjust the image size and choose between a slide or fade transition. Preview the autoplay feature by clicking the play button at the top of the slideshow, as shown in the image.
Once done, click Publish to showcase your article with the visually appealing slideshow, as shown below.

Jetpack typically generates portable slideshows that are suitable for direct embedding into blog articles and particularly useful for product reviews.
Alternatively, MetaSlider, another free plugin, offers a similar format for creating Slideshows. However, consider using the next recommended plugin for more extensive Slideshows tailored to diverse purposes.
Add a Slideshow Using the Depicter Plugin
The Depicter Slider plugin creates versatile slideshows for WooCommerce stores, including product reviews, testimonials, videos, and portfolios.
With advanced features for 404-page customization, it seamlessly integrates with popular page builders such as Elementor and Gutenberg.
If you’re not using a page builder, you can use a shortcode to place the slideshow anywhere on the website.
To use the Depicter plugin, install and activate it on your WordPress dashboard and navigate to Depicter → Dashboard, as shown below.
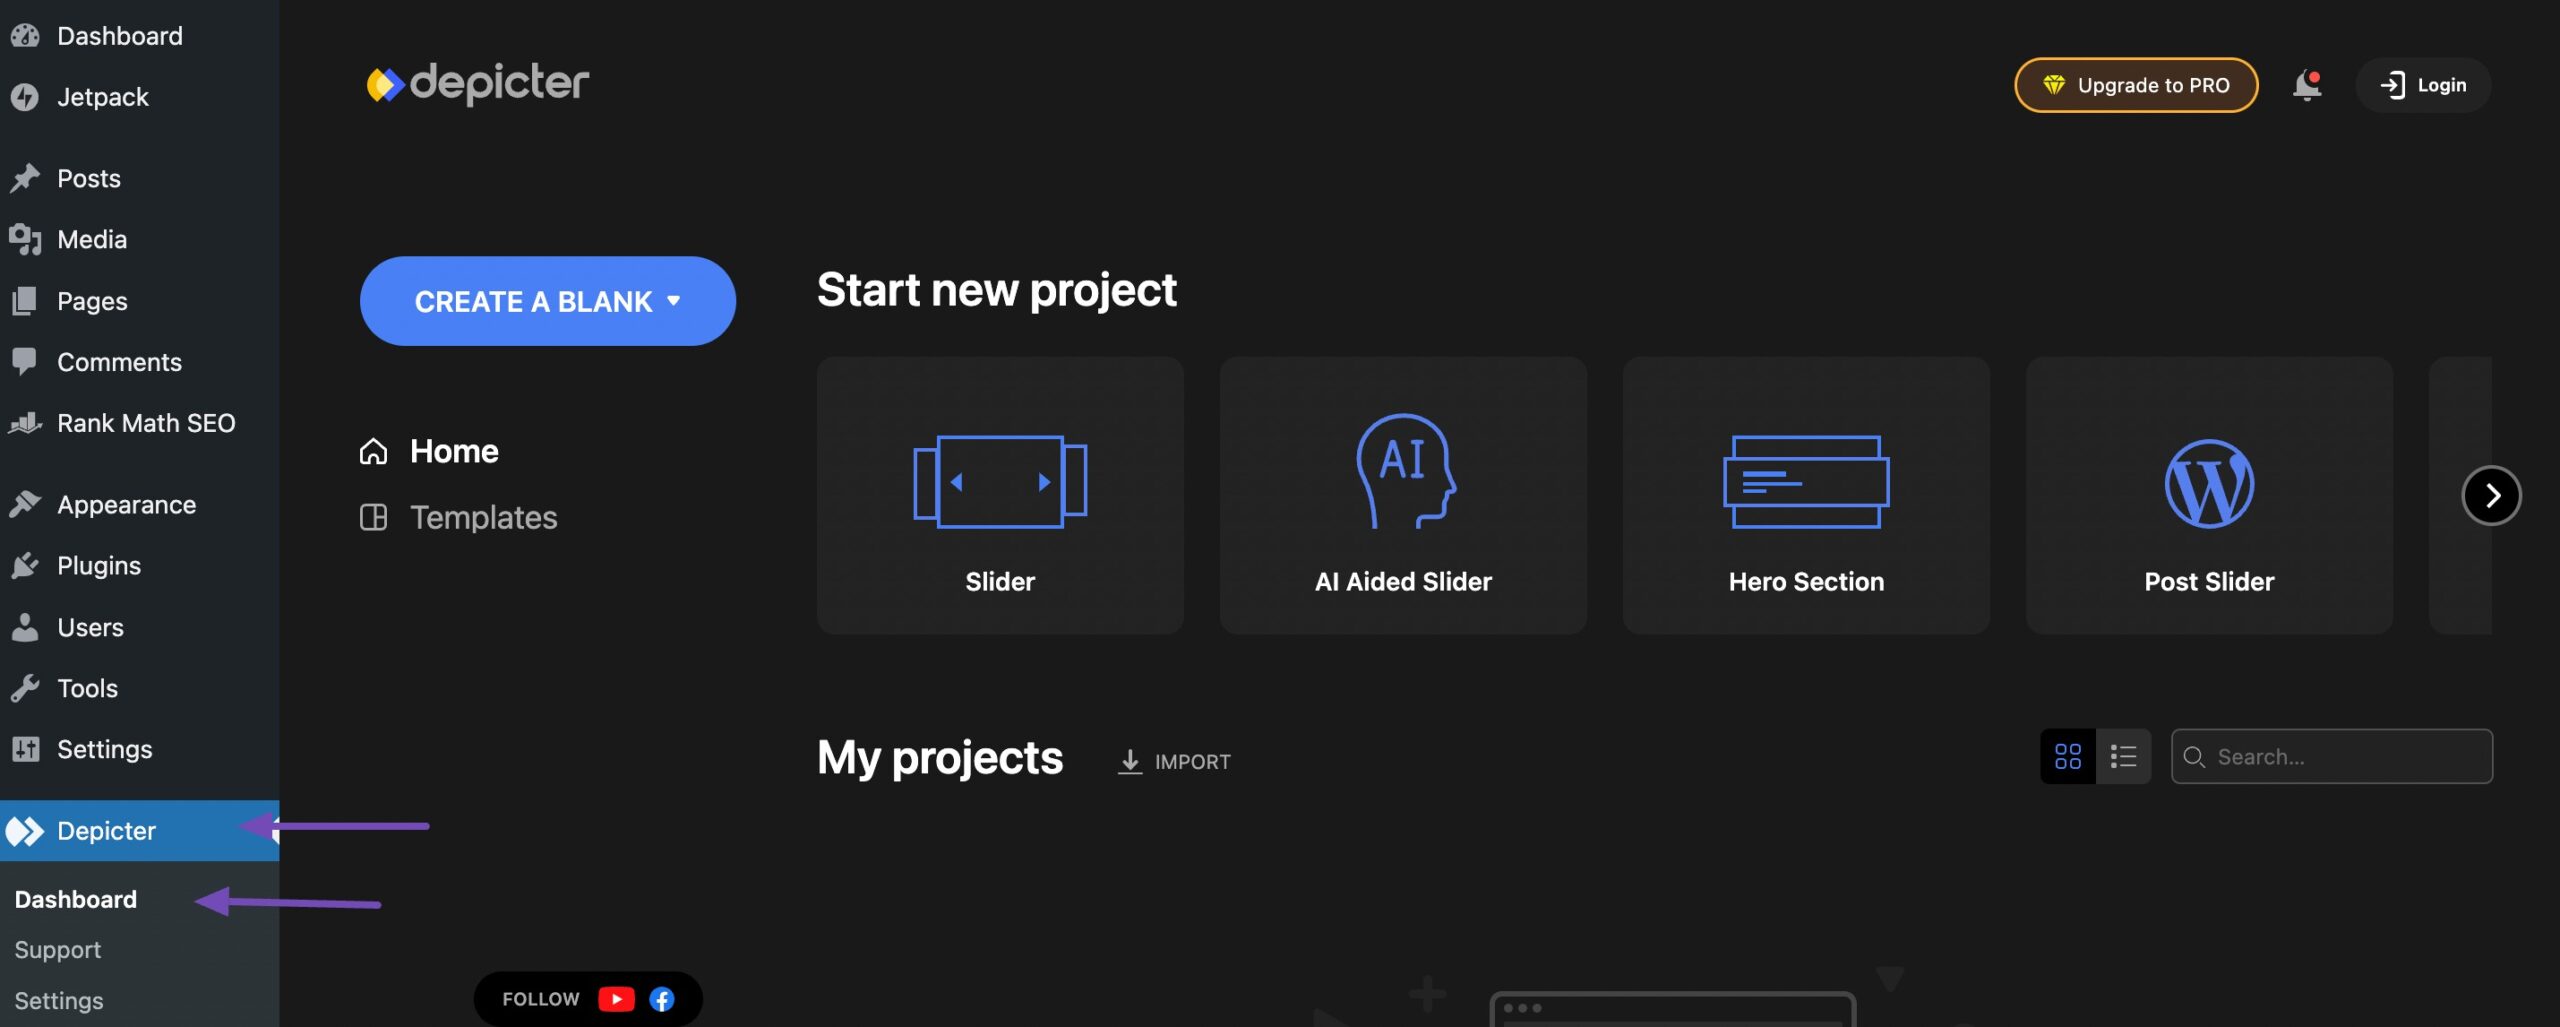
You’ll find various options to begin your project on the Depicter plugin page.
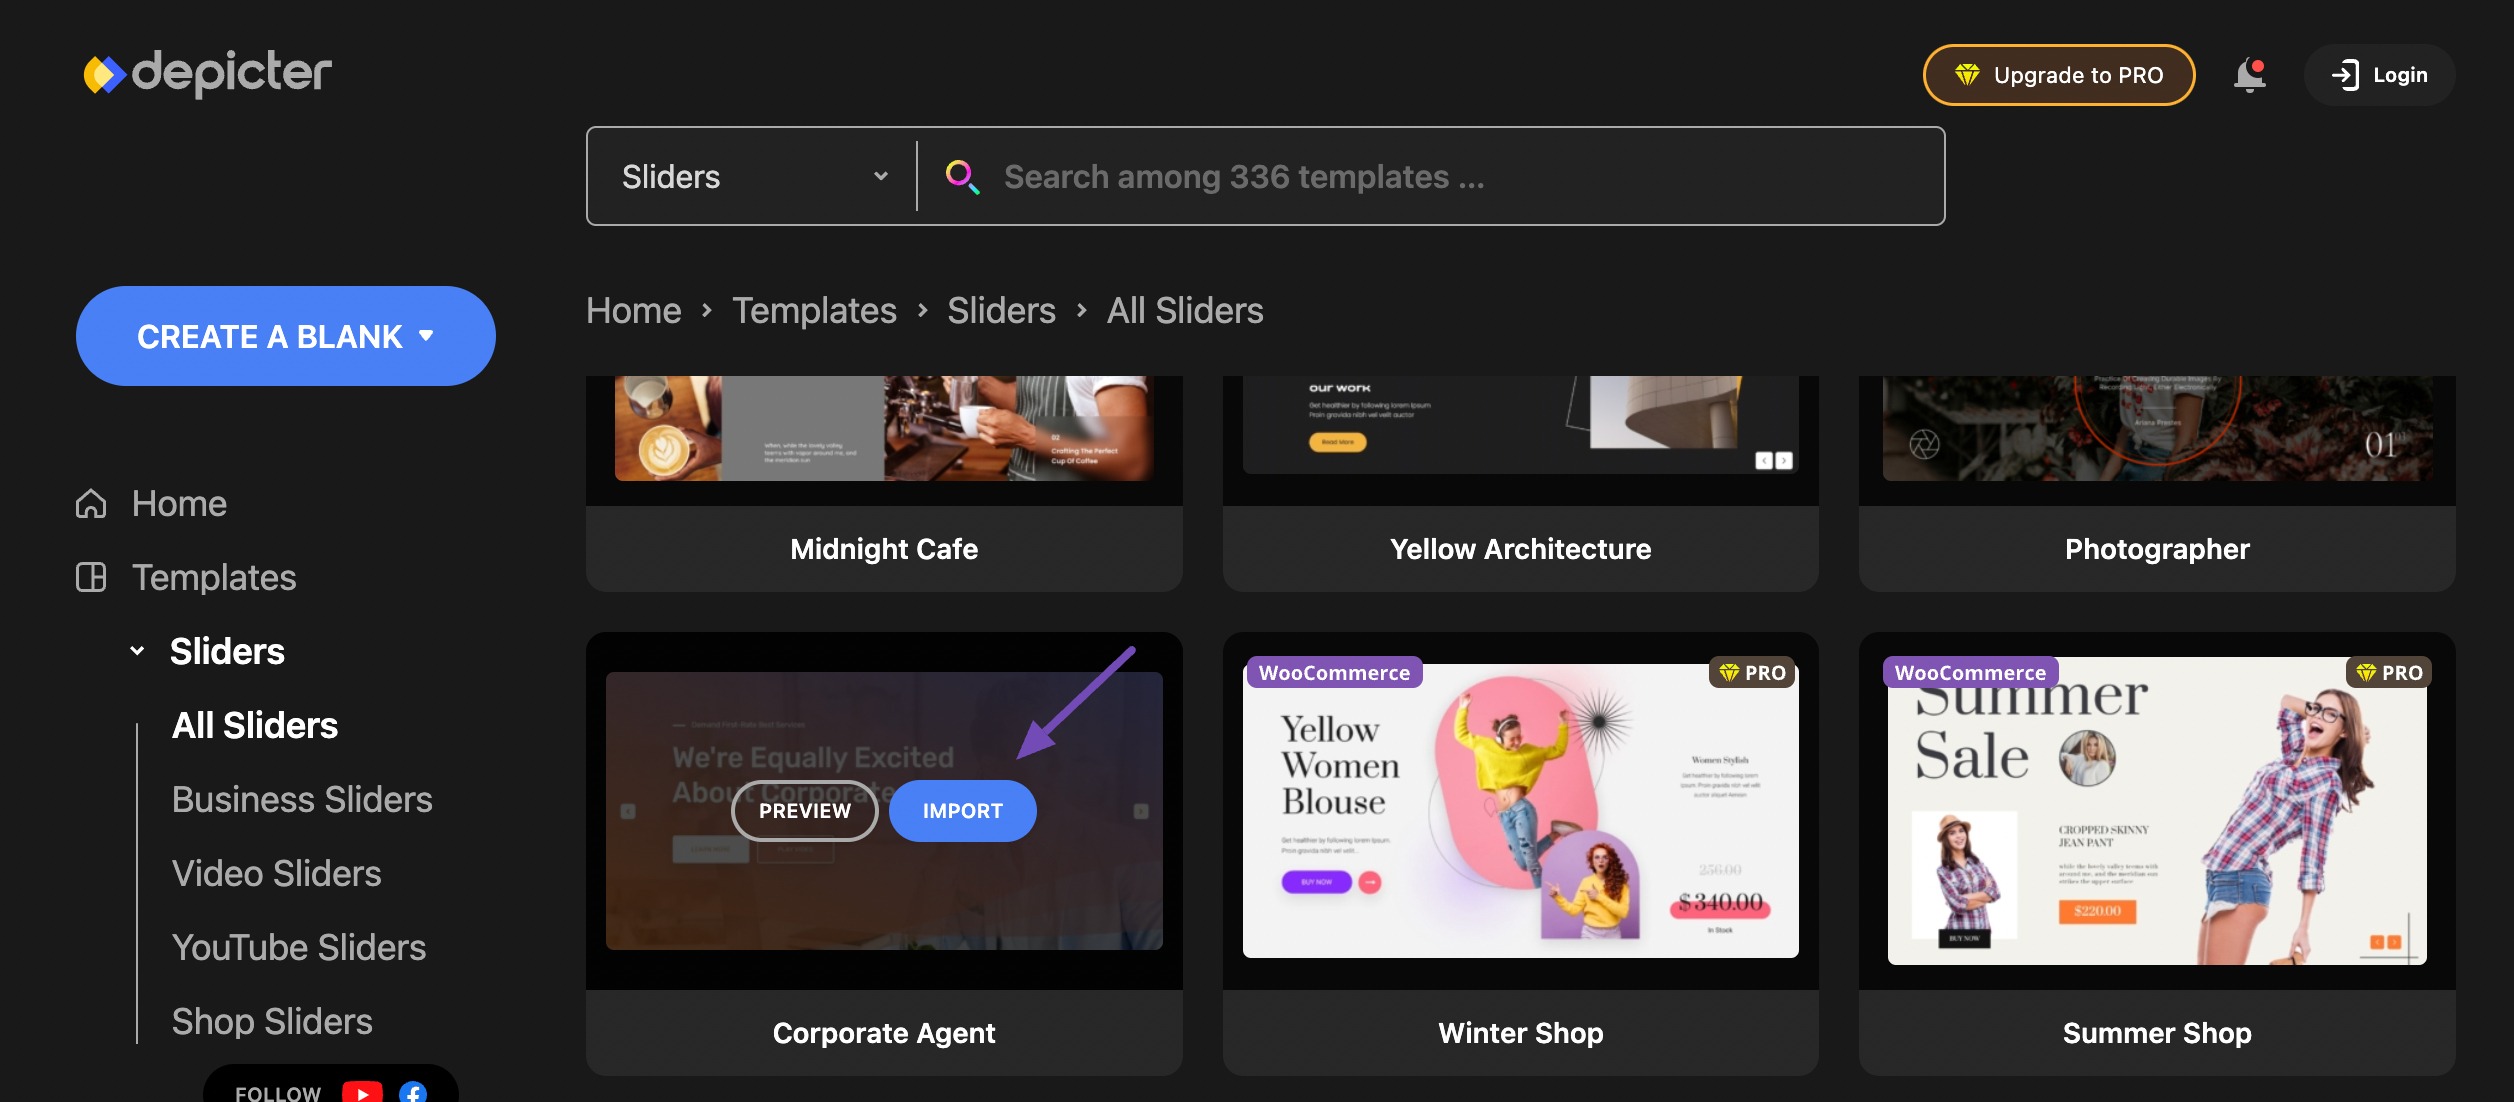
Start your project on the Depicter plugin page with options like creating from scratch or choosing from pre-made templates.
These templates are conveniently categorized as Slider, AI-Aided Slider, Hero Section, and Others. Simply select a category, and you’ll be redirected to a page with relevant templates.
For example, choosing the Slider category directs you to the appropriate templates.

The sliders section is subcategorized for easier navigation. Choose a shop template for your WooCommerce store, a YouTube video template for showcasing videos, or explore other options.
To customize a template, hover over it and click the IMPORT button, which will redirect you to the customization page.
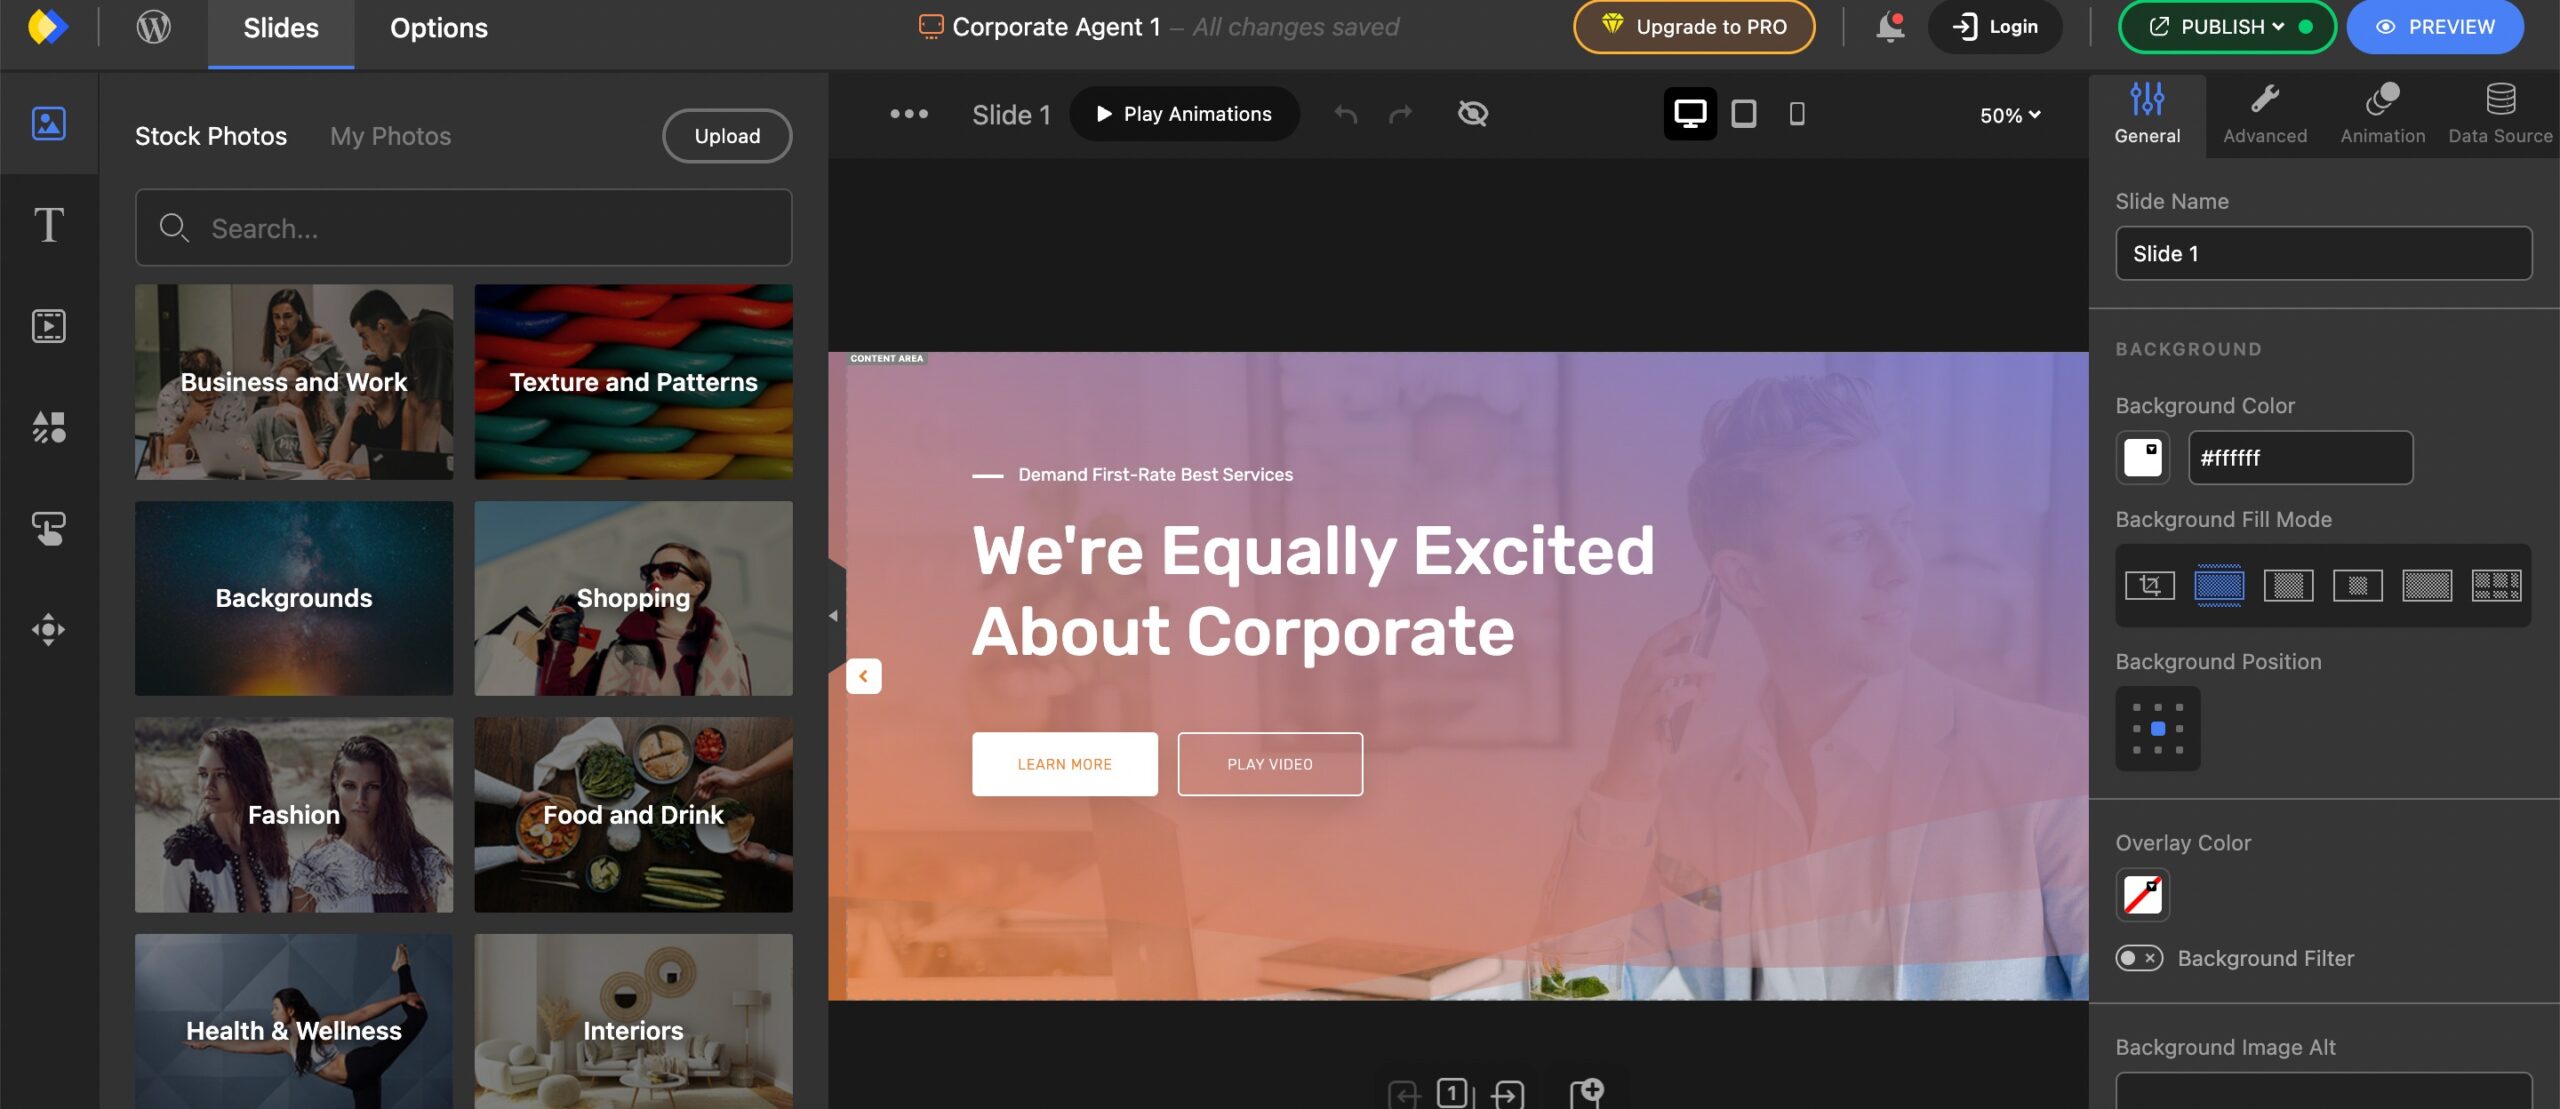
Use the feature-rich customization dashboard to personalize your slideshow template. Customize your slideshow on the dashboard by adding essential elements such as text, images, slides, shapes, and animations.
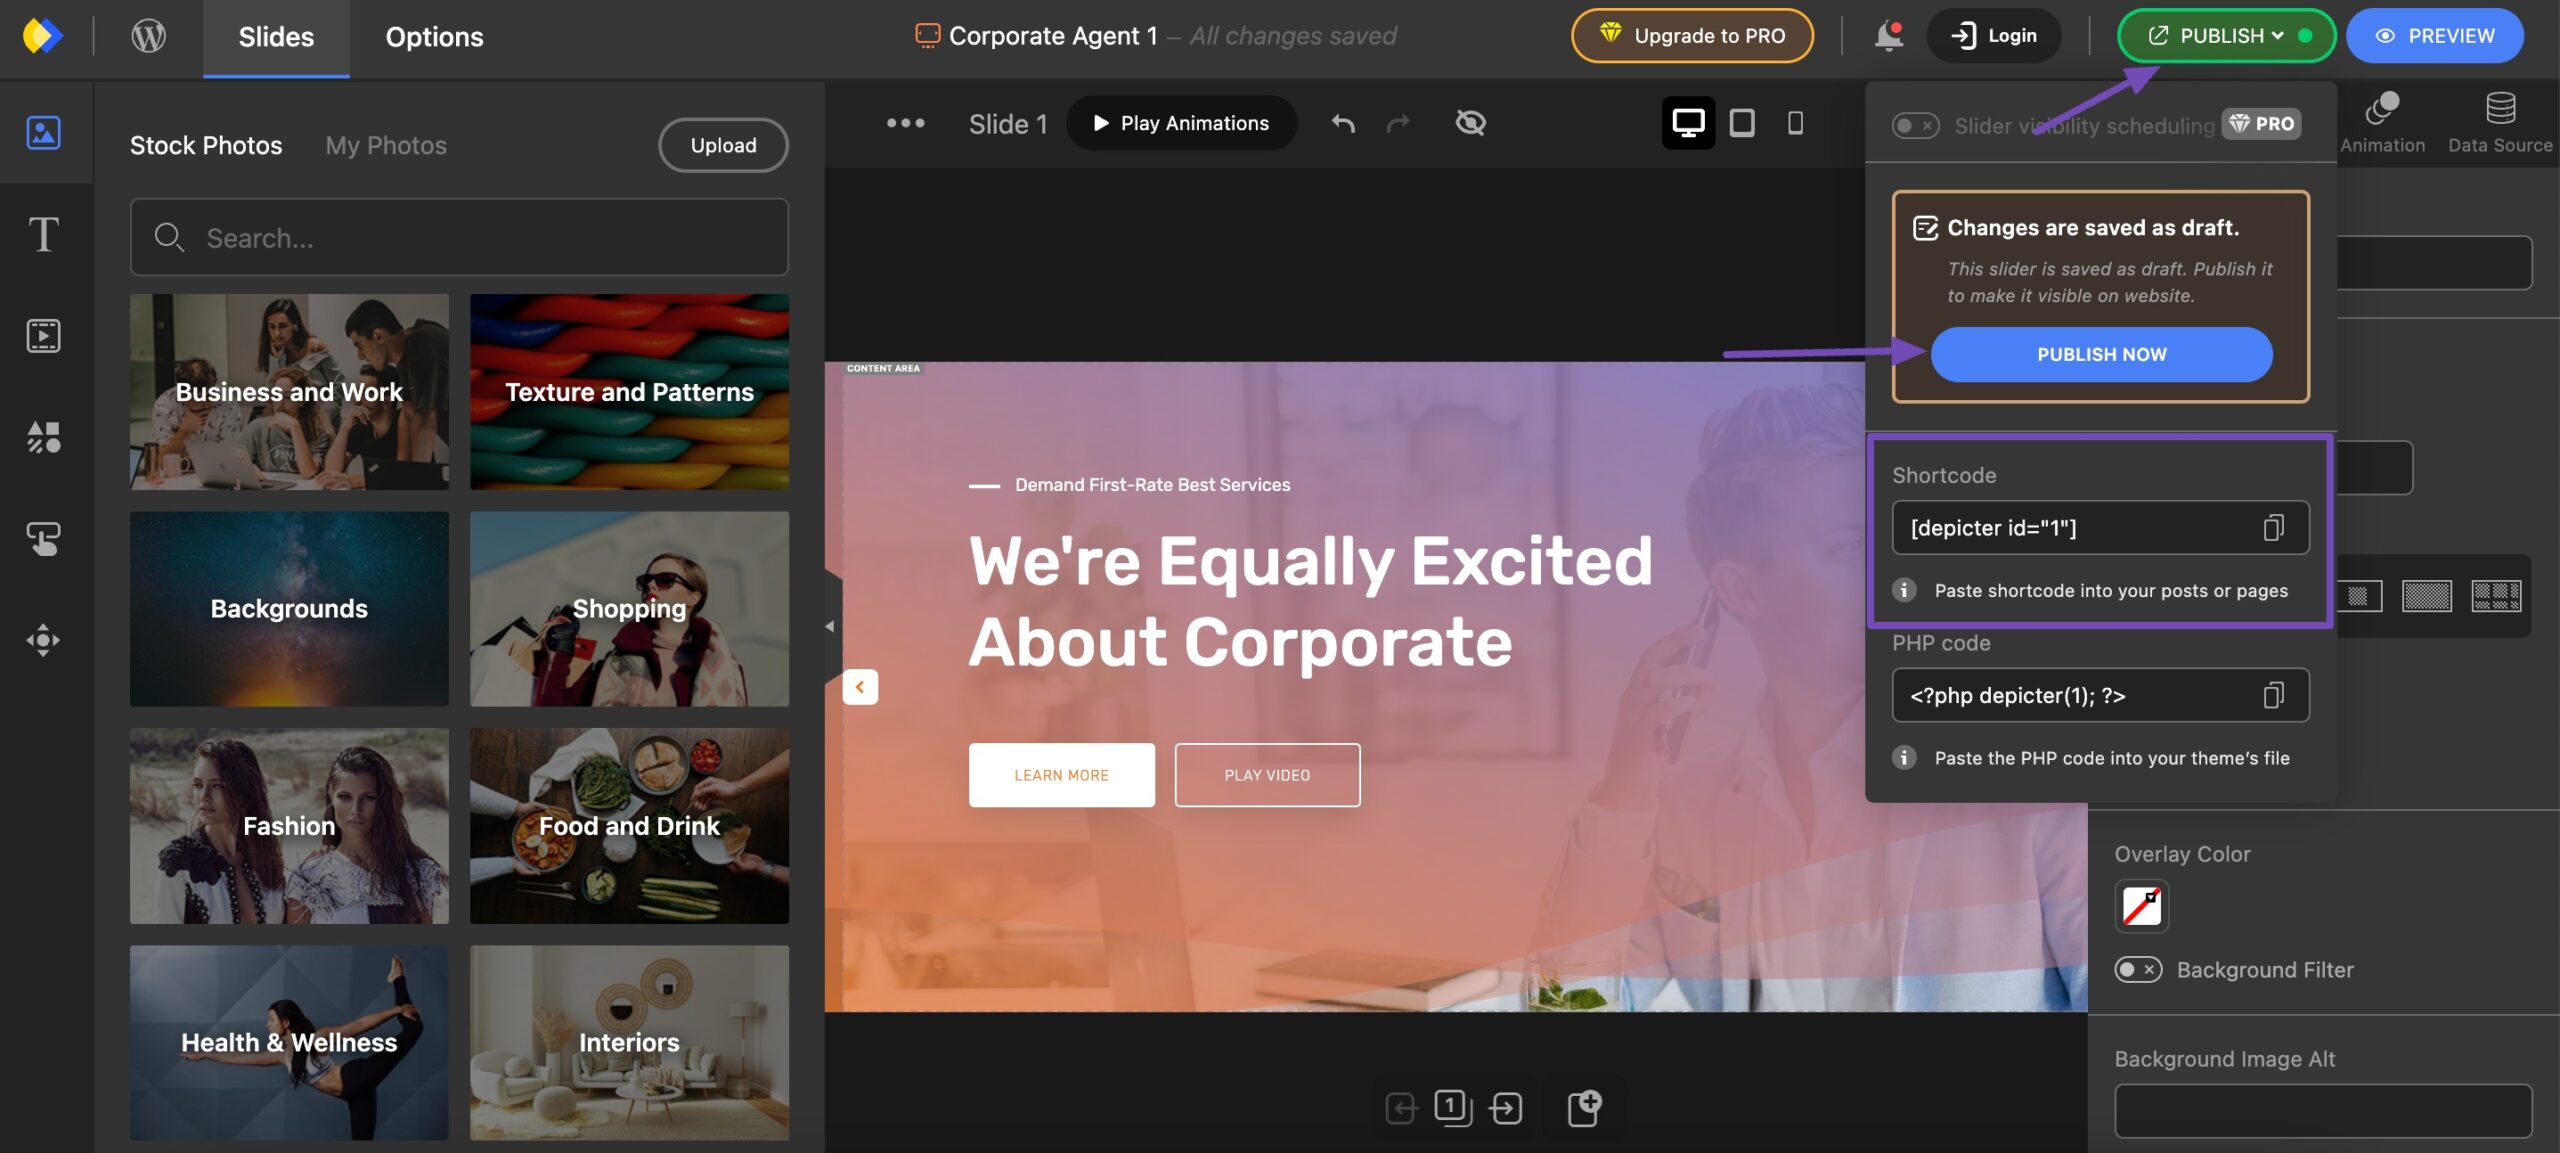
Once done, click the PUBLISH button in the upper right corner of the page.
Copy the generated slideshow shortcode and press the PUBLISH NOW button to launch the slideshow.
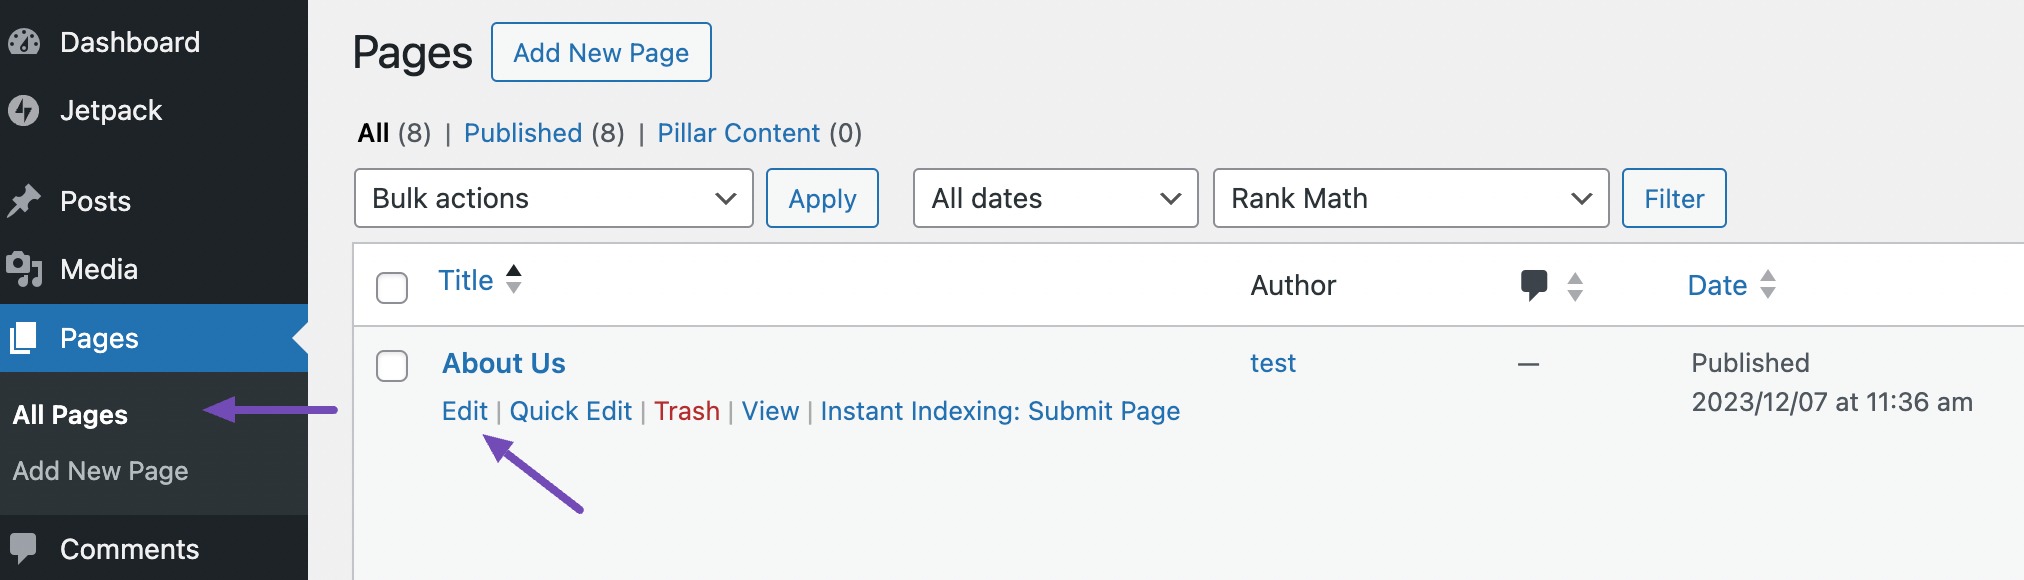
In order to add a slideshow on a specific website page, navigate to Pages → All Pages section from your WordPress dashboard.
Choose the page where you want to add a slideshow by clicking Edit, as shown below. Alternatively, click Add New Page to create a new page.
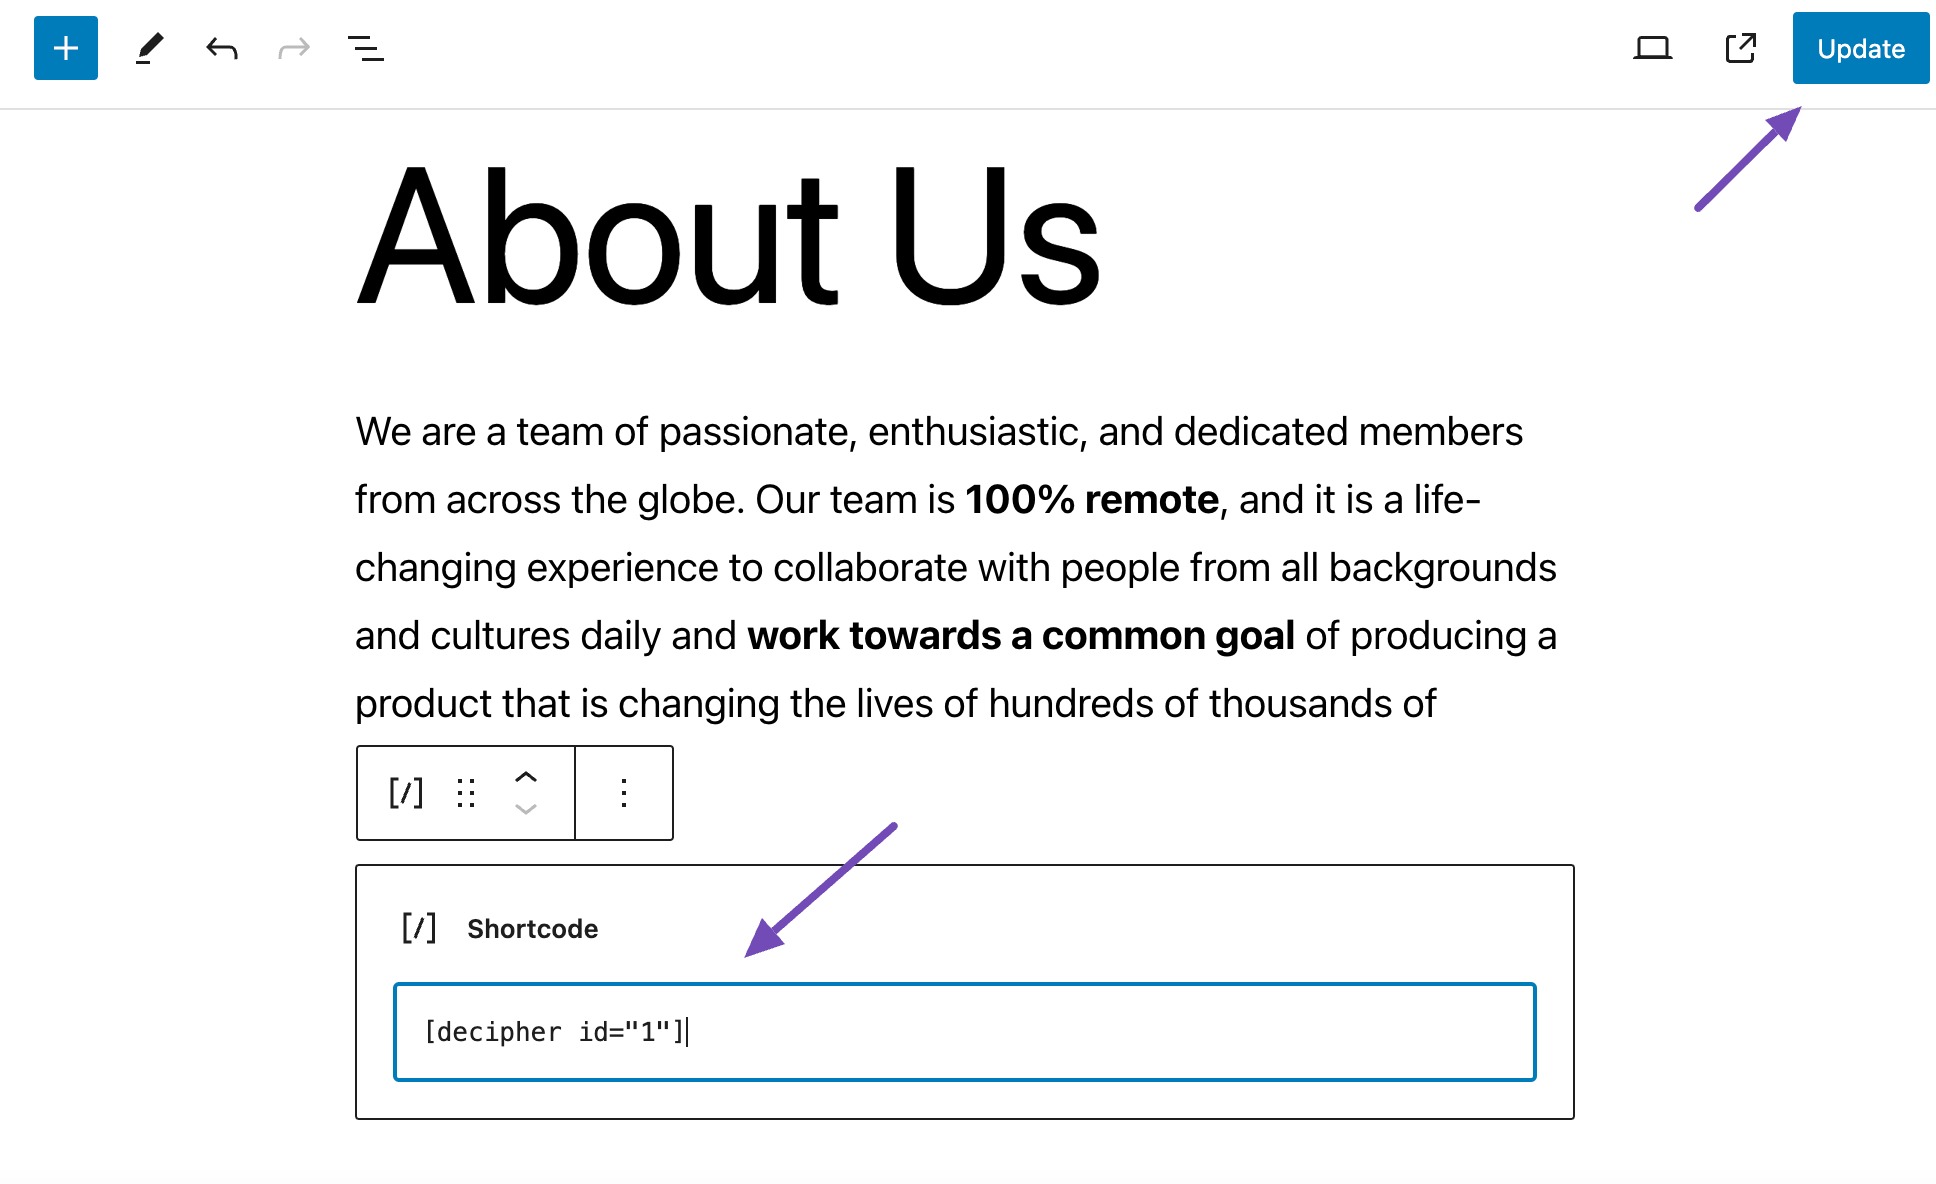
Once you’ve copied the slideshow shortcode, locate the Shortcode block, as shown below.
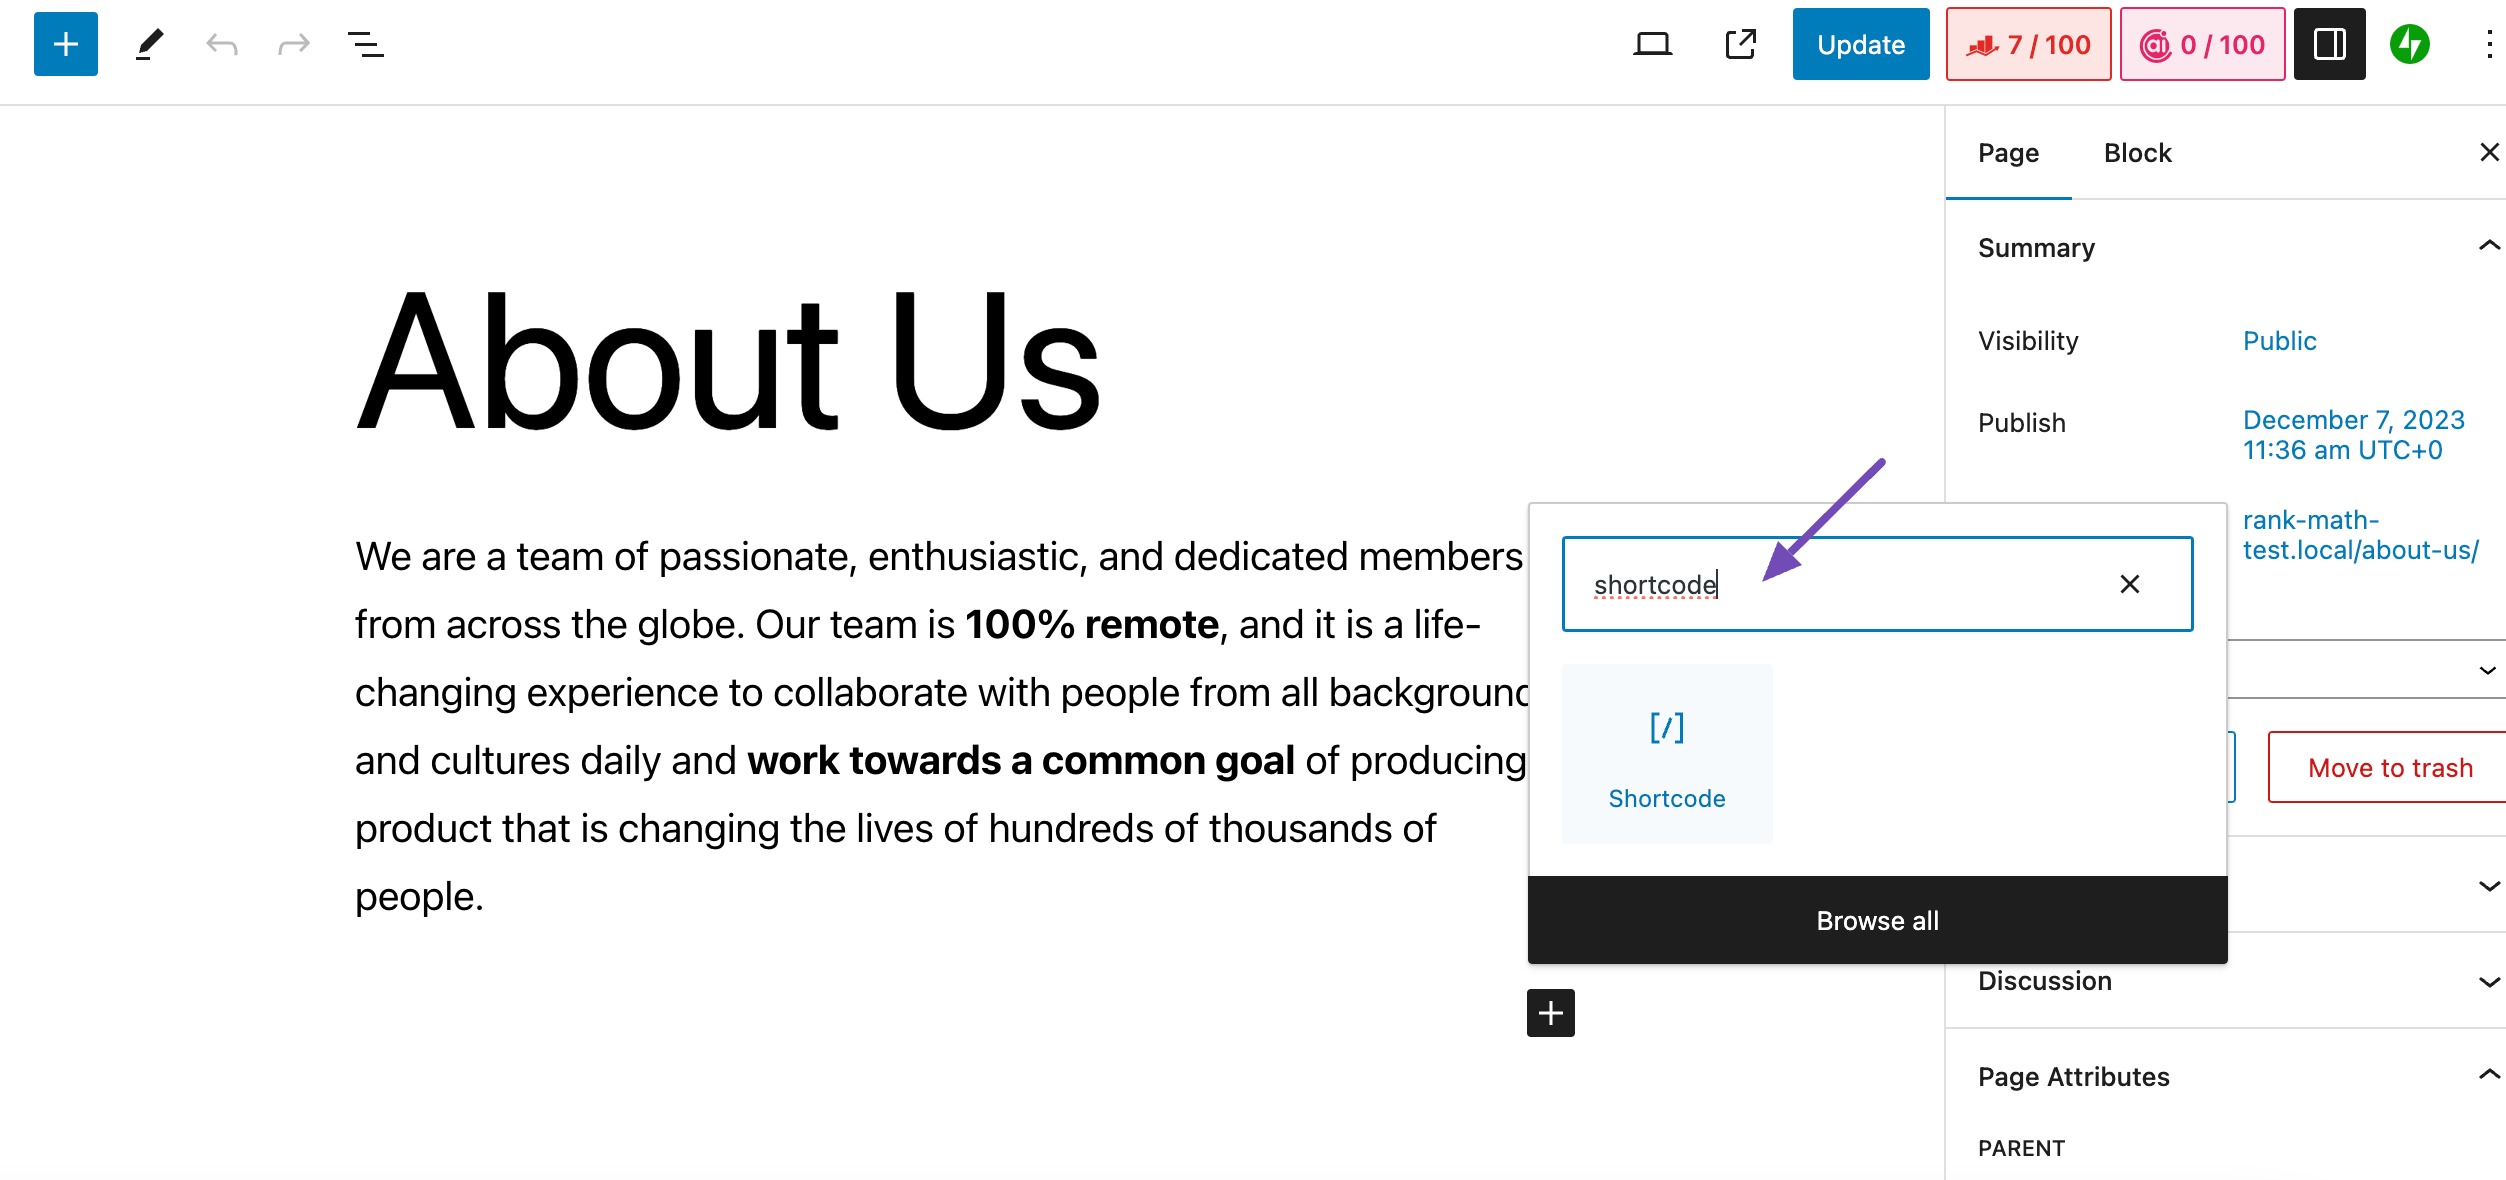
Paste the copied shortcode and click on the Update button, as shown below.
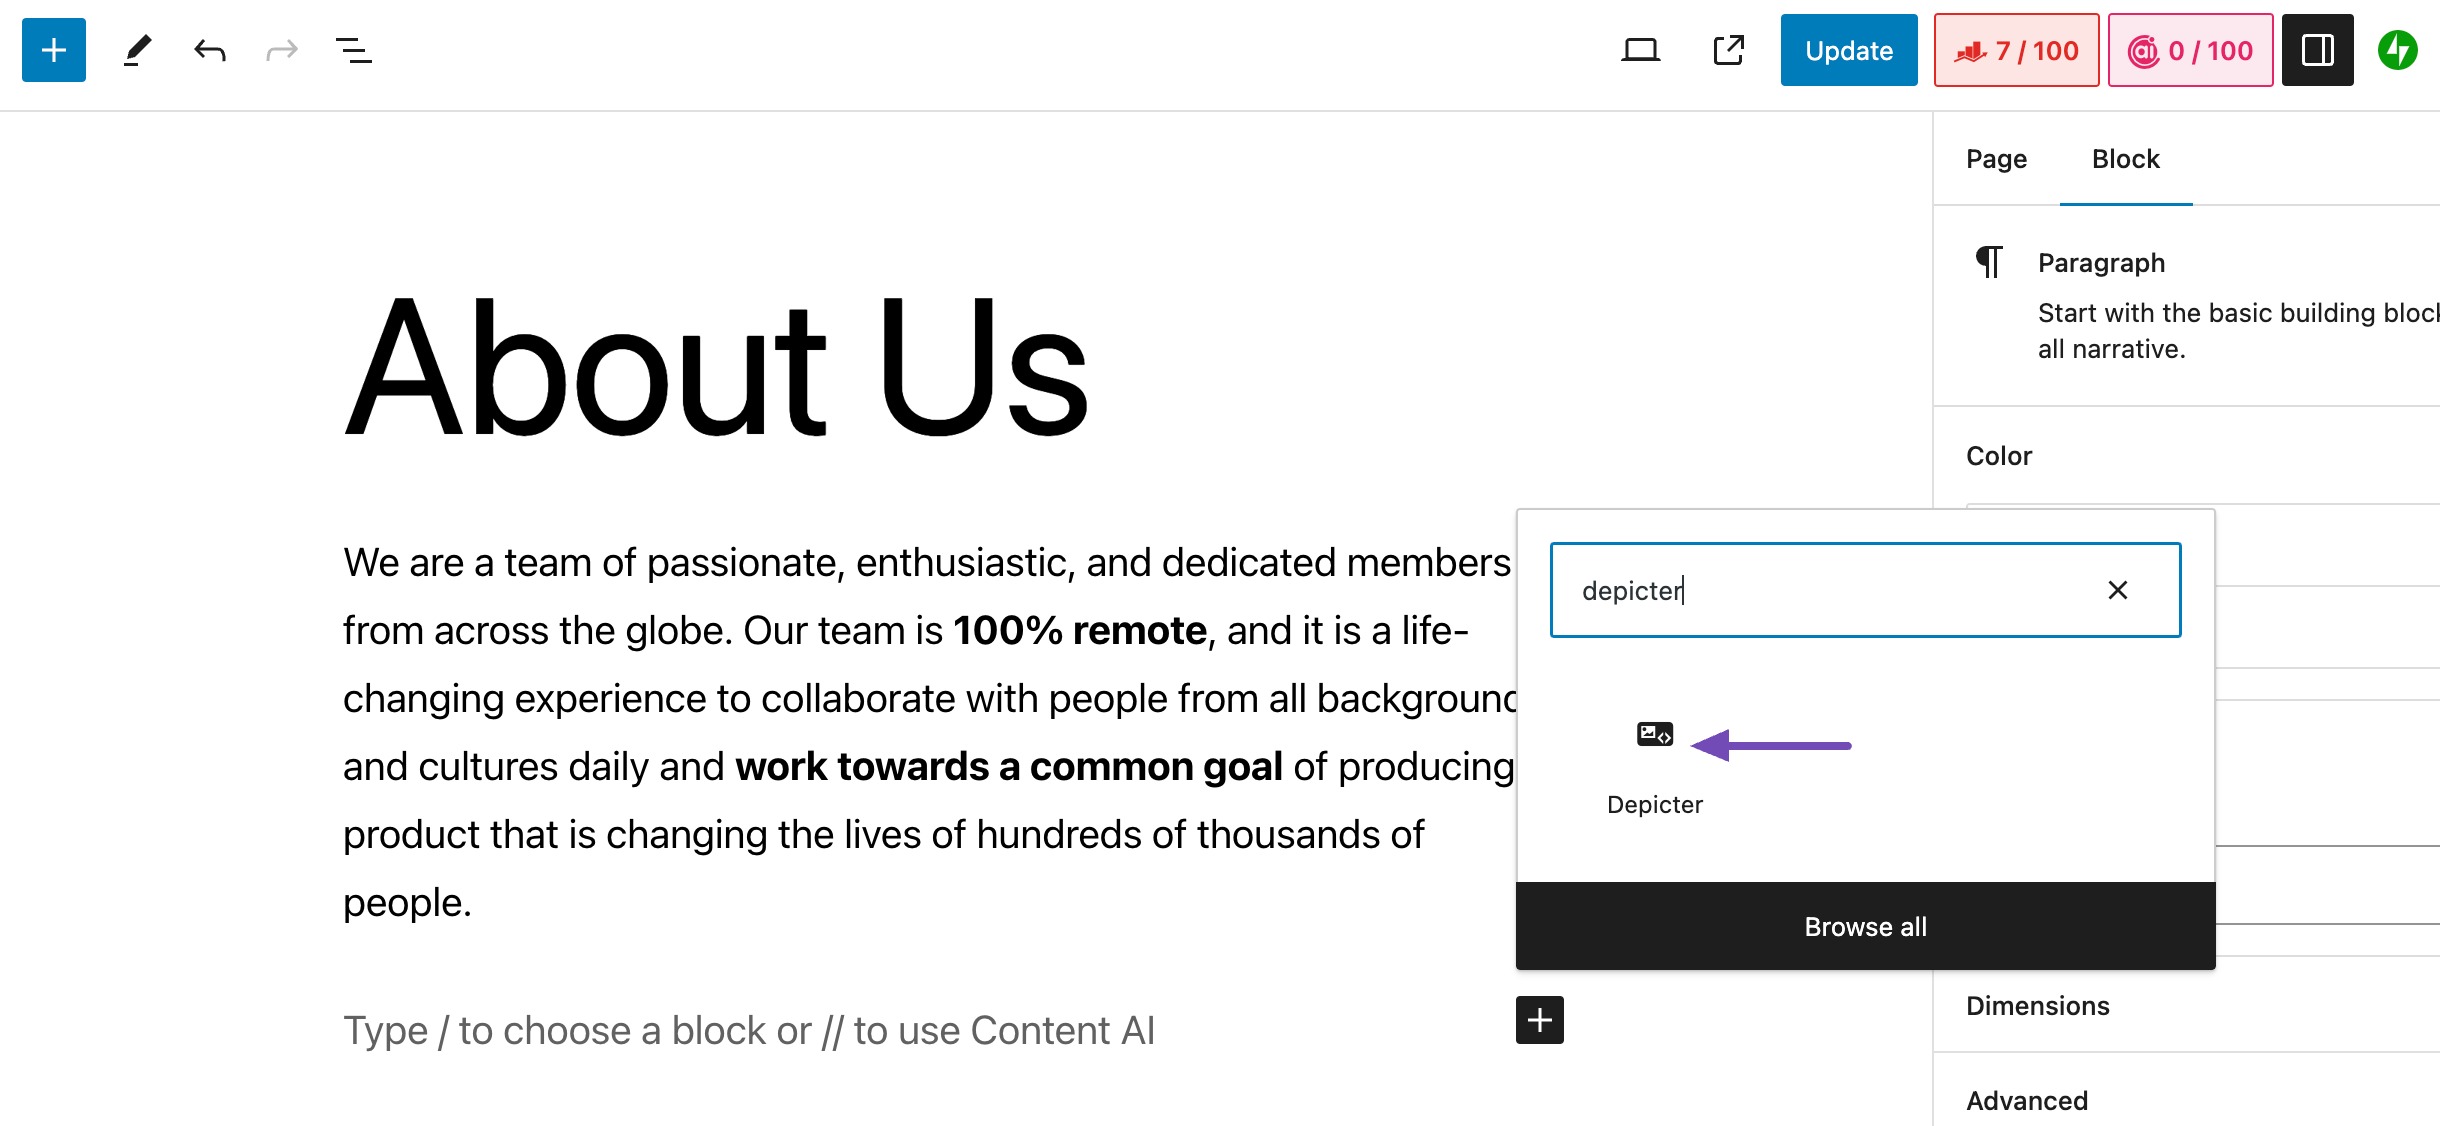
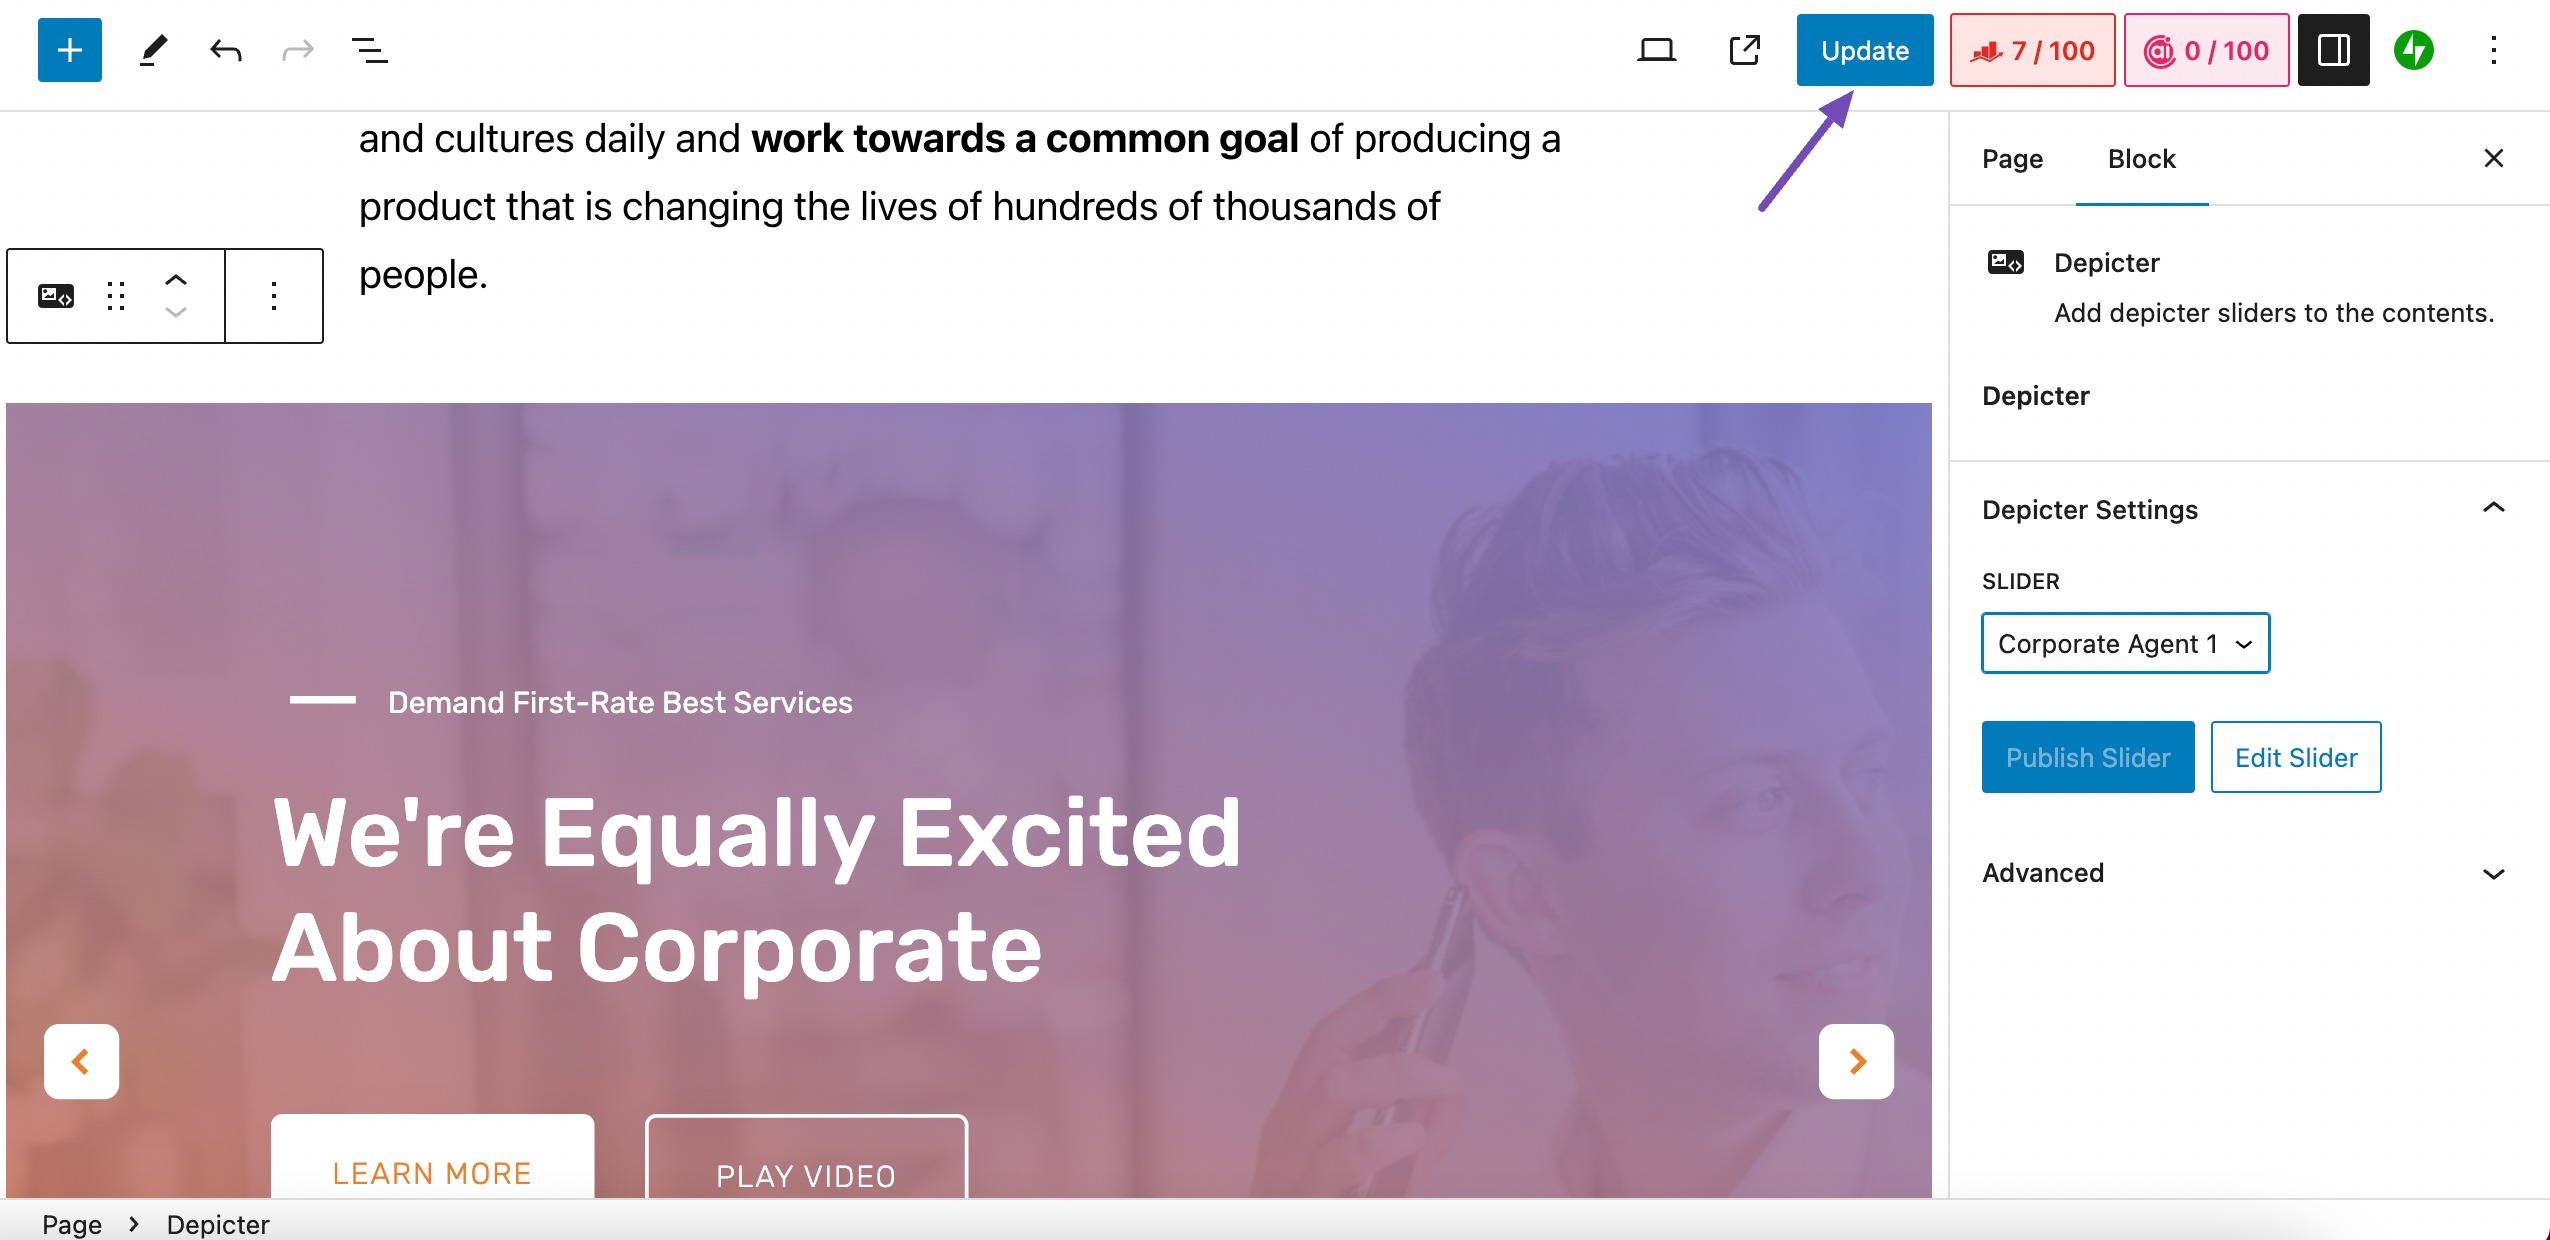
You can also use the plugin widget by searching for Depicter in the block inserter. Once located, select it as shown below.
Navigate to the Depicter Settings section in the Block tab and select the desired slideshow, as shown below.
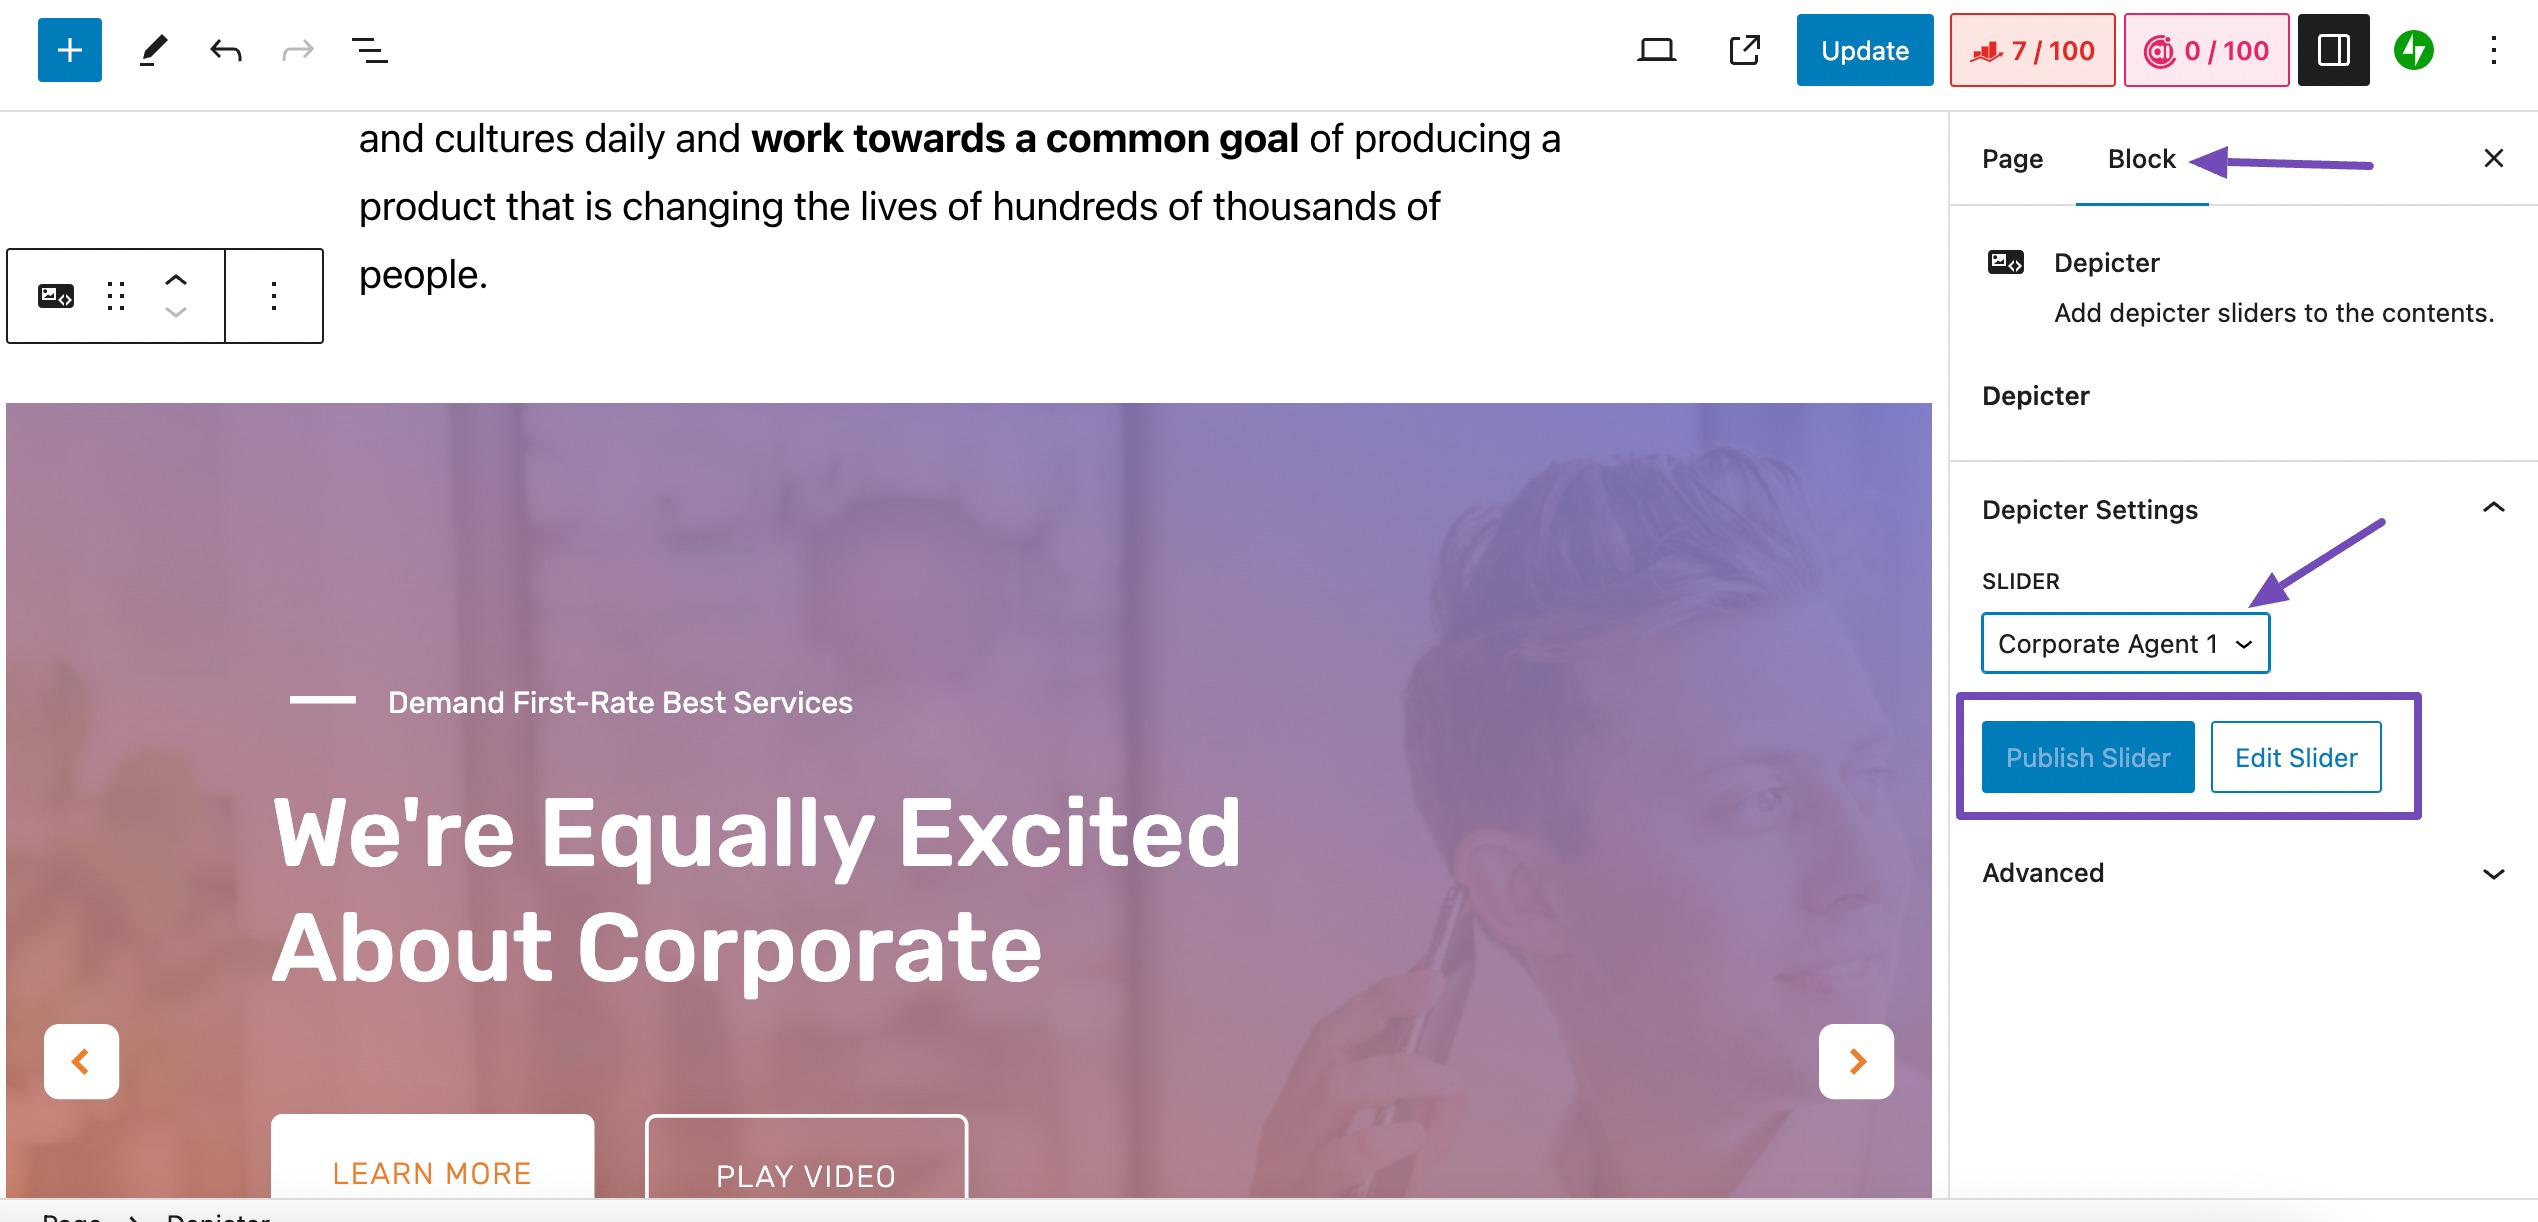
You’ll see the Publish Slider button if the selected slideshow hasn’t been published. If it’s already published, the Publish Slider button will be inactive, as shown above.
For additional slider edits, click the Edit Slider button.
Once you’ve made the changes, click the Publish/Update, as shown below.
3 Frequently Asked Questions
Can I use more than one slideshow on a single WordPress page?
Yes, you can use as many slideshows as you like on a WordPress page. However, it’s essential to use them strategically and avoid overloading the page with too much visual content.
What are the best practices for using slideshows on WordPress websites?
Limit each slideshow to 10 slides.
Use clear, relevant, visually appealing, and high-quality images.
Craft short, informative, and engaging captions.
Optimize slide transitions for smoothness.
Set appropriate timing for a comfortable viewing pace.
Ensure mobile responsiveness.
Test and refine for optimal performance on various browsers and devices.
What are some popular WordPress slideshow plugins?
Some popular WordPress Slideshow plugins include Jetpack, MetaSlider, Depicter, and Slider Revolution.
4 Conclusion
Slideshows have become an important element of successful WordPress websites.
You can strategically add a slideshow that can elevate your website, thereby captivating visitors, improving user experience, and effectively conveying your brand’s narrative.
With many plugins available, such as Depicter, creating dynamic presentations becomes a seamless experience.
You can effortlessly enhance your website’s visual appeal by selecting templates, customizing settings, and incorporating essential elements. The ability to showcase promotions, testimonials, or any other engaging content through a slideshow adds a layer of interactivity that captivates your audience.
This step-by-step guide empowers you to add a slideshow and elevate your WordPress site with compelling and eye-catching visuals. Typically, you can employ a shortcode or page builder widget to add a slideshow to your WordPress posts or pages.
If you are successfully able to add a slideshow to your WordPress website with the help of this article, please let us know by Tweeting @rankmathseo.


