Introduction:
A playwright is an open-source test automation library that was initially created by Microsoft contributors. It supports programming languages like NodeJS, Java, C#, and Python. The most widely used combination of NodeJS and Playwright is JavaScript/TypeScript, which is available under the Apache 2.0 License.
If you are new to the playwright, you can refer to my Previous Blog about what is playwright, its usage, and its features.
Getting Started with Playwright Setup:
This Blog explains how to set up Playwright with NodeJS easily.
Pre-Requisites:
- Install Visual Studio Code: Download and Install Visual Studio Code.
- Install NodeJS: Download and Install Node JS.
How to Install and run Playwright Test Script:
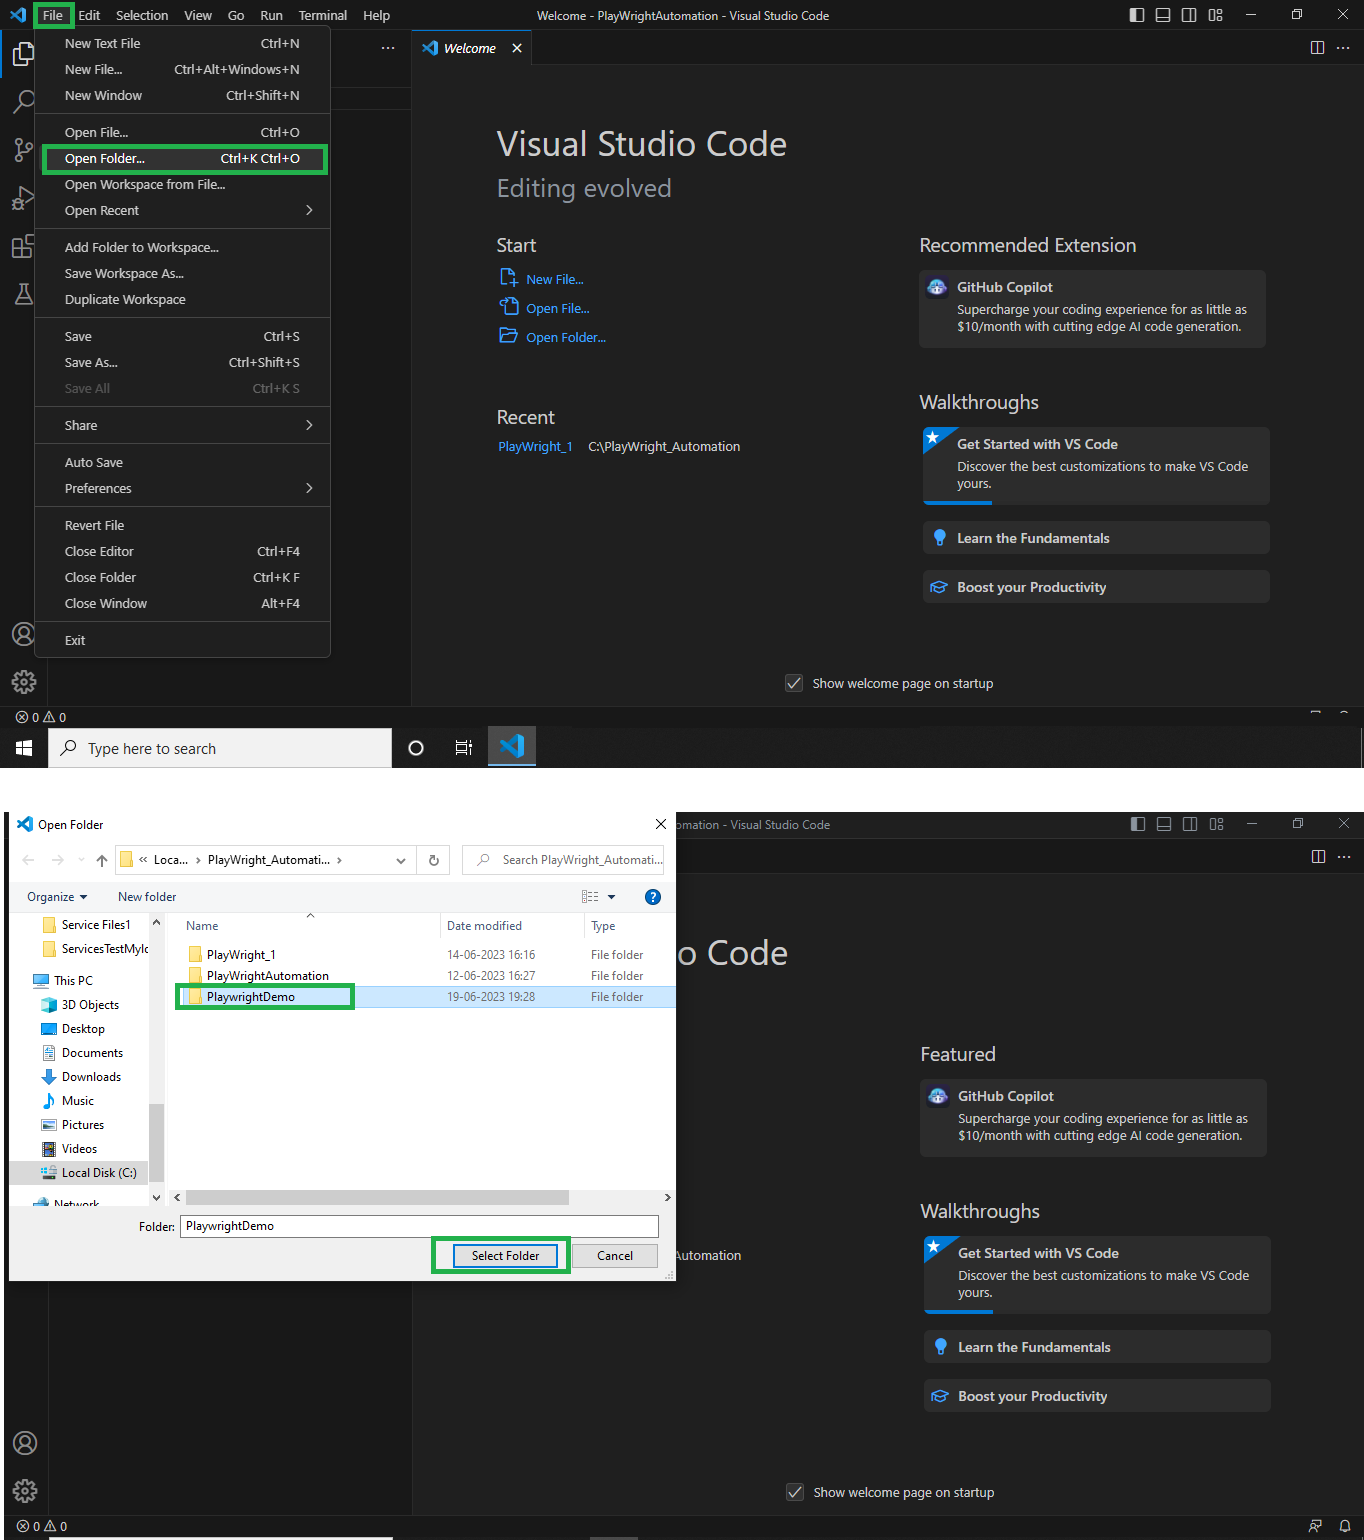
Step 1: In Visual Studio Code, make a fresh directory (e.g., PlaywrightDemo).
Step 2: Open the newly created directory in Visual Studio Code. From VS Code, click on File > Open Folder > Select the newly created folder (PlaywrightDemo).
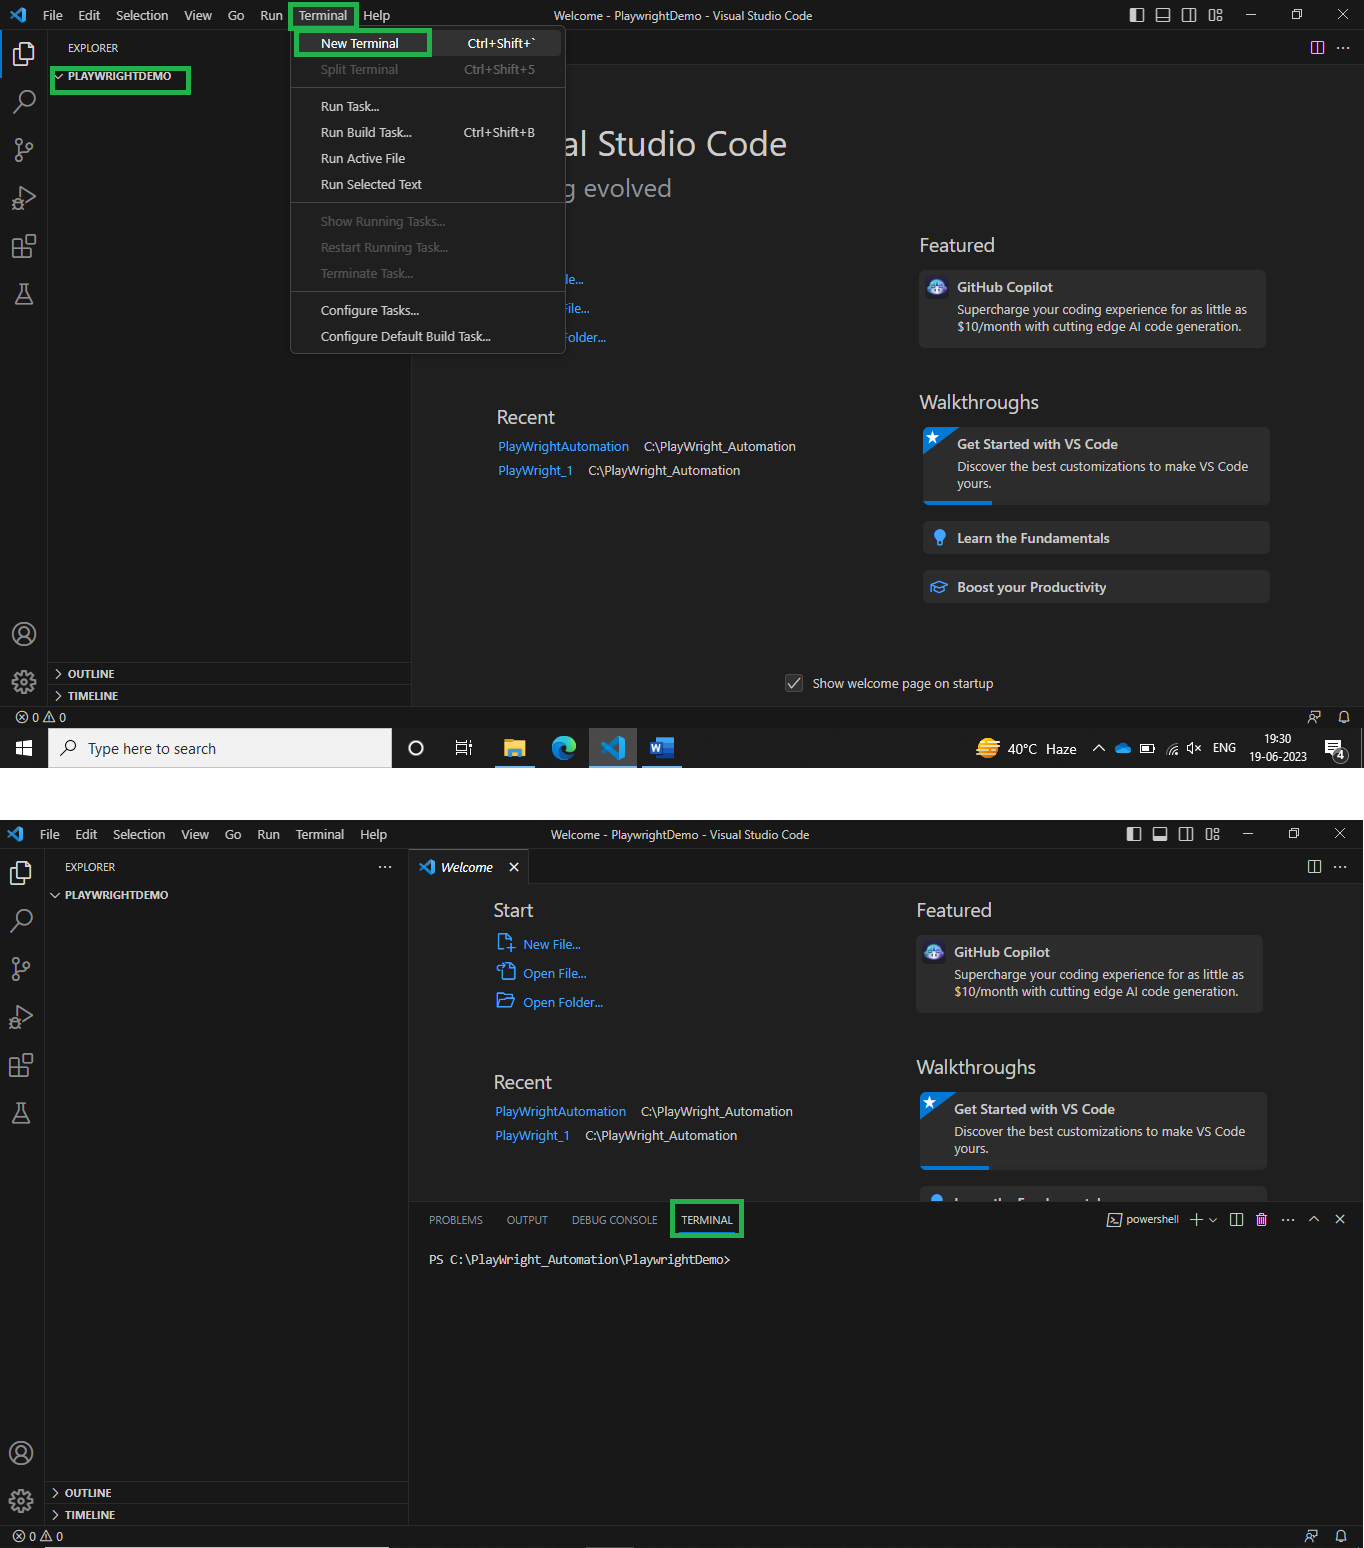
Step 3: Through VS Code, click on the Terminal Menu and select “New Terminal”.
Step 4: Enter the below command in the terminal to begin the Playwright installation.
npm init playwright
Note: The command mentioned above asks some questions. Please complete the necessary inputs. In this Blog, we are using javascript language.
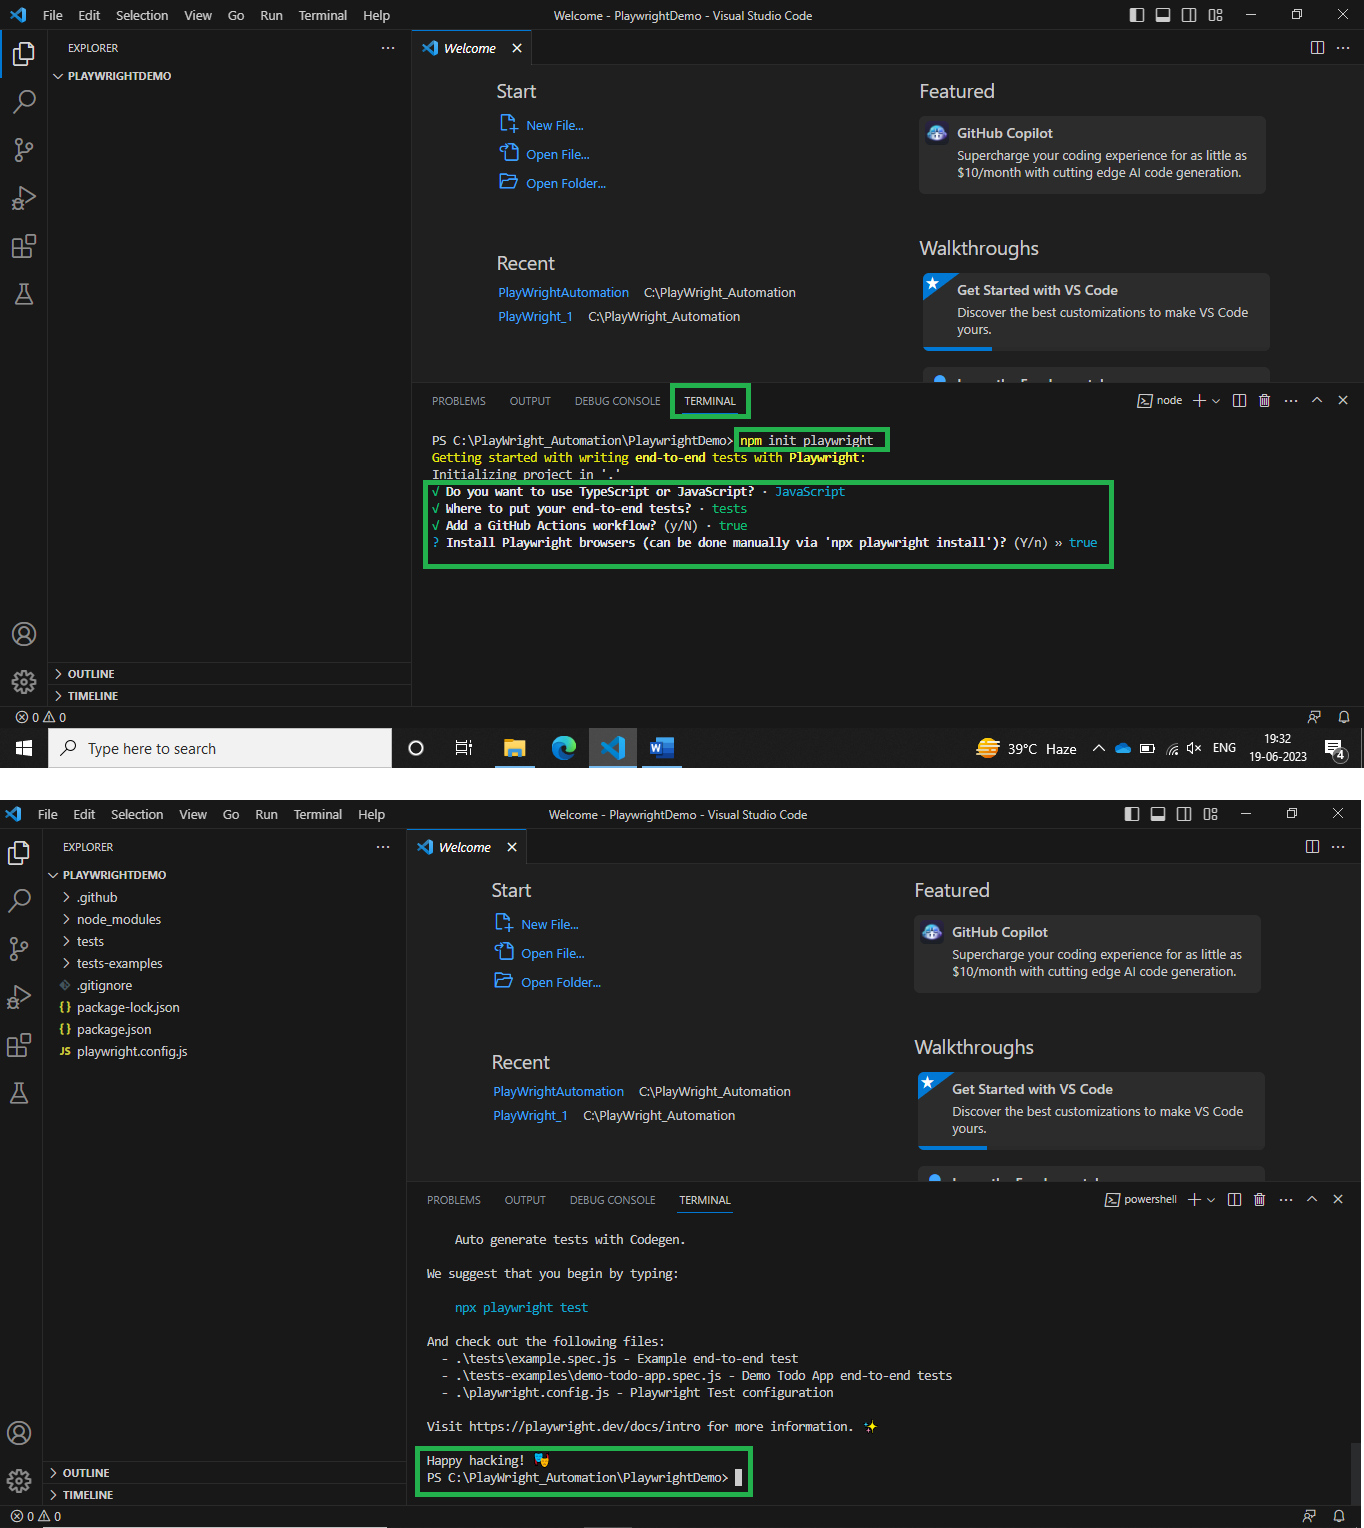
The Command Mentioned Above does the Following Action:
- Creates Package.json
- Installs npm library
- Sets up basic Files and Folders
-
testsfolder: This folder is where you store your actual test scripts. By default, Playwright creates anexample.spec.jsfile inside this folder. You can add more test files in this directory as per your requirements..gitignore: This file is useful if you’re using a Git repository for version control. It specifies files and folders that should be ignored by Git. Playwright automatically creates a.gitignorefile to exclude unnecessary files from being tracked in your repository.package.jsonandpackage-lock.json: These files are created to manage dependencies and package information for your project.package.jsonstores metadata about the project and lists the dependencies required for your Playwright scripts.package-lock.jsonis automatically generated and ensures consistent and reproducible installations of the specified packages.playwright.config.js: This file serves as the global configuration file for Playwright. It allows you to customize various options for your Playwright setup. You can modify this file to configure specific browsers, set up default launch options, define test timeout, and more.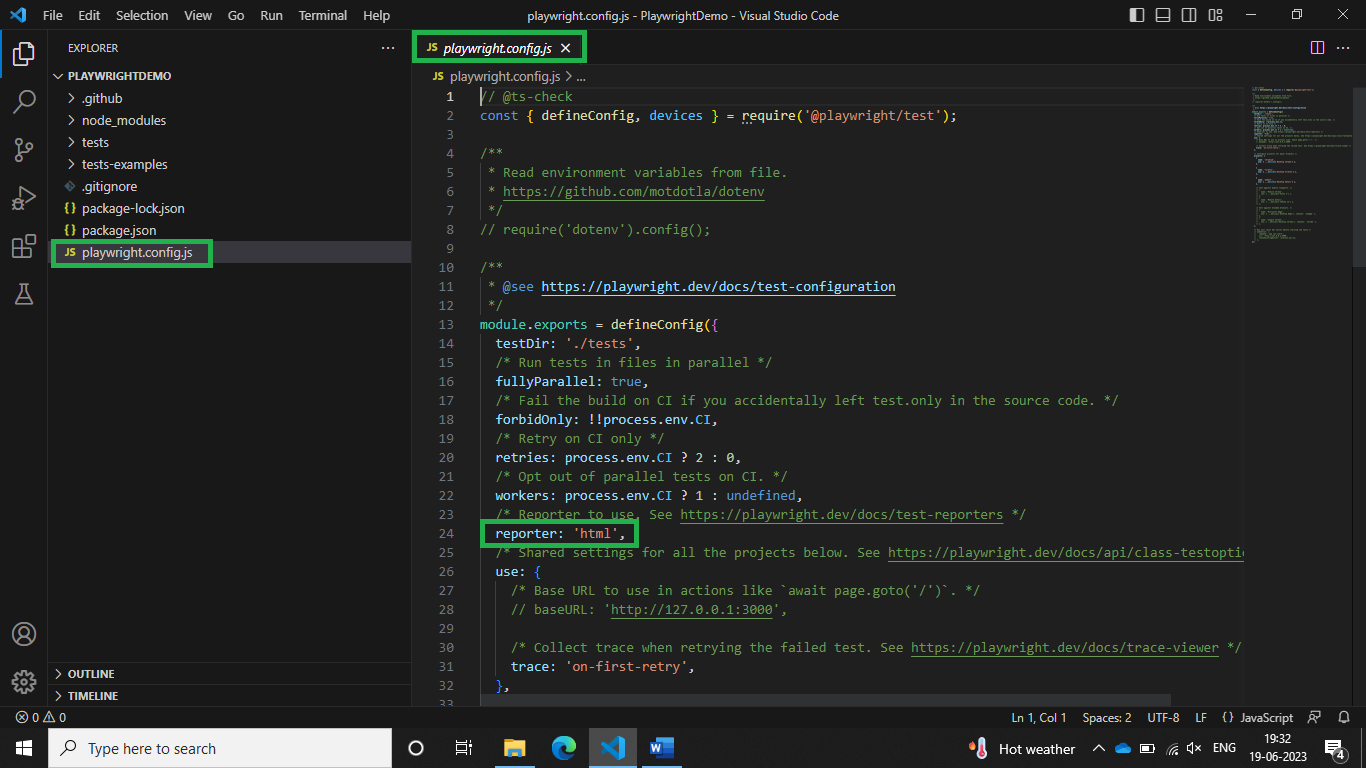
Step 5: Install Browsers
Playwright configures itself to run on existing browsers, which can create issues while running tests. Therefore, it is recommended to use the Playwright browser. You can install all different browsers in Playwright with the command mentioned below.
npx playwright install
Step 6: Execute the playwright Test Script
Playwright creates the playwright.config.js file, which is the global configuration file, upon installation and includes some settings. By default, the global configuration file contains the values to run on all the browsers. When you run the Playwright test, it executes on all three browsers.
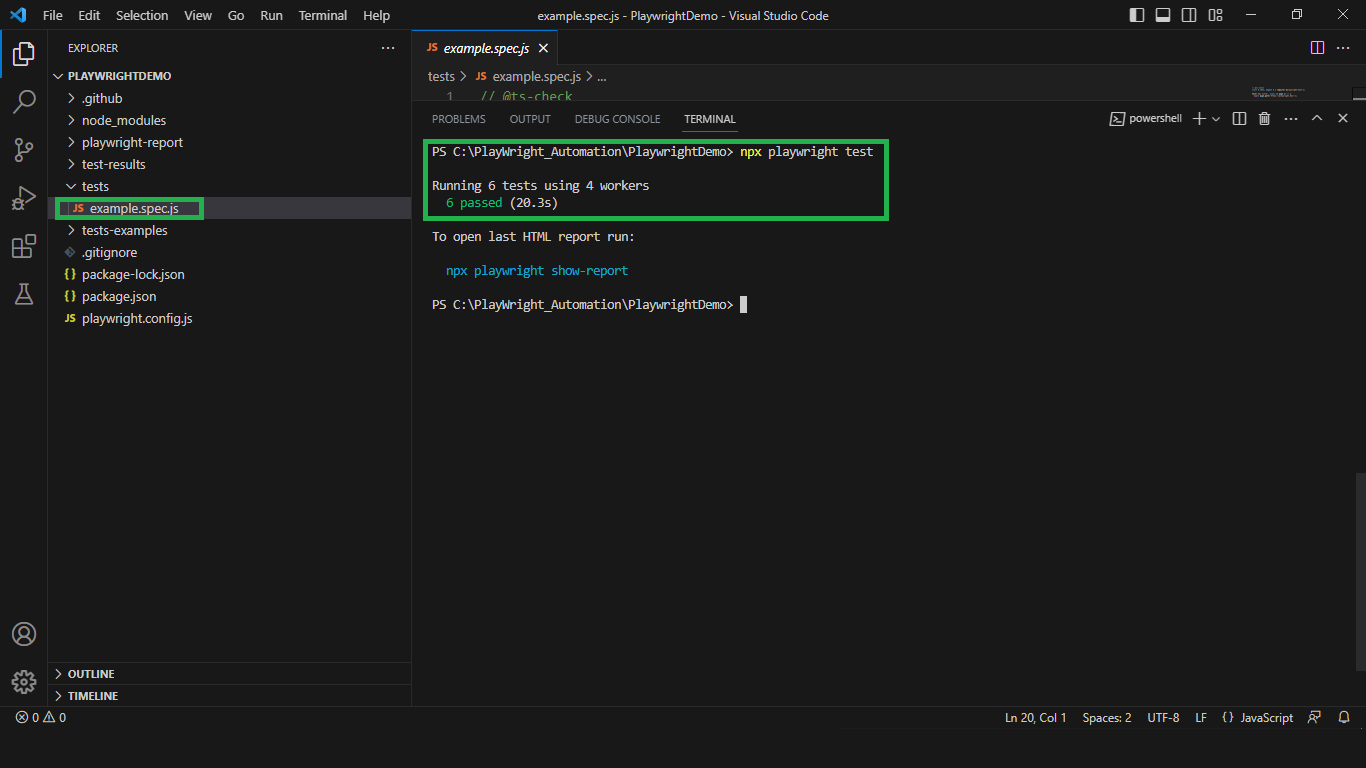
Note: As of now, we haven’t created any playwright tests. We are running the Test Runner over the sample test auto-generated by Playwright.
Run Playwright Spec by Entering the Command Below:
npx playwright test
Let’s Understand the Above Command:
We wanted to run all the spec files inside the tests folder, hence we haven’t mentioned any specific spec file name.
Playwright runs in headless mode by default.
If you wanted to run tests in headed mode, just enter the below command.
Command:
npx playwright test – headed
Once you execute the above command, the Playwright tests start executing in all browsers.
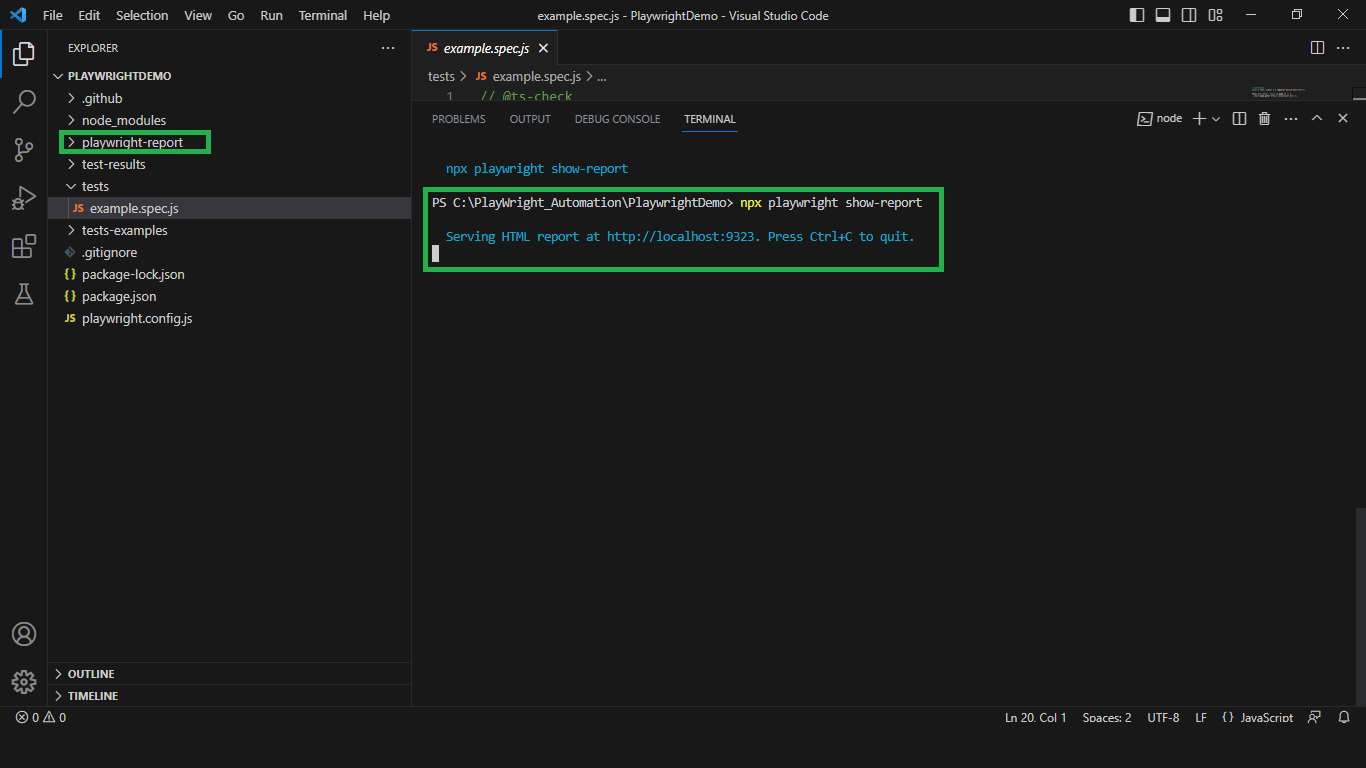
Step 7: View the Report
The Playwright test will generate the HTML report automatically and place it in the playwright-report folder because we specified it in our playwright.config.js file. (Default reporter type in playwright.config.js file is HTML only).
The HTML report that was generated, can be read by entering the below command:
npx playwright show-report
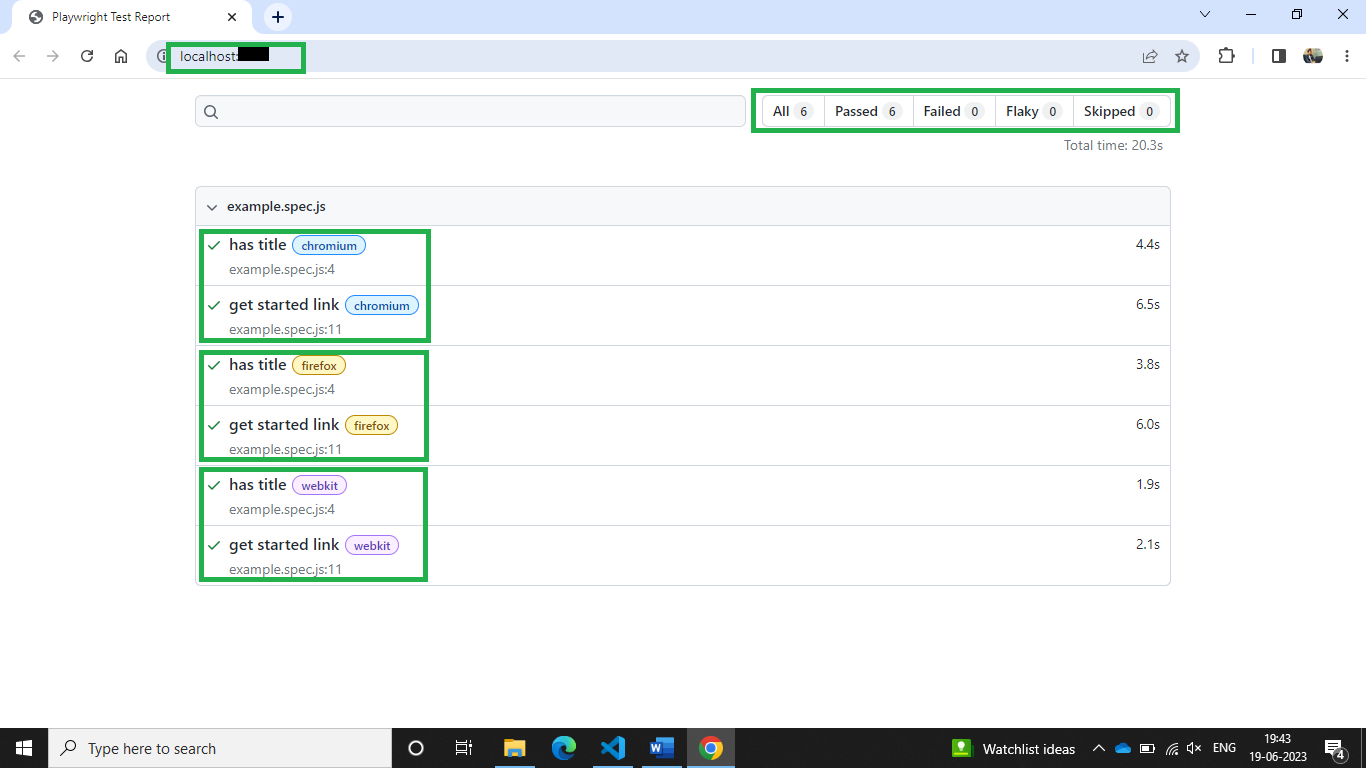
HTML Report:
Conclusion:
In this article, you learned about how to Install a Playwright with NodeJS, how to run the test, and how to generate tests report. I hope you enjoyed reading this post and found it to be useful.