
What is a Slowly Changing Dimension?
A Slowly Changing Dimension (SCD) is a dimension that stores and manages both current and historical data over time in a data warehouse. It is considered and implemented as one of the most critical ETL tasks in tracking the history of dimension records.
Type 1 SCDs – Overwriting
In a Type 1 SCD the new data overwrites the existing data. Thus, the existing data is lost as it is not stored anywhere else. This is the default type of dimension you create. You do not need to specify any additional information to create a Type 1 SCD.
Slowing Chaining Dimension Type 1:
Slowing Chaining Dimension Type 1 is used to maintain the latest data by comparing the existing data from the target. It will insert the new records. And update the new data by overwriting the existing data for those records that are updated. All the records contain current data only.
It is used to update the table when you do not need to keep any previous versions of data for those records (No historical records stored in the table).
Example:
This sample mapping is to showcase how SCD Type 1 works and in this exercise, we do not compare column to column for updates to check if is there any change in the existing record. In this we are only checking for Primary Key if exists then Update else Insert as new.
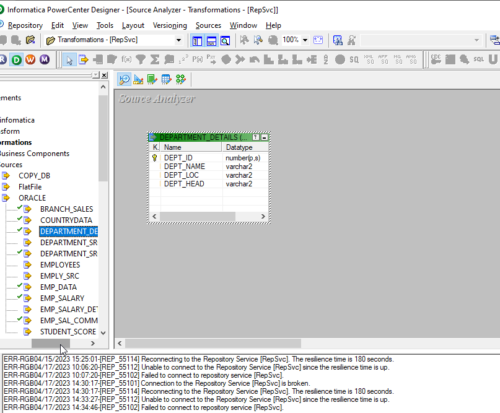
Please connect & open the Repository Folder where you want to create mapping and workflow.
1. Connect and Open the folder if not already opened.
2. Select Tools –> Mapping Designer

3. Select Mappings –> Create –> Enter the mapping name you want to create. Then click on “OK”.
4. Drag & drop the required source instance to mapping.
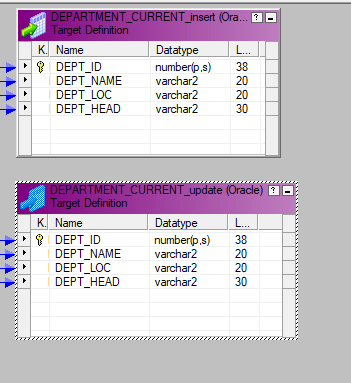
5. Drag & Drop target table to mapping (take 2 instances one for Insert and the other for update process)
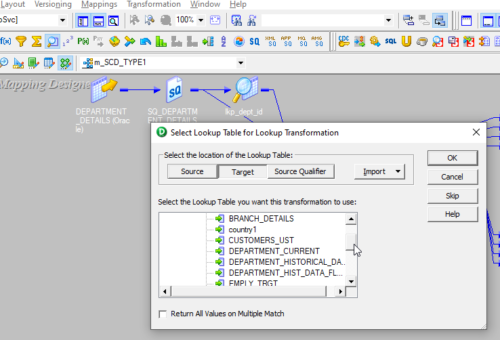
6. Add Lookup to the Mapping. The lookup instance is on the target table to check whether the incoming records exist or not, it is not then inserts else update them. (Here the lookup is connected one).
Target Table
Here we need to look up the target table so select the location of the lookup table as “Target” and select the table from the list under the Targets folder as shown below.
Then Click on “OK”
7. The lookup instance will be added to the mapping as shown below.
8. Now Drag the required columns from the Source qualifier to look up the transformation as below.

9. To define the lookup condition, double click on lookup transformation –> go to the condition tab

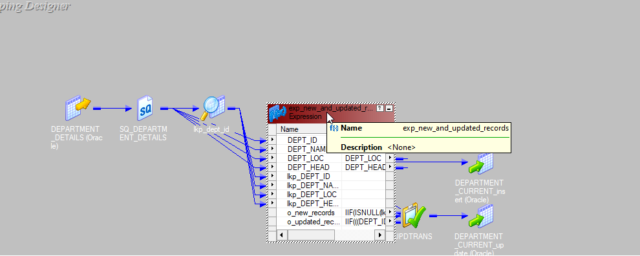
10. Drag Lookup Primary Key (from lookup) and all other columns dragged from source qualifier to lookup are dragged to Router Transformation to route/separate records for insert and update.
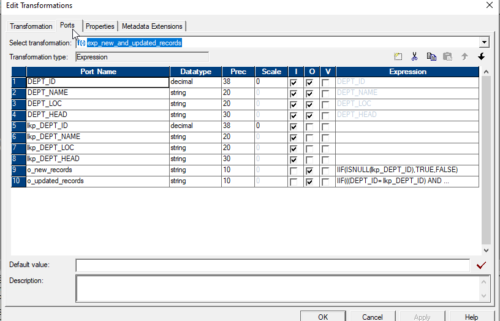
Output Variable Ports
And we will create two output variable ports for new records and updated records.
o_new_records = IIF(ISNULL(lkp_DEPT_ID),TRUE,FALSE)
o_updated_records = IIF(((DEPT_ID= lkp_DEPT_ID) AND
(DEPT_NAME!= lkp_DEPT_NAME) OR
(DEPT_LOC != lkp_DEPT_LOC) OR
(DEPT_HEAD != lkp_DEPT_HEAD)),TRUE,FALSE)
11. Condition to separate records for Insert and Update.
Double-click on Router Transformation — > go to the Group tab. To create 2 groups one for insert condition and the other for update condition.
For NEW_RECORD Group: o_new_records
Note: If case lookup DEPT_ID is null means there is no matching record in THE target so they go for Insert
For UPDATED_RECORDS Group: o_updated_records
Note: If case lookup DEPT_ID is not null means there is a matching record in the target so they go for Update

12. From NEW_RECORD Group of Router Transformation mapping columns to Target Table instance taken for Insert
(Note: Default incoming rows type is the insert that is why here we are not using update strategy for insert flow)
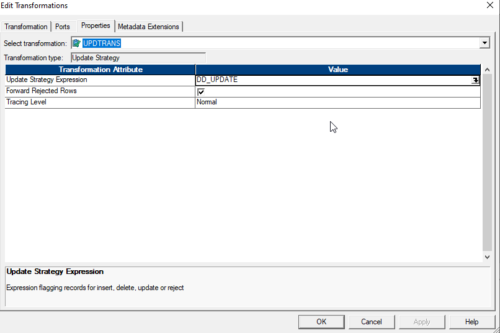
13. Add an update strategy to flag incoming records for update purposes. Drag the required column from Router Transformation – UPDATE_RECORD type Group as shown above
14. Double click on Update Strategy –> go to the Property tab
under “Update Strategy Expression” write: DD_UPDATE as shown below
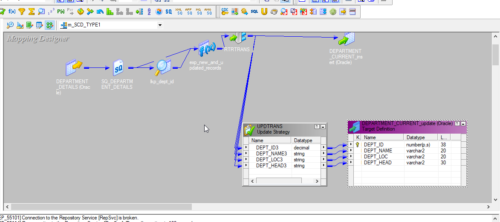
15. Map the required columns from Update Strategy to Target Instance taken for Update flow.

16. Create the workflow for the above mapping.
17. Connect and open the folder under which you have created the mapping.
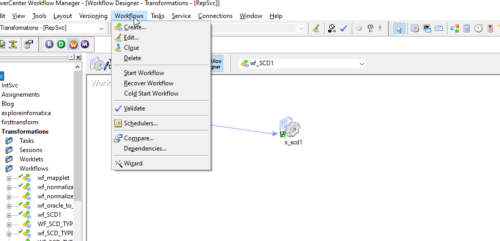
18. Select “Workflows” from the menu –> Click on “Create…” as shown below
19. It will Pop Up on the below screen. Entry the name for the workflow.
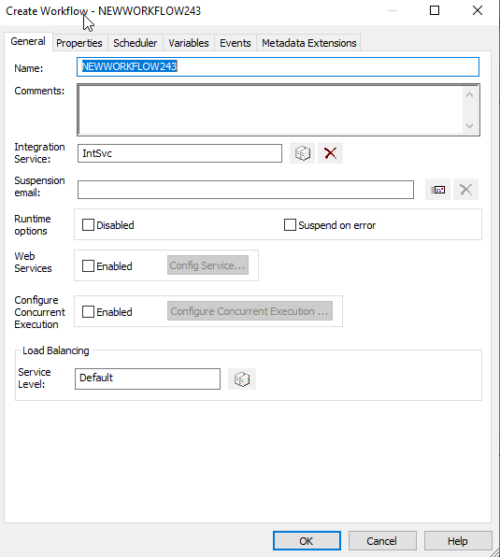
Then Click on “OK”.
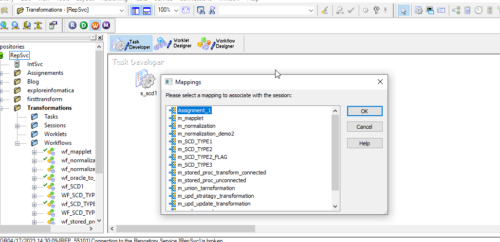
20. Create the session for the mapping by clicking the icon in the below screen. It will Pop up the Mappings list and from the list the mapping for which you want to create this session. As shown below.
Now, the session got created, then link the session with the start icon as below.
21. Double-click on Session then goes to –> Properties tab:
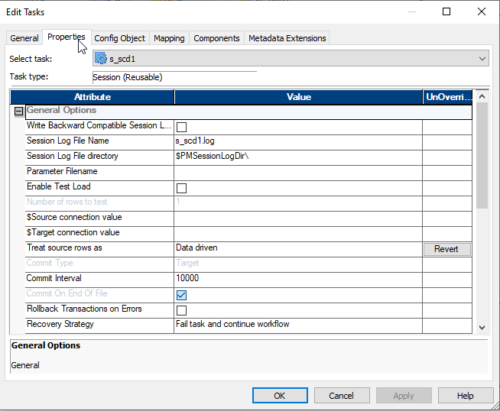
By default, Treat source rows as will be inserted but whenever you will add an update strategy in the mapping. Automatically Treat source rows as will be changed to Data Driven.
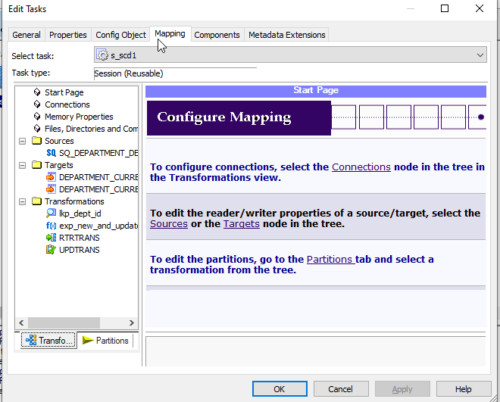
22. Then go to –> Mapping tab to assign/map source, target, and lookup database connection information
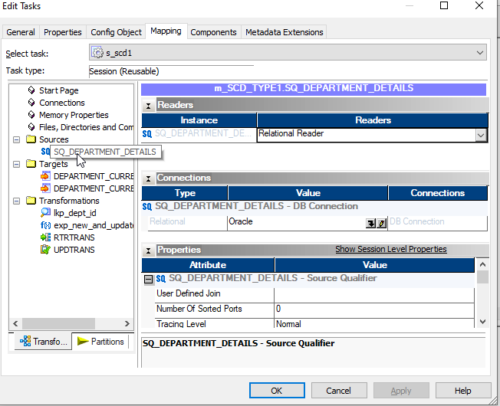
23. Go to the Sources folder in the left-side navigator, then select the source (SQ_DEPARTMENT_DETAILS) to assign a database connection. Click on the down arrow button to get the list of connections available for this repository and select the required one from the list. ex: oracle is the connection name pointing to the Oracle database in this example,
24. similarly go to the Target folder in the left-side navigator, then select the target (DEPARTMENT_CURRENT_insert) to assign a database connection. Click on the down arrow button to get the list of connections available for this repository and select the required one from the list. ex: Oracle is the connection name pointing to the Practice database in this example,
In properties, session select Insert values to insert data into the target

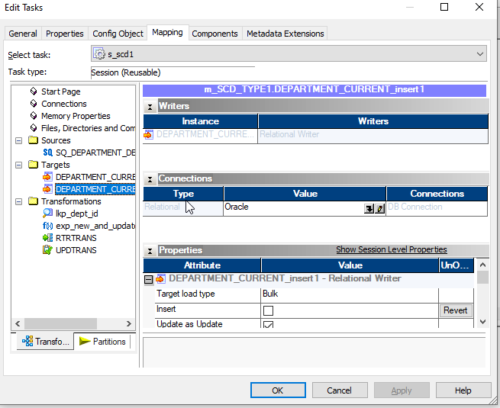
25. Then select the target folder in the left side navigator, then select (DEPARTMENT_CURRENT_insert1) to assign a database connection. Click on the down arrow button to get the list of connections available for this repository and select the required one from the list. ex: Oracle is the connection name pointing to the HR database in this example,
In properties, the session selects update values for updating data into the target
26. And check all the transformations Then click on “Apply” and “Ok”.
27. Save the session and workflow. then run the session/workflow.
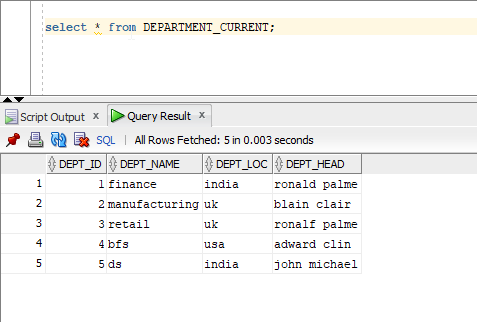
28. When you run the session first time all the records will be inserted.
29. In the below screen, I have INSERTED one record and MODIFIED record no 2, 4 and then you run the job a second time they will be updated.
30. In the below screen records highlighted with the red box are modified/updated records and highlighted in the green box are newly inserted records.
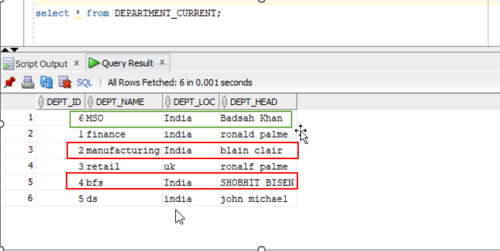
31. Other records which are not highlighted are overwritten records as they have no changes.
This is all about the Implementation of SCD type 1 in Informatica PowerCenter. I hope you enjoyed reading this post and found it to be helpful.
For more blogs click here.
Happy Reading!