With Universal Analytics being gradually phased out, now is the best time to get to know Google Analytics 4.
Google Analytics 4 (GA4) provides you with greater data collection accuracy than Universal Analytics (UA) and allows you to track the user journey across websites and apps.
GA4 also features new reports and enhanced Universal Analytics features. While GA4 is not a complete departure from Universal Analytics, the new features do take a little while to get used to.
In this guide, I’ll cover everything you need to know about GA4 including how to migrate from UA and how to navigate around the new platform.
What is Google Analytics 4?
To define it simply: Google Analytics 4 is a cross-platform analytics tool that allows you to track site visitors and monitor key user behavior metrics, which goes beyond just tracking traffic. This paints a fuller image of what users get up to when they land on your site.
It’s cross-platform in the sense that you can now measure how users engage with both your website and app—which is a first for Google Analytics.
Google Analytics was originally launched way back in 2004 and has undergone many updates in the time since. It has always been a reliable tool, but the newest version, GA4, reaches brand-new peaks in terms of usefulness.
The customer usage metrics allow you to track the user journey through GA4’s Funnel Exploration feature which shows you the exact steps users take before completing a conversion.
This feature allows you to track how effectively the funnel is followed which gives you a better understanding of the conversion process.
Not only is this data more insightful, but it is also gathered using a privacy-first model. GA4 uses data anonymization by default, meaning it no longer stores the IP addresses of site visitors (unlike Universal Analytics). While this is mainly beneficial to the site user, it does help you easily comply with the latest privacy laws, such as GDPR and CCPA.
Another major leap that GA4 takes is in its embracement of AI technology. Machine learning algorithms are used to provide you with purchase, churn, and revenue predictions for the future (more on this later). With this, you can get ahead of the curve in terms of emerging user trends.
Plus, it can greatly improve the accuracy of your retargeting campaigns. Retargeting ad campaigns involve targeting products to users who have previously visited your site or bought one of your products in the past.
Machine learning can help you narrow down your retargeting campaign to only target those who are most likely to become conversions.
By being able to identify potential future conversions, you can better organize your marketing campaign to secure them.
Google Analytics 4 Vs. Universal Analytics
The best way to highlight what Google Analytics 4 is would be to directly compare it to Universal Analytics, and highlight areas that have either been improved upon or remain the same (while also examining the brand-new features that one can find exclusively on GA4).
Machine learning
Google Analytics 4 is the first version of GA to integrate machine learning and AI. Therefore, it can now provide you with detailed insights into user behavior.
Interestingly, Google Analytics 4 does not need cookies to operate. Instead, it uses machine learning to fill in data gaps (left by users who opt out of cookie usage) and provide you with reliable insights into user history — without the need for cookies.
Through the power of AI, GA4 takes your past data, analyzes it, and makes useful predictions about future user behavior. Analyzing how users have interacted with your page in the past provides you with a degree of insight into how they might in the future.
GA4 then displays its predictions through its AI metrics, which are as follows:
- Churn probability — The chances of a user who was active in the last 7 days not being active again in the next 7 days.
- Purchase probability — The chances of an active user in the last 28 days becoming a conversion in the next 7 days.
- Revenue prediction — How much revenue you can expect to make over the next 28 days from a user who was active in the last 28 days?
With this data gathered, you can create intricate target audiences for future social media and Google Ads campaigns.
For example, these AI metrics can help you create an audience consisting of site visitors who are likely to return and spend $50 in your e-commerce store. Or, users who are likely to purchase a product in the next 7 days.
Determining the probability of such events manually would be next to impossible — which is why the addition of machine learning to GA4 is so useful.
Dashboard
The dashboard on Google Analytics 4 is completely different from that of Universal Analytics — but don’t let this alarm you. The dashboard has been changed for the better, with all essential metrics and data laid out in a clearer and more streamlined fashion.
The Universal Analytics dashboard looked like this:

The Google Analytics 4 dashboard now looks like this by default (you can reorganize it according to your needs—more on this later):

As you can see, the “Users” metric on the left is still the main focal point of the page. However, instead of “Sessions“, “Bounce Rate“, and “Session Duration“, you’ve got:
- “Event Count”—A real-time report of how many events have been completed over the last 7 days. As we’ll explore later, “Events” count as several things — it does not simply refer to purchase conversions. A user playing a video on your site can count as an event, as can a site visitor signing up for your mailing list.
- “Conversions“—This refers to any event that has been completed that is of high value to your website. For example, if a site visitor buys one of your products or subscribes to your service or newsletter.
- and “Sessions“—This metric reflects how many times a user has landed on your domain, regardless of whether they completed an event or not.
These can be shown here:

As default, these metrics will be set to show the last 7 days, but you can change this window at the bottom left-hand side of the graph:

On the far right of the dashboard, you can see how many site visitors you’ve received over the last 30 minutes.
This is similar to Universal Analytics’ “Active users in the last 5 minutes” feature. The big difference is that you can review the country of origin of most of this recent traffic directly below the graph:

Just like in Universal Analytics, each bar on the chart represents each minute in the last half hour.
If you hover your mouse over one of the bars, you can see exactly how many visitors you had 12 minutes ago, for example:

However, if you’re not happy with the new dashboard set up, don’t worry: you can totally customize your dashboard (much like you could on Universal Analytics). This way, whenever you log into Google Analytics 4, you’re met with only the reports that matter to you.
Additionally, you can also create custom visualizations for your GA4 dashboard in Google Data Studio. To do this, you’ll need to add GA4 as a “data source” on your Google Data Studio account.
The “Reports” section is also different.
You’ll find the reports section underneath “Home” on the main menu:

Click on this, and you’ll be presented with your “Reports snapshot”:

“New Users” is a metric that has been lifted from Universal Analytics.
It provides you with seriously helpful insight into how your marketing efforts are going—which is why it can now be found on the main reports dashboard:

Specifically, it allows you to understand how well you’re marketing your site and how many new users are finding your site, given that this metric reflects new interest in your website.
If you click on “Realtime Reports” on the left-hand menu:

you can get more insightful data. You can review what device your users are visiting from, whether it be their phone, tablet, or desktop.
You can also review where in the world these users are based, using the large world map:

If you scroll down the page, you’ll gain a quick snapshot of:

- Users by First user source —This reveals where users were before they arrived on your site. Site visitors could visit your site by simply typing in the URL of your site, or via either the SERPs or by clicking on a link from an external page. With this, you can determine which source is providing you with the most traffic currently.
- Users by Audience — Here, you review how your users fit into different categories. With GA4, you can create custom audiences that can help you break down and analyze your data. As you can see from the screenshot above, I don’t have any set user categories listed. This is because I haven’t defined any set audiences I want to track yet. (I’ll show you how to create a custom audience later in the article).
- Views by Page title and screen name — An obvious one, this displays the web pages that each of your current and recent site visitors are viewing. With this, you can see which of your web pages are gaining the most interest.
The “Life Cycle” reports section has also been totally revamped. As you can see underneath the main Life Cycle heading:

…there are 4 main headings:
Acquisition
User acquisition looks at where new customers come from (either organic search, direct, referral, organic social, or organic video):

while the traffic acquisition looks at both new and returning site visitors:

So, rather than looking at only the session default channel group of just new site visitors, traffic acquisition looks at the channel group of all your site visitors.
Engagement
This area looks at the actions the users take once they are on your site. Engagement reports include conversions, events, pages and screens, and landing pages.
All of this can give you a quick glimpse into how users interact with your site.
Most importantly, you can use this section to analyze the landing pages your site visitors are landing on most frequently.
Analyzing which pages most of your site visitors are landing on couldn’t be easier on GA4. All you have to do is head over to “Landing pages” which you’ll find under “Engagement”:

…and you’ll be able to review the pages that are pulling in the most users, as well as how long users are spending on average on each landing page.
Monetization
Here, you’ll find reports on how user engagement translates to monetization. Not only will you find reports on e-commerce purchases, but you’ll also be able to review the user purchase journey as a whole, and how publisher ads and promotions helped secure the conversion.
Retention
This area allows you to review how well you retain customers. Graphs and charts include retention by cohort, user engagement, and lifetime value.
User retention by cohort is probably the most valuable graph in Retention, as it allows you to analyze how many of your returning customers share characteristics:

In the above example, the graph shows you the retention of customers based on the first day they arrived vs 7 days later.
Event-based data model
The new event-based data model allows you to track every move users make on your domain.
This helps you to understand how your customers move through the purchasing funnel.
Event tracking has been a part of Google Analytics since 2004, but the concept has taken on a whole new meaning and value with Google Analytics 4.
In Universal Analytics, webmasters could use event tracking to record all the times that site visitors downloaded a file from your web page or clicked on a sign-up button.
While this provided you with some degree of insight, it could only provide you with information on specific events on specific pages.
In contrast, Google Analytics 4 classes all page actions as “events”. These include clicks, downloads, video plays, submissions, and so on.
These “events” are used as the core unit of measurement of user engagement, as they suggest that an action has been completed on your site.
Hold on—I know what you’re thinking:
Surely classing everything as an “event” will only lead to confusion?
How can classifying everything as an “event” be useful for analytical purposes?
Well, you can assign event parameters to specific user actions and give them a unique name to help you keep track of each action.
For example, if you want to measure how many people subscribed to your e-mail list, you can assign this action as an “event”. You could name the event something like “mailing_list_sign_up”.
Whenever these actions are carried out on your site, an “event” is recorded. If you’re familiar with UA, this is similar to assigning “Goal Completions.”
Once data has been gathered, you’ll be able to review how many times this specific event has been triggered.
I’ll explain more about the events-based model that Google Analytics 4 follows, including where to find them and how to create them, later in the article.
Cross-platform analysis
If you’ve got a website as well as an app, you can use GA4 for cross-platform analysis. The tool combines data from your app and website, allowing you to track the user journey across both platforms. This is unlike UA, which only allowed you to track web-based data.
Once you connect your iOS or Android app to Google Analytics 4, unique user IDs are used to track your customers. Data will be gathered from each logged-in session and sent straight to Google Analytics.
The data gathered from the apps is much the same as the data gathered from your website — “events” such as video views and clicks, as well as conversion tracking, screen views, and so on.
This information can help you better understand how users engage with your website and app features simultaneously.
A single data source (from either a website or an app) is referred to as a “data stream” in GA4. This “stream” is the flow of data from a user and a specific platform to your GA4 account.
Data limits
The data limits of Google Analytics 4 are similar to that of Universal Analytics. On both versions, you have a data limit of 2,000 properties.
In terms of individual property data limits, here’s what you should know:
- Data retention—14 months
- Number of audience—100
- Custom insights—50
- Conversions—30
- Ads links—400
Session calculations
Google Analytics 4 calculates user sessions slightly differently from that Universal Analytics. In UA, “new sessions” were recorded whenever a user’s timezone went past midnight.
This means that if a user was on your site between 11.59 pm and 12.01 am, Universal Analytics would count this 2-minute visit as two separate sessions. Although this may seem minor, if it occurred regularly enough it would make your session count massively unreliable.
With Google Analytics 4, each user is given a session ID that remains valid for the duration of time that they’re on a site. If it passes midnight and a user is still on your website, only one session is counted.
However, Google’s 30-minute rule still applies. This dictates that after 30-minutes of inactivity, the session is officially recorded as having ended. This rule is followed by both UA and GA4.
Bounce rate vs. engagement rate
While UA recorded bounce rate, GA4 has opted for the much more positive “engagement rate” metric.
The engagement rate metric reflects how many of your site visits are “engaged”.
This metric is calculated by adding together the number of user sessions that lasted longer than 10 seconds and featured either a conversion event or at least two page views. These sessions are aptly named “engaged sessions.”
The bounce rate still exists in GA4, however, it’s calculated slightly differently from how it is in UA. Instead of adding together all the times users “bounced” from your web page, it counts the “non-engaged sessions.”
Non-engaged sessions are sessions that last less than 10 seconds or don’t lead to a conversion event. In other words, they “bounced”.
These sessions are not recorded as a metric on your dashboard, but you can calculate your non-engaged session level by subtracting your engaged session count from your total session count.
Alternatively, you could add “bounce rate” to your Google Analytics 4 by customizing your reports and adding the metric manually.
Attribution modeling
Attribution modeling is the process of assigning credit to different touchpoints in sales paths. These “touchpoints” are the steps a user takes before they land on a conversion. Touchpoints can be anything involved in the sales funnel.
For example, a user clicking on the link on an e-mail ad, or when a user clicked on your site following an organic search.
This gives you a better idea of which touchpoints are most responsible for securing your conversions.
Google Analytics 4 has three different attribution ****** to choose from:
- Data-driven—This model looks at 50 different touchpoints to give credit to worthy touchpoints. Its in-depth analysis also looks at the time it took to complete the conversion and the device used.
- Ads Preferred—As the name implies, this model gives full credit to the last Google ad the user interacted with. If there are no Google ads in the sales funnel, then this model switches to cross-channel last click.
- Cross-channel rule-based—There are five different rules you can choose from with this attribution model:
- Linear — spreads credit evenly over all touchpoints.
- Position-based — gives most of the credit to the first and last clicks.
- Time decay — gives most credit to the touchpoint nearest the conversion.
- First click — gives full credit to the first click.
- Last click — gives full credit to the last click.
This is a big step up from Universal Analytics, which could only follow a last-non-direct click attribution model. In this model, direct traffic is excluded and the entire conversion value is credited to the last channel the user interacted with before making a purchase or converting.
Plus, there are over 50 touchpoints that Google Analytics 4 considers, which is considerably higher than the 4 touchpoints that Universal Analytics’ considers.
Create custom segments
Another key difference is that Google Analytics 4 allows you to create custom segments. Instead of analyzing data based on location and age, you can create super granular segments to pinpoint a very particular type of site visitor.
For example, you can create a segment focused only on-site visitors who added an item to their shopping basket but didn’t complete the purchase. Other examples of custom segments you could make include events completed from a specific operating system or in a particular location.
Custom segments are based on trigger events that occur on your website. This is what makes GA4 segments different from UA ones. On UA, your only segment options were user and session. Now, GA4 allows users to create user, session, and event segments, which allows you to get much more creative.
You can create custom segments in the “Explore” section of GA4.
Search bar
One thing that both UA and GA4 have in common is an intuitive search bar. You can use this feature to pull up data and insights instantly. It can also be used to find help pages if you’re stuck.
For example, if I were to ask “How many new users did we get last week on mobile”, GA4 will give me an instant answer and also suggest relevant reports to check out:

Or, if you need help setting up a GA4 feature, you could type that in the search bar and get help. For example, “how do I set up events”. GA4 will then provide you with a list of links to relevant help pages:

New suggested audience
With a greater focus on purchase funnels, Google Analytics 4 is able to make accurate suggested audiences to help you expand your reach.
GA4 gathers data on site visitors who abandoned purchases and clicked off from tutorial videos (amongst other actions) and creates “suggested audiences” from them.
With suggested audiences highlighted, you can launch Google Ads and social media campaigns in order to target these audiences.
You can review these suggestions: go to Admin > Audiences > “New audience”:

And you’ll see suggested audiences listed under the “Use a reference” section:

Above, suggested audiences include:
- Recently active users
- Purchasers
- 7-day inactive purchasers
- Non-purchases
- 7-day inactive users
Of course, your audience suggestions depend entirely on how your site visitors interact with your webpage. GA4 may also make suggested audiences such as:
- Achievers
- Billable users
- Item searchers
- Item viewers
- Leads
- Registered users
- Searchers
- Streamers
- Top scorers
- Top players
- Tutorial abandoners
- Video completed
- Video start
- Wishlist users
DebugView
Google Analytics 4’s DebugView allows you to monitor how your domain is functioning and helps you troubleshoot issues.
DebugView displays visitor data in real time, showing you how users are navigating through your domain and completing events.
It also shows you whenever site visitors are met with errors or warnings. With these errors highlighted, you know which parts of your site are functioning correctly and which parts aren’t.
You could use DebugView with Universal Analytics, however, this had to be installed as a browser extension. Google Analytics 4 is different because you can use DebugView right on the platform, without having to install additional plug-ins.
In order to use DebugView, you have to first enable the feature.
To enable DebugView and monitor all events on an individual webpage, you’ll need to add the ‘debug_mode’:true parameter to your Google Tag configuration, which will look like this:
gtag(‘config’, ‘G-12345ABCDE’, { ‘debug_mode’:true });
Alternatively, you could change debug_mode to “true” in Google Tag Manager.
Once enabled, you’ll be able to review DebugView via Admin:

Connection to BigQuery
Before, you needed a Google Analytics 360 account to connect your Universal Analytics to BigQuery. Now, Google Analytics 4 offers all users a free connection to the cloud-based data warehouse service. All you need is a Google Cloud account and BigQuery owner permissions.
BigQuery is useful if you maintain a site that receives high levels of traffic. Google Analytics may not have the capacity to store all your data, so it would be a good idea to use the data warehousing services provided by BigQuery.
This platform can also be used to aggregate and group data from various sources and perform further analysis.
In order to link your BigQuery account, head over to Admin and click on “BigQuery Links” underneath “Product Links”:

Then hit “Link”:

On the next page, select “Choose a BigQuery Project”:

…and you should then be shown a window with your BigQuery account listed. If you can’t see it listed, your BigQuery account may not be linked to your Google Cloud account.
You’ll then need to set your data location, select data streams, and decide how frequently you want data to be exported to BigQuery (your options are either daily or continuous).
It may take some time before data from GA4 is exported to BigQuery. However, after 24 hours, you should start to see GA4 data appearing on your BigQuery account.
How to Get Started with Google Analytics 4
Now, let us explore how to actually use the platform.
Using GA4 starts with signing in.
If you’ve used a version of Google Analytics in the past, you’ll already have a Google Analytics account.
If you don’t, you’ll need to start from scratch.
Either way, you’ll have to set up GA4.
Step 1: Create an account
As aforementioned, there are two ways of doing this.
If you’ve never had a Google Analytics account:
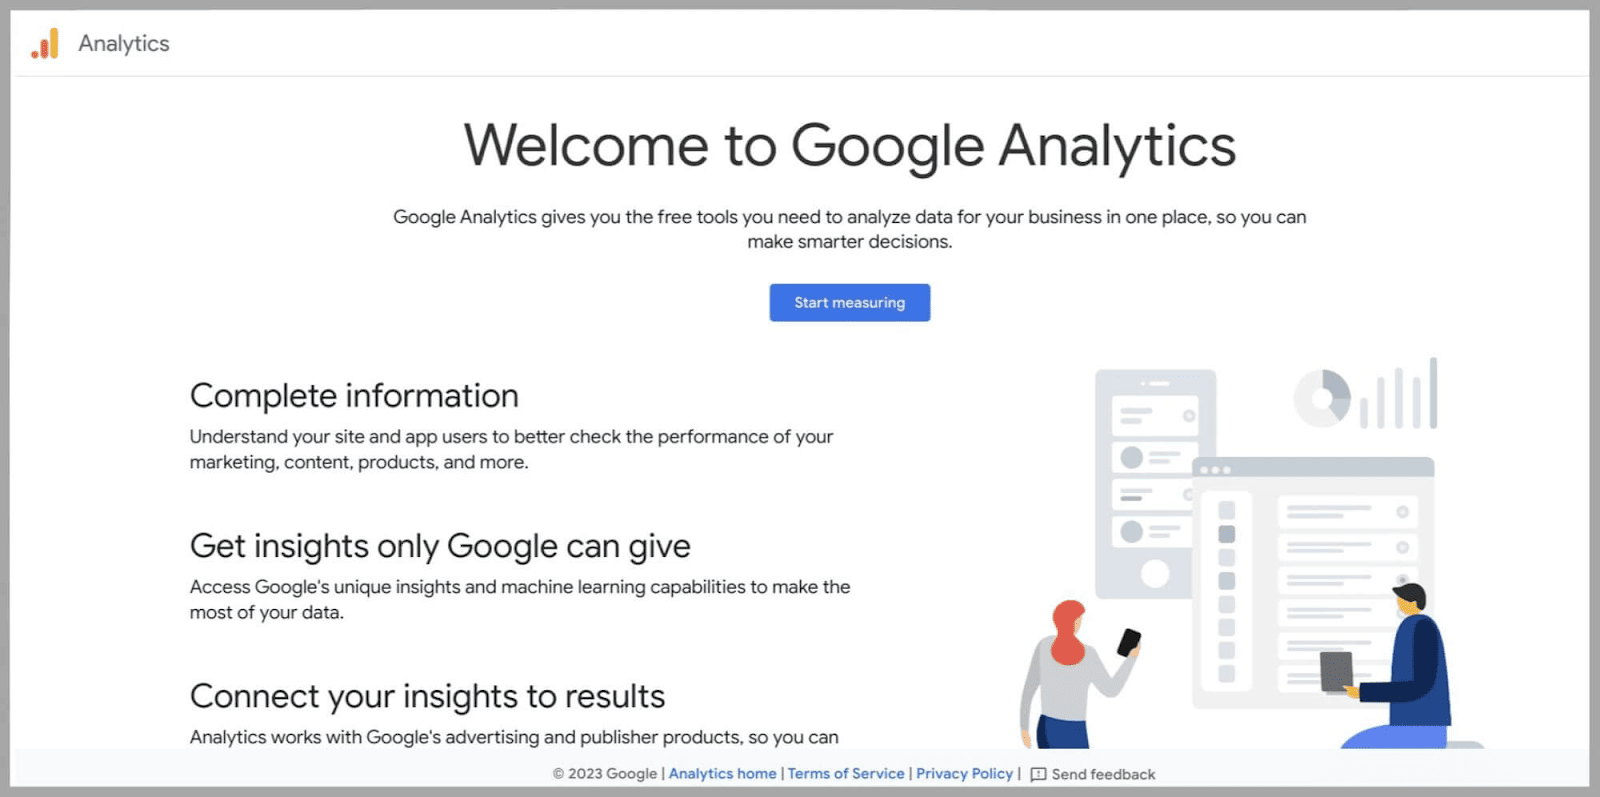
On the Google Analytics homepage, you’ll see the “Start measuring” button:

Click on this — it will take you to an “Account details” page:

Step 2: Add account name and edit settings
The next thing to do is provide a name in the “Account name” box. If you’re only planning on analyzing one domain, you can use your domain name as your account name.

Next, you need to tick off the account data-sharing settings that you want in your Google Analytics. This really depends on how much data you want to share with Google:

Step 3: Property set-up
In the “Property name” box, type out the name of your URL, and set the “Reporting time zone” and “Currency“:

When you hit “Next“, you’ll be prompted to answer a few questions about your business.
Fill these out in the best way that describes your business.

You’ll then be prompted to state your Google Analytics objectives:

Lastly, you’ll also have to accept the Google Analytics 4 terms of service.
Step 4: Set up a data stream
One of the big differences between Google Analytics 4 and Universal Analytics is that you can put both web and app data into the property settings.
At this stage, you can choose to connect either an iOS or Android app or opt to just focus on web data:

To add a web data stream
Click on the “Web” button, add your URL, and give your site a “Stream name“:

I’d recommend leaving “Enhanced measurement” turned on.
This will allow GA4 to collect on-page data, such as “video views”, “downloads”, and other valuable information.
To add app data stream
Click on “Android” or “iOS”, whichever type of app you want to monitor.
What you’re then required to fill out depends on the type of app you’re registering.
For example, if you’re adding an Android app, you’ll need to fill out your package and app name:

After you hit “Register app”, you’ll have to:
Download the config file for your app > add the Google Analytics for Firebase SDK to your app > run the app to confirm the installation of the SDK/check if the app is communicating with Google servers > hit “finish.”
How to add GA4 to an existing property
If you’ve used Universal Analytics in the past, you can easily migrate to Google Analytics 4 via the Google Analytics 4 Property Setup Assistant.
This saves you the hassle of inserting information about your website, as the name, time zone, and currency of your site can be transferred between UA and Google Analytics 4.
Here’s how you do it:
Go to your Google Analytics account and select “Admin.”
Directly under the “Property” column, make sure you have the relevant Universal Analytics account selected, before clicking on “GA4 Setup Assistant”:

You’ll then be presented with the “Create a new Google Analytics 4 property” screen.
This page will either say:
- Create and continue
- Or Create property
If it says “Create and continue”, you’ll need to set up your Google Tag manually. There are several options for how to do this. You could either:
- Install manually
- Install with CMS or a website builder
- Create a new Google tag
To install a Google tag manually, select “install manually”, and copy the Javascript code that is given to you.
You’ll have to paste this code after the “<head> element” of every page on your website that you want to track.
This will create a link between your website and Google Analytics, allowing GA4 to start collecting data from your site.
On the other hand, if it says “Create property”, you can transfer your Universal Analytics tags to Google Analytics 4.
Once you’ve successfully connected your tags, select “done.”
You’ll then be returned to the main setup page, where it should say “You have successfully connected your properties”.
How to Use Google Analytics 4
Now that you’ve set up Google Analytics 4, it’s time to explore and experiment with its main functions.
While you may be familiar with how to do some of the following with UA, Google Analytics 4 follows a totally different process, so you’ll need to learn all over again.
How to track conversions
As aforementioned, “events” in Google Analytics 4 allow you to measure conversions on a very granular level.
If you’ve connected your app to Google Analytics 4, you’ll have several predefined “events”, including:
- First_open — This event is triggered whenever a user opens the app for the first time.
- App_store_subscription_convert — When a user switches from a free trial to an app subscription, this event will be triggered.
- App_store_subscription_renew — When a subscribed user switches to a higher paid tier, or renews their current subscription, this event will be triggered.
- In_app_purchase — This event suggests that one of your app users has purchased an in-app piece of digital content.
If you’ve connected your website to Google Analytics 4, then you’ll have the following predefined events:
- First_visit — This event records whenever a new visitor lands on your site for the first time.
- Page_view — This event is triggered whenever a user lands on a new page.
- Session_start — As the name implies, this event is triggered whenever a session on your website starts.
- User_engagement — This event is triggered if a user spends more than 10 seconds on one page, and also visits at least one other web page on your site. It suggests that the user is engaged in your website.
But how do you view these apps and web-based events?
Under the “Life Cycle Reports” section, click “Engagement”, and then click on “Events”:

When I scroll down to the bottom of this page, I can see my list of events:

(Bear in mind: I don’t have an app, so the events you see in the images are all web-based)
So far, I’ve also added these events:
- Scroll
- Click
- Form_start
- Form_submit
- File_download
As I’ve already explained, you can assign events to basically anything, but how do you do it?
Here’s how: On the Events page, click on “Create event“:

…and then “Create“:

A box will then appear, where you can give your new event a name:

You can name your new event literally anything that you want. However, as a best practice, I’d recommend making them concise yet descriptive.
You want to be able to identify specific events easily. If you don’t give each a distinct and clear name, it could be very easy to get them mixed up further down the line.
Also, make sure the name features the underscores in the place of spaces — just as they appear in the predefined event titles.
For example, let’s say I want to create an event to track whenever someone signs up for my newsletter.
I could name this event something like:
“newsletter_sign_up”
With this, I’m going to create an event that will trigger every time someone lands on my newsletter sign-up page.
To make this event work, I’ll need to type in two specific matching conditions in the matching conditions section on the form.
Here are the two conditions I’ve set for this example:

The first condition sets up the event as a “page view.”
The second condition identifies the page I want to record. In this case, it’s the “newsletter sign-up” page. This means that whenever a site visitor views the page in question, an event will be recorded.
These two conditions need to occur for the event to count as a conversion. As in, a page view needs to occur, and that page view needs to be the URL specified in the “Value” part of the second condition.
Once you’ve finished adding conditions, hit the “Create” button at the top right-hand side of the form.
Your new event should appear next to the rest of your events within 24 hours of you submitting it. Once it appears, it will not provide you with past data regarding the event, as it cannot gather data retrospectively.
However, as soon as this event is triggered in the future, you will start to receive data regarding it.
Through Google Tag Manager, you can also set up events for your e-commerce site.
Purchase event parameters for e-commerce conversions include:
- Currency—The type of currency the user bought your product with, i.e. USD.
- Transaction_id—The order ID attached to the transaction.
- Value—The value of the order.
- Items—The specific items the user is buying.
These parameters are useful from an analytical point of view as you can use them to determine the average amount spent by a certain currency user. You can also use them to determine which items are most popular with which specific demographic.
It’s worth noting here that you can control your events from the main events table. This conversion table can be found in Admin:

Once you’ve arrived at the events table, you can use the blue toggle at the end named “mark as a conversion?”:

This is useful if you’ve created an event and no longer want to record it. It’s even more useful if there’s a certain type of page you want Google Analytics 4 to stop recording as a conversion
Once set up, you can review your conversions in Reports.
Tracking conversions is useful for lots of reasons. For example, if a lot of users are landing on your “newsletter sign-up” page but are not actually signing up for your newsletter, it could indicate an issue with the sign-up process.
How to import goals from UA
If you’ve been using UA for a while, you’re probably wondering if you can import your historical data from your Universal Analytics property to the new platform. Unfortunately, due to the major differences between the two ******, data sets cannot be merged.
However, you can import your UA goals to GA4, to save you the hassle of setting up brand-new conversion events.
To do this, head over to your Admin menu and click on the “Property” button at the top of the menu. From the drop-down menu, select the Universal Analytics account you want to import goals from.
Then, select “Set-up Assistant” from the menu that appears on the right:

Caution: Don’t select any goals from your UA that you already have set up as events in GA4. This may cause you conversion confusion further down the line.
Once you have selected all the goals you’d like to import to GA4, hit “Import selected conversions“, which you’ll be able to find at the top right of your page.
Wait until a pop-up message appears on the bottom left-hand side of your screen. This message will confirm whether your goals have been successfully imported as events.
How to set up life cycle reporting
The life cycle reports on Google Analytics 4 looks at the entire life cycle of your site visitors, from the point at which they enter your website to when they leave or complete a purchase event.
Life cycle reporting allows you to review how your site visitors go through the sales funnel more broadly.
There are several ways to set up life cycle reporting. While setting up a Google Analytics property, you can select “get baseline reports” when choosing your business objectives.
Alternatively, if you migrate from Universal Analytics to Google Analytics 4 using Setup Assistant, life cycle reporting will be added to your new analytics property by default.
If you currently don’t have life cycle reporting set up in Google Analytics 4, you can add the reports manually.
To do this, click on “Library,” and then publish your lifecycle reports:

To publish a report collection, simply click on the three dots to the right of the card and select “Publish” from the drop-down menu:

Monitor Traffic
You can use this new Google Analytics 4 platform to monitor your traffic levels, and also determine exactly where they’re coming from.
To get to know your traffic better, click on “Reports” > “Acquisition” > “Traffic acquisition“:

You’ll then be presented with a graph showing you the sources of your traffic, namely:
- Organic search
- Unassigned
- Direct
- Referral
- and Organic social.
If you scroll down further, you can review the exact number of users that visited your page via these 5 sources. You can also review:
- Sessions
- Engaged sessions
- Average engagement time per session
- Engagement sessions per user
- And Events per session

For more precise data, you can scroll up to the top of the page and enter specific **** parameters:

Here, you could analyze your traffic level over 12 months, 3 months, and 1 month—right down to your traffic levels over the last day.
Not only will this alter the results of your graph, but also the table below.
This gives you valuable insight into how well your website is performing — especially when you can use the calendar settings to pinpoint the **** on which it started.
How to define audiences
As aforementioned, you can create categories to help split up your collected data. Rather than trying to analyze huge blocks of data, you can split your site visitors, up by metrics, dimensions, and events.
To do it, head over to Admin, then “Audiences” > “New audience”:

You can choose to build on an existing audience by selecting “Templates.” However, for this example, we’ll “Start from scratch”:

Next, give the audience a title and start selecting dimensions (i.e., characteristics that define the audience, such as age and device type):

When selecting a dimension, you can also select if the condition “is one of” or “is not one of” to include or exclude it from the dimension.
You can also select “At any point in time” to make the condition apply to users who at one point fit into this age group bracket:

For this example, I will create a custom audience of 45-54-year-olds who visit my website via a desktop.
So I’ll name this:
“45-54-year old desktop users”, and add the extra desktop metric via “platform/device” > “platform/device category”:

After this, select contains web/desktop:

Next, hit “Save” in the top right-hand corner:

…and your new audience will appear in your audience list:

You can check this table in the future to review how this demographic has grown or shrunk in time since.
If you’ve connected your Google Ads to GA4, then you’ll also be able to view and use these audiences in your ad analysis. You can find saved audiences in the Google Ads Shared Library.
Analyze Search Queries
To analyze search queries with this analytics tool, you’ll need to first connect your Google Search Console.
To do this, click on “Admin” on the left-hand side of the dashboard.
Then, under the “Product Links” tab, select “Search Console Links“:

…then click on the “Link” button:

…and you’ll be shown a search bar that reads “Link to Search Console properties I manage.” At the right-hand side of this bar, select “Choose Accounts”:

This will then show you the Google Search Console accounts that are linked with the Google account you are signed into GA4 with.
Blue tick the property that you’d like to connect and hit “Confirm.”
Lastly, you’ll have to select whichever data stream is associated with the website and press “Submit.”
After which, you should see a “link created confirmation.”
Once you’ve successfully connected your Google Search Console, go to “Reports” and then select the “Google Search Console” tab.
Here, you’ll have two options: “Queries” and “Google organic search traffic“:

For the purpose of this task, select “Queries.” You’ll be led to a graph displaying your Google search click level over a set period:

If you scroll down, you’ll find a table presenting all your organic search queries (all 29077 worth, in my case):

Now, you can analyze the search terms that are pulling you in the Search clicks and impressions.
Here, you can also review the:
- Organic Google click-through rate
- Organic search position
Overall, queries are a super handy feature that provides you with very insightful data.
Integration with Google Ads
With a bigger focus on allowing users to review the full customer cycle, it makes sense that Google has made it much easier to connect your Google Ads with your Universal Analytics account.
By connecting your Google Ads account, you streamline the entire sales process into your GA4 dashboard. You can review a sales funnel from when the customer clicks on the ad right up to when they buy the product.
To connect your Google Ads account, head over to Admin, scroll down, and select “Google Ads Links” under Product Links:

Then select “Link”:

Next, click on “Choose Google Ads accounts”:

…and select your Google Ads account and click “Confirm”.
Lastly, review your settings and, once happy with them, click “submit.”
Once you’ve successfully connected your Google Ads account, you should be able to review your Google Ads data in your Reports within 48 hours.
How to generate free-form reports
Formally known as “Analysis Hub“, this section has recently been renamed to “Explorations“, and can be found on the left-hand side menu:

Here, you can make charts, tables, multi-step funnels, and tree graphs.
To create a free-form report, you need to either select the “blank” or “free form” option. For this example, I’m going to use the “free form” option:
Once you click on it, you’ll be presented with two editing columns on the left — variables and tab settings. On the right, you’ll see the output of the generated report:

In the “sections” column, you can change the name of your free-form report, and choose the **** range, dimensions, and metrics that you want to include:
For example, by clicking the “+” next to dimensions, a page will pop up displaying all the available dimensions you can incorporate into your table:
Tick what you want to add then hit “Import“:

You can get creative in the tab settings, and choose how you want your report to look. Options range from a humble table to a visually-appealing geo-map:

Once you’ve finished editing, you have the option to either export the data into a Google Sheet or PDF by hitting the download button.
Or share the document with others who have access to your Google Analytics property by hitting the share icon:

How to use GA4’s report templates
If you don’t want to make your own free-form report, you could use one of GA4’s pre-made report templates.
In the Explorations tab, you’ll find a host of report templates that you can build insightful graphs and charts from.
Next to “free form”, you have a range of options to scroll through and choose from:

Alternatively, if you click on “Template gallery”:

You’ll see all your template options on one page.
Your options are:
- Funnel exploration — Chart and analyze user journeys and visually review the funnels that your site visitors go through.
- Path exploration — Discover new user journeys that your customers are going through.
- Segment overlap — With this, you can create Venn diagrams to establish how your segments overlap. This is great for analysis as it allows you to find similarities between your segments and potentially identify new audiences.
- User explorer — This option allows you to analyze the movements of individual user segments on your site. By isolating users, you can uncover unique insights.
- Cohort exploration — This allows you to analyze the movements and site activity performed by site users in the same cohort. For example, you can create a graph to track the activity of site visitors who all share the same first visit ****.
- User lifetime — Here, you can review the entirety of visitors’ activity on your site. From the first **** they arrived on your site, to when they made a purchase and beyond.
Whichever one you choose, the set-up process for each of these template options is mostly the same as setting up a free-form report. The only difference is that the visualization options will be predetermined.
For example, after I click on the funnel exploration template option, I’m given the option to edit segments and dimensions:

However, when it comes to visualizations, I’ve only got two options:

Once you’ve selected the segments, dimensions, and metrics you want this infographic to show, download it or share it using the icons at the top right:

Standard Google Analytics 4 Vs. Google Analytics 360
By upgrading to Google Analytics 360, you unlock much bigger data limits for your Google Analytics 4 account. The upfront price is USD $150,000 per year, which grants you the following data limits (vs. how much you get with a standard Google Analytics 4 account):
User properties
Google Analytics 360 — 100 per property
Google Analytics 4 — 25 per property
Event parameters
Google Analytics 360 — 100 per event
Google Analytics 4 — 25 per event
Total conversions
Google Analytics 360 — 50
Google Analytics 4 — 30
Total Audiences
Google Analytics 360 — 400
Google Analytics 4 — 100
Explorations
Google Analytics 360 — 1,000 shared per property
Google Analytics 4 — 500 shared per property
Data retention
Google Analytics 360 — 50 months maximum
Google Analytics 4 — 14 months maximum
Distinctly named events
Google Analytics 360 — 2,000 per app instance
Google Analytics 4 — 500 per app instance
Google Analytics: Pros and Cons
Like it or not, Google Analytics 4 is here to stay. Still, that doesn’t mean I can’t criticize it somewhat. It’s a decent platform, but there are still some downsides to it — especially if you currently enjoy using Universal Analytics.
To summarize, here are the main pros and cons of the platform:
Pros
Follow the user journey more granularly
The events allow you to analyze precisely what your site visitors get up to when they land on your web page – whether it be viewing a product, downloading a PDF, or clicking on an internal link. Google Analytics 4 allows you to create customer funnels from scratch, which lets you follow the user journey through your site step-by-step.
Create custom audiences
You can narrow down and organize the data presented by Google Analytics 4 by creating custom (and highly granular) audiences. Plus, these custom audiences can automatically connect with your Google Ads account, alongside other Google integrations.
Integrate multiple platforms
With multiple data stream options, you can integrate several websites and apps (within Google Analytics 4’s property limits).
Cons
It has a different interface from Universal Analytics
Google Analytics 4 is a new platform, meaning you have to learn how to use Google Analytics all over again.
If you’ve been using Universal Analytics since 2012, you may notice some drastic feature changes when you make the switch to GA4.
Basically, everyone who starts using GA4 will have to undergo a learning curve.
Can’t migrate data from Universal Analytics
Given how different Google Analytics 4 is from Universal Analytics, it’s unsurprising that the two platforms aren’t compatible. As I’ve said before, you can’t migrate past data into GA4. This means you can’t compare data saved on UA with data saved on GA.
There’s a limit on custom dimensions
While it’s really handy that Google Analytics 4 allows you to create custom dimensions, it doesn’t help that there’s a limit on how many custom dimensions you have.
You’re allowed to track user locations, device types, and clicks — but only to a certain extent.
While the custom dimensions limit for GA4 is slightly higher than UA, it does still limit you.
There are no view filters
Universal Analytics has view filters, while Google Analytics 4 does not. This makes it difficult to isolate data from a data set or segment.
While you can create totally new segments, you can’t narrow down the data presented in these segments. For example, once the segments have been created, you can’t exclude data from specific IP addresses or subdomains.
FAQs
What happens if you don’t switch to GA4?
If you don’t switch to Google Analytics 4, you won’t receive any new data from Google Analytics. On July 1st, 2023, Universal Analytics has stop processing data, so you won’t be able to gain any up-to-**** information from it. It is recommended that you make the switch to GA4 now to not lose out on any functionality.
Is GA4 GDPR compliant?
GA4 is not GDPR compliant by default but can be modified by the user in order to be compliant.
GDPR (General Data Protection Regulation) is the EU law on data protection. As with Universal Analytics, webmasters can modify the GA4 settings to ensure that it is GDPR compliant. For example, Google has implemented data anonymization, data sharing controls, and data detention durations options for webmasters to control.
The main issue with GA4 is that it stores user data by default. So, as long as you don’t change any privacy settings, GA4 will remain GDPR compliant.
Does Google Analytics 4 store IP addresses?
Google Analytics 4 does not store full IP addresses. When it analyzes an IP address, it cuts off the last part. It then takes and stores the metadata from the rest of the IP address. This way, Google Analytics is able to gather more general information about the site visitors. This includes information on cities, continents, countries, regions, and sub-continents of the web users who visit the site. However, it does not record the exact location of the site visitor.
Source link : Backlinko.com